This blog post is about installing Ghost 5 CMS on Ubuntu 26.04 OS with MySQL and Caddy. Ghost is a modern, open-source content management system (CMS) focused on professional publishing, blogging, and newsletters. It is designed to be fast, user-friendly, and lightweight, providing a distraction-free writing experience with built-in tools for memberships, paid subscriptions, and email marketing. It stores data in two primary locations: MySQL databases for structured content (posts, users, settings) and the filesystem for images and themes. Caddy serves as a reverse proxy and web server for the Ghost CMS, acting as the public-facing bridge that handles SSL/TLS certificates and directs web traffic to the Ghost application container.
Installing Ghost 5 CMS on Ubuntu 26.04 with MySQL and Caddy is a straightforward process that may take around 20 minutes. Let’s get started!
Table of Contents
Prerequisites
- A server running Ubuntu 26.04 OS is ready for Ghost 5 CMS installation.
- User privileges: root or non-root user with sudo privileges
- A valid domain with a pointed A record to the server
Step 1. Update the System
Before we start installing MySQL, Ghost, and Caddy, we will update the system packages to their latest versions. Execute the following command before beginning with Ghost 5 CMS on Ubuntu for best results:
apt update -y && apt upgrade -y
Step 2. Install MySQL database server
By default, the MySQL packages are included in the latest Ubuntu 26.04 repository. Installing the MySQL server can be done with the following command, which is a key step for Ghost 5 CMS on Ubuntu to run properly.
apt install mysql-server -y
Once installed, start and enable the MySQL service for automatic start after system boot:
systemctl start mysql && systemctl enable mysql
Once started to check the status of the MySQL service, you can use the following command:
systemctl status mysql
You should get the following output:
root@host:~# systemctl status mysql
● mysql.service - MySQL Community Server
     Loaded: loaded (/usr/lib/systemd/system/mysql.service; enabled; preset: enabled)
     Active: active (running) since Thu 2026-05-07 18:18:39 CDT; 36s ago
 Invocation: 8fd4b1881e35460e8a16adf84a346b6d
   Main PID: 161108 (mysqld)
     Status: "Server is operational"
      Tasks: 35 (limit: 4027)
     Memory: 478.2M (peak: 478.5M)
        CPU: 2.959s
     CGroup: /system.slice/mysql.service
             └─161108 /usr/sbin/mysqld

May 07 18:18:36 host.test.vps systemd[1]: Starting mysql.service - MySQL Community Server...
May 07 18:18:39 host.test.vps systemd[1]: Started mysql.service - MySQL Community Server.
Step 3. Create a Ghost MySQL database and a user
To create a Ghost database, a Ghost user, and assign the correct permissions, execute the following commands in the MySQL terminal. This step is essential for a successful Ghost 5 CMS on Ubuntu deployment.
CREATE USER 'ghostuser'@'localhost' IDENTIFIED BY 'YourStrongPassword';

CREATE DATABASE ghostdb;

GRANT ALL PRIVILEGES ON ghostdb.* TO 'ghostuser'@'localhost';

FLUSH PRIVILEGES;

EXIT;
Step 4. Install NodeJS
Ghost 5 requires Nodejs v22.x LTS because it is built on a modern Node.js technology stack, making it a fast, scalable, and lightweight alternative to traditional platforms. It relies on Node.js as a server-side runtime environment, so we need to install it with the following commands. When installing Node.js for Ghost 5 CMS on Ubuntu, be sure to use the recommended version.
apt install curl -y

curl -fsSL https://nodesource.com | sudo -E bash -

apt-get install nodejs npm -y
Once installed, verify the installation by checking the nodejs version:
node -v
You should get the following output:
root@host:~# node -v
v22.22.1
Step 5. Install Caddy Web Server
As we explained previously, Caddy serves as a reverse proxy and web server for the Ghost CMS, acting as the public-facing bridge that handles SSL/TLS certificates and directs web traffic to the Ghost application container. To install it, execute these commands one by one in the terminal. Caddy is recommended for running Ghost 5 CMS on Ubuntu due to its security features.
apt install debian-keyring debian-archive-keyring apt-transport-https -y

curl -1sLf 'https://dl.cloudsmith.io/public/caddy/stable/gpg.key' | sudo gpg --dearmor -o /usr/share/keyrings/caddy-stable-archive-keyring.gpg

curl -1sLf 'https://dl.cloudsmith.io/public/caddy/stable/debian.deb.txt' | sudo tee /etc/apt/sources.list.d/caddy-stable.list

apt update -y

apt install caddy -y
Once installed, start and enable the Caddy service for automatic start after system boot:
systemctl start caddy && systemctl enable caddy
Once started to check the status of the Caddy service, you can use the following command:
systemctl status caddy
You should get the following output:
root@host:~# systemctl status caddy
● caddy.service - Caddy
     Loaded: loaded (/usr/lib/systemd/system/caddy.service; enabled; preset: enabled)
     Active: active (running) since Thu 2026-05-07 18:37:01 CDT; 1min 19s ago
 Invocation: 1706c8a74cd84c9586d190759f9fbf10
       Docs: https://caddyserver.com/docs/
   Main PID: 162131 (caddy)
      Tasks: 8 (limit: 4027)
     Memory: 9.6M (peak: 10M)
        CPU: 157ms
     CGroup: /system.slice/caddy.service
             └─162131 /usr/bin/caddy run --environ --config /etc/caddy/Caddyfile
Step 6. Install Ghost CMS
To install Ghost CMS, first, we need to install Ghost-Cli globally. These steps help ensure Ghost 5 CMS runs smoothly on Ubuntu.
npm install -g ghost-cli@latest
Once Ghost-Cli is installed globally, we can create a Ghost user:
adduser ghost
Next, we need to create the Ghost directory and set the correct permissions:
mkdir -p /var/www/ghost

chown -R ghost:ghost /var/www/ghost

chmod 775 /var/www/ghost

cd /var/www/ghost
Next login as Ghost user:
su ghost
To install Ghost finally, execute the following command:
ghost install local --db mysql
During the process, the CLI will prompt you for your local MySQL credentials that you set before in Step 3 above. The installation will start, and after its completion should look like this. This is the final part of installing Ghost 5 CMS on Ubuntu.
✔ Checking for latest Ghost version
✔ Checking system Node.js version - found v22.22.1
✔ Checking current folder permissions
✔ Checking memory availability
✔ Checking free space
✔ Checking SQLite build dependencies - found Python v3.14.4 with setuptools
✔ Checking pnpm installation - found corepack v0.24.0
✔ Setting up install directory
✔ Downloading and installing Ghost v6.37.0
✔ Finishing install process
✔ Enter your MySQL hostname: localhost
✔ Enter your MySQL username: ghostuser
✔ Enter your MySQL password: YourStrongPassword
✔ Enter your Ghost database name: ghostdb
✔ Configuring Ghost
✔ Setting up instance
✔ Starting Ghost

Ghost uses direct mail by default. To set up an alternative email method read our docs at https://ghost.org/docs/config/#mail

------------------------------------------------------------------------------

Ghost was installed successfully! To complete setup of your publication, visit:

    http://localhost:2368/ghost/
Step 7. Configure Caddy as a Reverse Proxy
To configure Caddy as a Reverse Proxy, edit the following file /etc/caddy/Caddyfile with your favorite text editor to look like this. Managing Caddy is crucial when hosting Ghost 5 CMS using Ubuntu for maximum efficiency.
yourdomain.com {
    reverse_proxy localhost:2368
    encode gzip zstd
}
Save the file, close it, and restart the Caddy service:
systemctl restart caddy
Step 8. Finish Ghost Installation
To finish the Ghost installation, access the domain you set in the Caddy file: https://YourDomain.com/ghost. Fill in your Site name, email, and credentials.
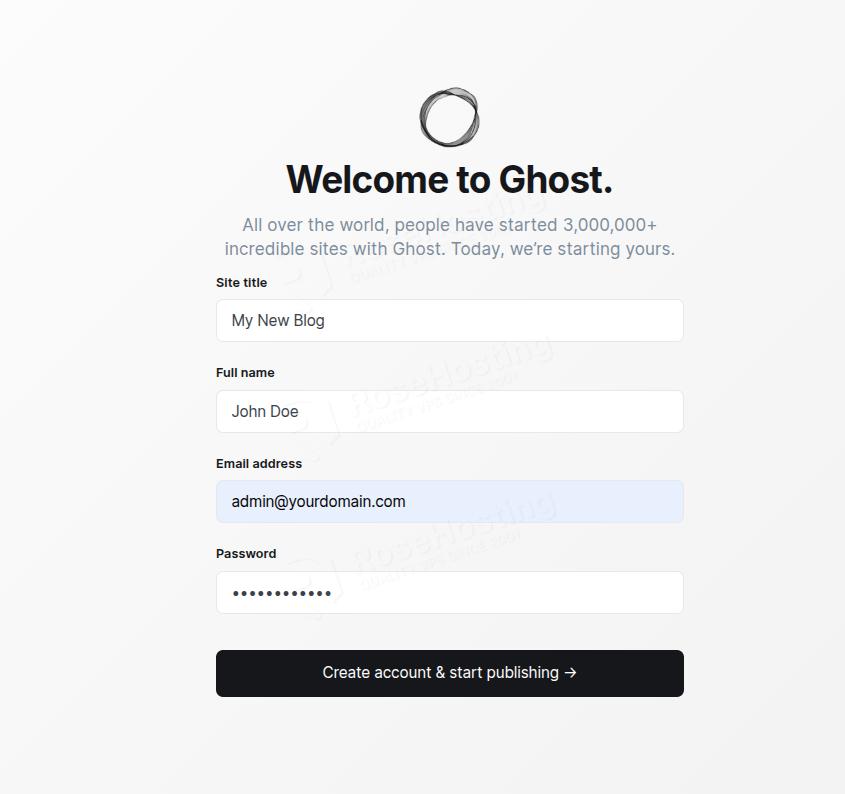
Once the information is filled, click on the Create account & start publishing -> and you will be redirected to the Ghost admin dashboard:
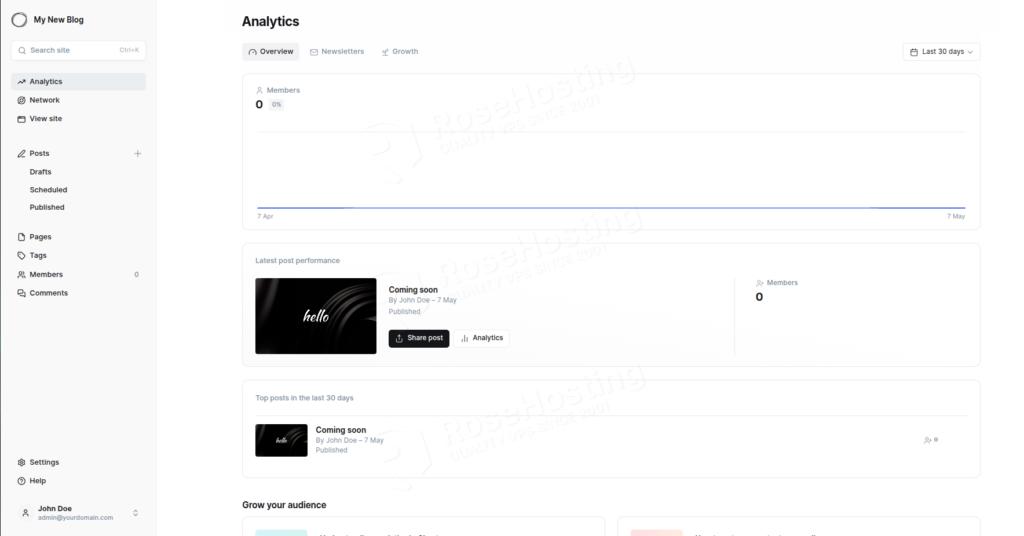
Congratulations! You successfully installed Ghost 5 CMS on Ubuntu 26.04 OS with MySQL and Caddy.
Of course, you do not have to install it yourself if you have difficulty with Linux. All you have to do is sign up for one of our Ghost hosting plans and submit a support ticket. Our admins are available 24/7 and will help you with any aspect of installing Ghost CMS.
If you liked this post on installing Ghost CMS on Ubuntu 26.04, please share it with your friends or leave a comment below. Thanks.