
Owncloud is an open-source application for file sharing and syncing. It is an alternative to file hosting services like Dropbox, Google Drive, or OneDrive.
Owncloud was initially developed in 2010, and it has expanded into a venture with millions of users and thousands of developers, evaluators, bug reporters, designers, and documentation writers. In this tutorial, we will show you how to install Owncloud on Debian 12.
Table of Contents
Prerequisites
- A Debian 12 VPS
- SSH root access or a regular system user with sudo privileges
Step 1. Log in via SSH
Let’s log in to your Debian 12 VPS through SSH as a root user or as a regular user with sudo privileges.
ssh root@IP_Address -p Port_number
If you cannot log in as root, remember to substitute “root” with a user that has sudo privileges. Additionally, change “IP_Address” and “Port_Number” to make sure they match your server’s respective IP address and SSH port.
You can check whether you have the correct Debian version installed on your server with the following command:
# lsb_release -a
You should get this output:
No LSB modules are available.
Distributor ID: Debian
Description: Debian GNU/Linux 12 (bookworm)
Release: 12
Codename: bookworm
Step 2. Install and Configure Apache
Owncloud was initially developed for the popular LAMP stack, but it can function on any web server that provides an updated version of PHP and MySQL. In this stage, we will install Apache as the webserver. Let’s proceed with the installation of Apache now.
# apt install apache2
On Debian machines, Apache will start automatically after installation. To confirm this, you can execute the following command.
# systemctl status apache2
You will see the status displayed, indicating that Apache is operational.
Owncloud requires mod_rewrite, and the rewrite module is not enabled by default. Let’s enable it and the other two modules now.
# a2enmod rewrite headers unique_id
After enabling the modules, we need to restart apache to apply the new configuration.
# systemctl restart apache2
Now, let’s create two directories for our Owncloud installation.
# mkdir -p /var/www/html/yourdomain.com/
Then, let’s assign the appropriate permissions to these directories.
# chown -R www-data: /var/www/html/yourdomain.com/
The next step is to create an apache virtual host.
# nano /etc/apache2/sites-available/yourdomain.com.conf
Then add the following lines to the file. Make sure to replace yourdomain.com with your actual domain or subdomain name.
<VirtualHost *:80>

ServerAdmin admin@yourdomain.com
ServerName yourdomain.com
ServerAlias www.yourdomain.com
DocumentRoot /var/www/html/yourdomain.com

ErrorLog ${APACHE_LOG_DIR}/yourdomain.com_error.log
CustomLog ${APACHE_LOG_DIR}/yourdomain.com_access.log combined

<Directory /var/www/html/yourdomain.com/>
  Options +FollowSymlinks
  AllowOverride All
</Directory>
 <IfModule mod_dav.c>
  Dav off
 </IfModule>

</VirtualHost>
Save the file, then exit. It is time to enable the virtual host.
# a2ensite yourdomain.com
Reload apache to apply the changes.
# systemctl reload apache2
By default, on Debian 12, Apache is using MPM Event. We need to switch to MPM PREFORK so we can enable mod_php. We will enable mod_php in the next step after installing PHP.
# a2dismod mpm_event
# a2enmod mpm_prefork
Step 3. Install PHP
Since Debian 12 ships with PHP 8.2 and Owncloud at the moment does not support PHP 8.0, we need to install PHP 7.4. We suggest adding a third-party source, Ondřej Surý’s PHP source, which offers current PHP packages. Execute the following commands to add the repository.
apt install -y apt-transport-https lsb-release ca-certificates wget
wget -O /etc/apt/trusted.gpg.d/php.gpg https://packages.sury.org/php/apt.gpg
echo "deb https://packages.sury.org/php/ $(lsb_release -sc) main" | tee /etc/apt/sources.list.d/php.list
Now, let’s refresh the package index files on the system
# apt update
Since you have set up the necessary PPA on your system and the package index is updated, let’s proceed with installing the required PHP version.
# apt install php7.4-{xml,intl,common,json,curl,mbstring,mysql,gd,imagick,zip,opcache} libapache2-mod-php7.4
PHP and its required extensions have been installed. Let’s enable MOD PHP for Apache.
# a2enmod php7.4
To apply the changes, let’s restart Apache.
# systemctl restart apache
Step 4. Install MariaDB Server
Owncloud supports MySQL server version 8.0+ or equivalent MariaDB server, PostgreSQL, Oracle, and SQLite. In this step, we are going to install the MariaDB server from the default Debian 12 repository. To install the MariaDB server, execute this command below:
# apt install mariadb-server
MariaDB should be up and running now.
Step 5. Create a Database
On Debian 12, MariaDB will start automatically upon installation. So, let’s log in to MySQL shell and create a database for our Owncloud website.
# mysql
Once logged in to MySQL shell, we can run the following commands.
mysql> CREATE DATABASE owncloud;
mysql> GRANT ALL on owncloud.* to owncloud@localhost identified by 'm0d1fyth15';
mysql> FLUSH PRIVILEGES;
mysql> \q
Remember to replace m0d1fyth15 with a stronger password.
Step 6. Download OwnCloud
Go to the Owncloud download page to get your desired version. In this step, we are going to download the most recent stable version.
# cd /var/www/html/yourdomain.com
# wget https://download.owncloud.com/server/stable/owncloud-latest.tar.bz2
# tar -xf owncloud-latest.tar.bz2 --strip-components 1
The commands above will download and then extract the compressed file into the directory /var/www/html/yourdomain.com. Now, let’s give the correct permissions.
# chown -R www-data: /var/www/html/yourdomain.com/
Step 7. Install OwnCloud
In this step, we need to go to http://yourdomain.com using any web browser. Make sure to go to the domain you configured earlier when setting up the Apache virtual host.
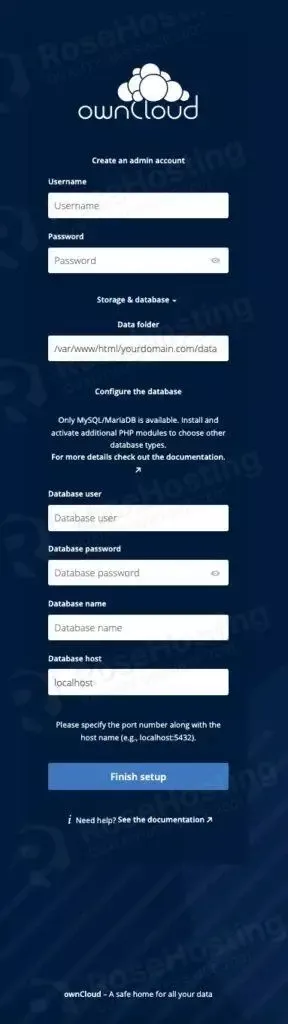
Fill the forms with the administrative user and password you want, and also fill in the database credentials we created earlier in this post, then click on the Finish Setup button.
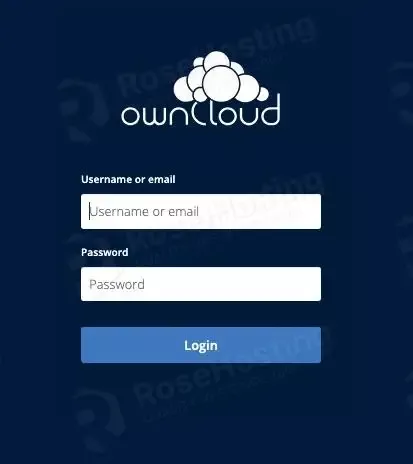
Log in with the administrative account you created in the previous step. Now, you can customize your newly installed Owncloud website.
That’s it! You have successfully installed Owncloud on Debian 12.
Of course, if you are one of our Debian Hosting customers, you don’t have to install Owncloud on Debian 12 yourself – simply ask our admins, sit back, and relax. Our admins will install Owncloud on Debian 12 for you immediately without any additional fee, along with many useful optimizations that we can do for you. Managing an Owncloud-based website is not just about the installation; we can help you with optimizing your Owncloud installation if you have an active service with us.
If you liked this post about how to install Owncloud on Debian 12, please share it with your friends on social networks or simply leave a comment in the comments section. Thanks.