OwnCloud is a free file-sharing software, similar to Dropbox. It provides robust security and a user-friendly way to share and access data. It seamlessly integrates with IT devices to secure, track, and report data usage. OwnCloud places control in the hands of IT users and offers service providers centralized storage and transmission capabilities for synchronization and sharing. OwnCloud provides universal file access using a network interface or WebDAV. In this article, we will show you how to install ownCloud on Ubuntu 26.04.
Table of Contents
Prerequisites
- An Ubuntu 26.04 server
- SSH root access or a regular system user with sudo privileges
Conventions
# – given commands should be executed with root privileges either directly as a root user or by use of sudo command
$ – given commands should be executed as a regular user
Step 1. Update the System
Let’s log in to your Ubuntu 26.04 VPS through SSH as a root user or as a regular user with sudo privileges.
ssh root@IP_Address -p Port_numberIf you cannot log in as root, remember to substitute “root” with a user that has sudo privileges. Additionally, change “IP_Address” and “Port_Number” to match your server’s IP address and SSH port.

You can check whether you have the correct Ubuntu version installed on your server with the following command:
$ lsb_release -aYou should get this output:
No LSB modules are available.
Distributor ID: Ubuntu
Description:  Ubuntu 26.04 LTS
Release:  26.04
Codename: resolute
Step 2. Add a System User
Let’s create a new system user called ‘master’; run this command:
# /usr/sbin/adduser masterYou will be prompted to create a password. Make sure to use a strong password when prompted.
Step 3. Add User to Sudoer
On Ubuntu machines, administrative privileges are typically granted by adding users to the sudo group. To give a regular user full sudo access (i.e., the ability to run commands as root with sudo), add them to the sudo group using one of these commands:
# /usr/sbin/usermod -aG sudo masterStep 4. Install Docker
Before we can install ownCloud on Ubuntu 26.04, we need to make a few prerequisite installations. One of these is Docker. There are some methods to install Docker on Ubuntu 26.04 system. In this step, we will install Docker Engine from Docker’s APT repository. This is by far the best and most recommended way to install Docker because it lets us update it easily. Before installing Docker Engine on a new host machine for the first time, you need to configure the Docker APT repository. Then you can install and update Docker from the repository.
Run these commands to add and configure Docker’s APT repository.
# apt update
# apt install ca-certificates curl
# install -m 0755 -d /etc/apt/keyrings
# curl -fsSL https://download.docker.com/linux/ubuntu/gpg -o /etc/apt/keyrings/docker.asc
# chmod a+r /etc/apt/keyrings/docker.asc
Now we can add the repository to Apt sources:
# tee /etc/apt/sources.list.d/docker.sources <<EOF
Types: deb
URIs: https://download.docker.com/linux/ubuntu
Suites: $(. /etc/os-release && echo "${UBUNTU_CODENAME:-$VERSION_CODENAME}")
Components: stable
Architectures: $(dpkg --print-architecture)
Signed-By: /etc/apt/keyrings/docker.asc
EOF
Once added, update the package index files on the system.
# apt updateFinally, install the Docker packages.
# apt install docker-ce docker-ce-cli containerd.io docker-buildx-plugin docker-compose-pluginThat’s it, Docker has been installed on your Ubuntu 26.04 system. We can run the command below to verify the installation.
# docker versionIt will show you an output like this:
Client: Docker Engine - Community
 Version:           29.4.3
 API version:       1.54
 Go version:        go1.26.2
 Git commit:        055a478
 Built:             Wed May  6 17:07:26 2026
 OS/Arch:           linux/amd64
 Context:           default

Server: Docker Engine - Community
 Engine:
  Version:          29.4.3
  API version:      1.54 (minimum version 1.40)
  Go version:       go1.26.2
  Git commit:       56be731
  Built:            Wed May  6 17:07:26 2026
  OS/Arch:          linux/amd64
  Experimental:     false
 containerd:
  Version:          v2.2.3
  GitCommit:        77c84241c7cbdd9b4eca2591793e3d4f4317c590
 runc:
  Version:          1.3.5
  GitCommit:        v1.3.5-0-g488fc13e
 docker-init:
  Version:          0.19.0
  GitCommit:        de40ad0
Step 5. Run Docker without Sudo
The Docker daemon binds to a Unix socket. When running the docker command without sudo, you will get this error message:
permission denied while trying to connect to the docker API at unix:///var/run/docker.sockTo run Docker commands without sudo, we need to add the user we want to the docker group:
# usermod -aG docker $USERFor example, let’s add the user “master” to the docker group:
# usermod -aG docker masterNow you can switch to the ‘master’ user and run Docker without sudo.
Step 6. Install ownCloud on Ubuntu 26.04 with Docker Compose
Since ownCloud currently supports PHP 8.3 and Ubuntu 26.04 ships with PHP 8.5, we cannot install ownCloud as we usually do. We need to install ownCloud using Docker Compose. Let’s do this using our new system user.
# su - masterNow, let’s create a new directory.
$ mkdir owncloud-docker && cd owncloud-dockerLet’s create a docker-compose.yml file in your directory:
$ nano docker-compose.ymlPaste the following configuration into the file; do not forget to replace owncloud.yourdomain.com with your actual domain name:
volumes:
  files:
    driver: local
  mysql:
    driver: local
  redis:
    driver: local

services:
  owncloud:
    image: owncloud/server:${OWNCLOUD_VERSION}
    container_name: owncloud_server
    restart: always
    ports:
      - ${HTTP_PORT}:8080
    depends_on:
      - mariadb
      - redis
    environment:
      - OWNCLOUD_DOMAIN=${OWNCLOUD_DOMAIN}
      - OWNCLOUD_TRUSTED_DOMAINS=${OWNCLOUD_TRUSTED_DOMAINS}
      - OWNCLOUD_DB_TYPE=mysql
      - OWNCLOUD_DB_NAME=owncloud
      - OWNCLOUD_DB_USERNAME=owncloud
      - OWNCLOUD_DB_PASSWORD=owncloud
      - OWNCLOUD_DB_HOST=mariadb
      - OWNCLOUD_ADMIN_USERNAME=${ADMIN_USERNAME}
      - OWNCLOUD_ADMIN_PASSWORD=${ADMIN_PASSWORD}
      - OWNCLOUD_MYSQL_UTF8MB4=true
      - OWNCLOUD_REDIS_ENABLED=true
      - OWNCLOUD_REDIS_HOST=redis
    healthcheck:
      test: ["CMD", "/usr/bin/healthcheck"]
      interval: 30s
      timeout: 10s
      retries: 5
    volumes:
      - files:/mnt/data

  mariadb:
    image: mariadb:10.11
    container_name: owncloud_mariadb
    restart: always
    environment:
      - MYSQL_ROOT_PASSWORD=owncloud
      - MYSQL_USER=owncloud
      - MYSQL_PASSWORD=owncloud
      - MYSQL_DATABASE=owncloud
      - MARIADB_AUTO_UPGRADE=1
    command: ["--max-allowed-packet=128M", "--innodb-log-file-size=64M"]
    healthcheck:
      test: ["CMD", "mysqladmin", "ping", "-u", "root", "--password=owncloud"]
      interval: 10s
      timeout: 5s
      retries: 5
    volumes:
      - mysql:/var/lib/mysql

  redis:
    image: redis:6
    container_name: owncloud_redis
    restart: always
    command: ["--databases", "1"]
    healthcheck:
      test: ["CMD", "redis-cli", "ping"]
      interval: 10s
      timeout: 5s
      retries: 5
    volumes:
      - redis:/data
Save and exit the editor. Now, let’s create the .env file.
cat << EOF > .env
OWNCLOUD_VERSION=10.16
OWNCLOUD_DOMAIN=localhost:8080
OWNCLOUD_TRUSTED_DOMAINS=cloud.yourdomain.com
ADMIN_USERNAME=admin
ADMIN_PASSWORD=admin
HTTP_PORT=8080
EOF
At this point, we can run the command below.
$ docker compose up -dThe image will start downloading, and the container will begin running. Please be informed that this process may take several minutes to complete. You can monitor the progress with:
$ docker logs -f owncloud_serverStep 7. Set Up Nginx as a Reverse Proxy
To access ownCloud via a domain name instead of typing the IP address and port number, we need a web server. In this tutorial, we will install and use Nginx. Run the following command to install it
$ sudo apt -y install nginxUpon installation, Nginx will run automatically. It is also configured to start automatically upon reboot.
Now, let’s create an Nginx server block for the domain name you will use for accessing ownCloud. For example, we will use cloud.yourdomain.com
$ sudo nano /etc/nginx/conf.d/owncloud.confInsert the following into that file
server {
   listen 80;
   server_name cloud.yourdomain.com;

   location / {
       proxy_pass http://localhost:8080/;
       proxy_set_header Host $host;
       proxy_set_header X-Real-IP $remote_addr;
       proxy_set_header X-Forwarded-For $proxy_add_x_forwarded_for;
       proxy_set_header X-Forwarded-Proto $scheme;
   }
}
Save the file, then exit. You can restart nginx now.
$ sudo systemctl restart nginxThat’s it. You should now be able to access ownCloud at http://cloud.yourdomain.com using the credentials in your .env file.
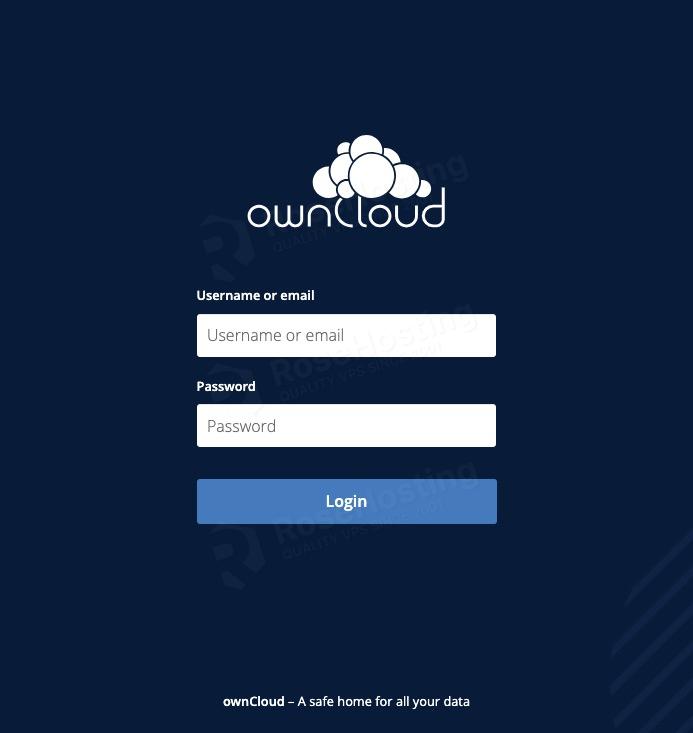
Every time you make changes to your .env file, you need to stop and restart Docker by running the command below.
$ docker compose down && docker compose up -dWrapping Everything Up
Of course, you don’t have to install ownCloud on Ubuntu 26.04 if you use one of our ownCloud VPS Hosting services, in which case you can simply ask our expert Linux admins to install ownCloud on Ubuntu 26.04 for you. They are available 24×7 and will take care of your request immediately. Managing ownCloud instances is not just about the installation; we can help you optimize your ownCloud installation if you have an active service with us.
If you liked this post on how to install ownCloud on Ubuntu 26.04, please share it with your friends or leave a comment below.