Paperless-ngx is a document management application for storing, reading, and categorizing documents digitally. This application can simplify storing scanned or digital documents. Paperless-ngx is a fork of the Paperless-ng project, which in turn is a fork of the Paperless project (a fork was created to continue development after the previous developer stopped maintenance). In this article, we will show you how to install Paperless NGX document management system on Debian 13.
Table of Contents
Prerequisites
- A Debian 13 VPS
- SSH root access or a regular system user with sudo privileges
Conventions
# – given commands should be executed with root privileges either directly as a root user or by use of sudo command
$ – given commands should be executed as a regular user
Step 1. Update the System
Let’s log in to your Debian 13 VPS through SSH as a root user or as a regular user with sudo privileges.
ssh root@IP_Address -p Port_numberIf you cannot log in as root, remember to substitute “root” with a user that has sudo privileges. Additionally, change “IP_Address” and “Port_Number” to match your server’s IP address and SSH port.

You can check whether you have the correct Debian version installed on your server with the following command:
# lsb_release -aYou should get this output:
No LSB modules are available.
Distributor ID: Debian
Description:  Debian GNU/Linux 13 (trixie)
Release:  13
Codename: trixie
Step 2. Install Dependencies
There are several packages we need to install, including Redis. Let’s just start and install them all.
# apt install python3 python3-pip python3-dev imagemagick fonts-liberation gnupg libpq-dev default-libmysqlclient-dev pkg-config libmagic-dev libzbar0 poppler-utils unpaper ghostscript icc-profiles-free qpdf libxml2 pngquant zlib1g tesseract-ocr redisStep 3. Create a System User
In this step, we will create a new system user to run Paperless. Let’s execute the command below; you can substitute ‘paperless’ with any username you like.
# useradd -mrd /opt/paperless paperless -s /bin/bash
# passwd paperless
Step 4. Install MariaDB Server
For the database engine, Paperless supports PostgreSQL or MariaDB. In this step, we will install the MariaDB server from the default Debian 13 repository. To install the MariaDB server, execute the command below:
# apt install mariadb-server MariaDB should be up and running now.
# systemctl status mariadbThe command above will return an output like this:
● mariadb.service - MariaDB 11.8.6 database server
     Loaded: loaded (/usr/lib/systemd/system/mariadb.service; enabled; preset: enabled)
     Active: active (running) since Mon 2026-07-13 21:53:56 CDT; 1min 52s ago
 Invocation: c4c554a48861419fa960d110b7b350db
       Docs: man:mariadbd(8)
             https://mariadb.com/kb/en/library/systemd/
   Main PID: 5218 (mariadbd)
     Status: "Taking your SQL requests now..."
      Tasks: 10 (limit: 30725)
     Memory: 125M (peak: 129.8M)
        CPU: 4.220s
     CGroup: /system.slice/mariadb.service
             └─5218 /usr/sbin/mariadbd

Jul 13 21:53:54 debian13.rosehosting.com mariadbd[5218]: 2026-07-13 21:53:54 0 [Note] Plugin 'FEEDBACK' is disabled.
Jul 13 21:53:54 debian13.rosehosting.com mariadbd[5218]: 2026-07-13 21:53:54 0 [Note] Plugin 'wsrep-provider' is disabled.
Jul 13 21:53:54 debian13.rosehosting.com mariadbd[5218]: 2026-07-13 21:53:54 0 [Note] InnoDB: Loading buffer pool(s) from /var/lib/mysql/ib_buffer_pool
Jul 13 21:53:54 debian13.rosehosting.com mariadbd[5218]: 2026-07-13 21:53:54 0 [Note] InnoDB: Buffer pool(s) load completed at 260713 21:53:54
Jul 13 21:53:56 debian13.rosehosting.com mariadbd[5218]: 2026-07-13 21:53:56 0 [Note] Server socket created on IP: '127.0.0.1', port: '3306'.
Jul 13 21:53:56 debian13.rosehosting.com mariadbd[5218]: 2026-07-13 21:53:56 0 [Note] mariadbd: Event Scheduler: Loaded 0 events
Jul 13 21:53:56 debian13.rosehosting.com mariadbd[5218]: 2026-07-13 21:53:56 0 [Note] /usr/sbin/mariadbd: ready for connections.
Jul 13 21:53:56 debian13.rosehosting.com mariadbd[5218]: Version: '11.8.6-MariaDB-0+deb13u1 from Debian'  socket: '/run/mysqld/mysqld.sock'  port: 3306  -- Please help get to 10k stars at https>
Jul 13 21:53:56 debian13.rosehosting.com systemd[1]: Started mariadb.service - MariaDB 11.8.6 database server.
Jul 13 21:53:56 debian13.rosehosting.com /etc/mysql/debian-start[5247]: Checking for insecure root accounts.
Step 5. Add a Database
On Debian 13, MariaDB will start automatically upon installation. Since the database server is now up and running, we can log in to the MySQL shell and create a database for our Paperless website.
# mariadbOnce logged in to the MariaDB/MySQL shell, we can run the following commands.
MariaDB [none]> CREATE DATABASE paperless;
MariaDB [none]> GRANT ALL on paperless.* to paperless@localhost identified by 'm0d1fyth15';
MariaDB [none]> FLUSH PRIVILEGES;
MariaDB [none]> \q
Step 6. Download Paperless
A higher version is available for download, but it is still in beta. So, we will download the older stable version. We will also switch to a new system user we created earlier. To check the available versions to download, you can go to their GitHub page at https://github.com/paperless-ngx/paperless-ngx/releases
# su - paperlessOnce switched to the ‘paperless’ user, we can download the installation file.
$ wget https://github.com/paperless-ngx/paperless-ngx/releases/download/v2.20.15/paperless-ngx-v2.20.15.tar.xzNow, let’s extract it.
$ tar -xf paperless-ngx-v2.20.15.tar.xz --strip-components=1Step 7. Configure Paperless
Prior to installing Paperless NGX, we need to modify the existing paperless.conf file and create some directories.
/opt/paperless/media
/opt/paperless/data
/opt/paperless/consume
$ mkdir -p /opt/paperless/{media,data,consume}Next, we need to edit the paperless.conf file.
$ nano paperless.confInsert the following:
PAPERLESS_REDIS=redis://localhost:6379
PAPERLESS_DBHOST=localhost
PAPERLESS_DBENGINE=mariadb
PAPERLESS_DBPORT=3306
PAPERLESS_DBNAME=paperless
PAPERLESS_DBUSER=paperless
PAPERLESS_DBPASS=m0d1fyth15
PAPERLESS_CONSUMPTION_DIR=../consume
PAPERLESS_DATA_DIR=../data
PAPERLESS_MEDIA_ROOT=../media
PAPERLESS_STATICDIR=../static
PAPERLESS_SECRET_KEY=[RANDOM_STRING]
PAPERLESS_URL=https://paperless.yourdomain.com
For the [RANDOM_STRING], you can generate one by running this command:
$ tr -dc 'A-Za-z0-9' < /dev/urandom | head -c 20; echoStep 8. Install Paperless
We just need to download the Python dependency packages and run the migration command to complete the Paperless NGX installation.
$ pip3 install -r requirements.txt --break-system-packagesNext, we need to run the migration command:
$ cd src
$ python3 manage.py migrate
Then, we need to modify the systemd files in the scripts directory.
$ cd ~/scripts
$ sed -i 's#granian#/opt/paperless/.local/bin/granian#g' *
$ sed -i 's#celery#/opt/paperless/.local/bin/celery#g' *
Done, let’s exit from the paperless user.
$ exitStep 9. Create Systemd Files
We edited the systemd files in the previous step. Now, we can add them to the server.
# cp /opt/paperless/scripts/* /usr/lib/systemd/system/We can reload the systemd daemon and start the services now.
# systemctl daemon-reload
# systemctl enable --now paperless-{webserver,scheduler,consumer}
Step 10. Create a Paperless NGX Account
At this point, you should be able to access http://YOUR_SERVER_IP_ADDRESS:8000
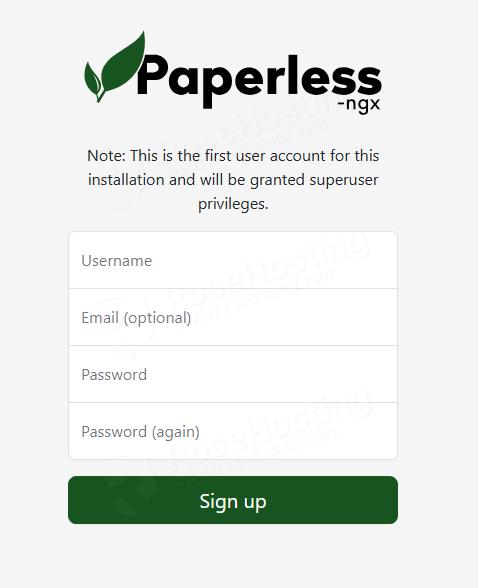
Fill in all, then hit the Sign Up button.
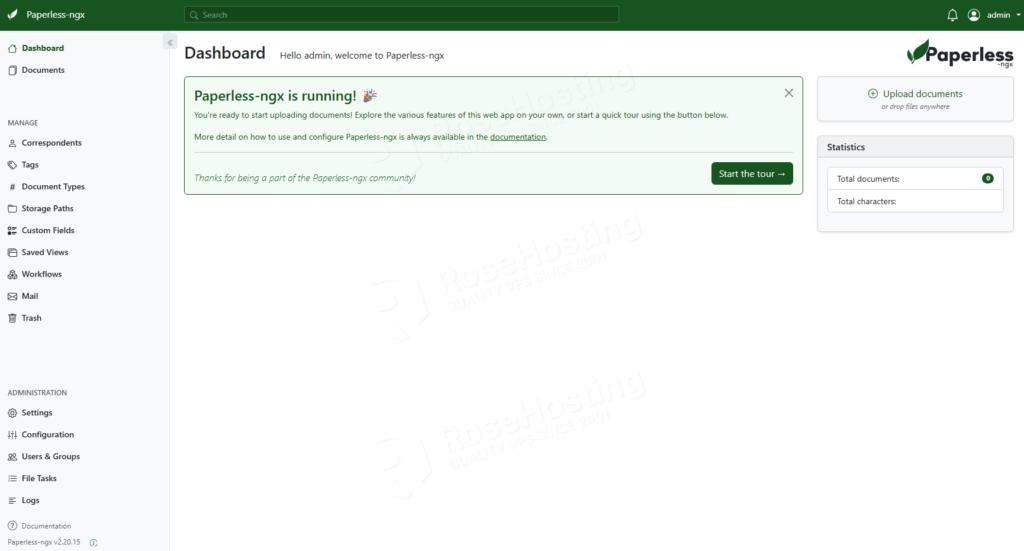
That’s it; you are redirected to the dashboard now.
Step 11. Install and Configure Nginx
# apt install nginxNext, we need to create an Nginx server block.
# nano /etc/nginx/conf.d/paperless.confInsert the following into the file:
server {
    listen 80;
    server_name paperless.yourdomain.com;

    client_max_body_size 512M;

    location / {
        proxy_pass http://127.0.0.1:8000;

        proxy_set_header Host $http_host;
        proxy_set_header X-Real-IP $remote_addr;
        proxy_set_header X-Forwarded-For $proxy_add_x_forwarded_for;
        proxy_set_header X-Forwarded-Proto $scheme;

        proxy_http_version 1.1;
        proxy_set_header Upgrade $http_upgrade;
        proxy_set_header Connection "upgrade";

        proxy_read_timeout 600s;
        proxy_send_timeout 600s;
    }
}
Make sure to replace paperless.yourdomain.com with your own domain/subdomain name, and it should match PAPERLESS_URL in your paperless.conf. Save the file, then restart nginx.
Step 12. Install SSL Certificate
In this step, we will install certbot. Certbot is an ACME client for generating Let’s Encrypt SSL certificates.
# apt install python3-certbot-nginxOnce installed, we can execute this command to generate an SSL certificate. But make sure that your subdomain or domain name is already pointing to your server; otherwise, certbot will fail to generate the SSL certificate.
# certbot --nginx -d paperless.yourdomain.comThe command will return an output like this if everything is okay.
Saving debug log to /var/log/letsencrypt/letsencrypt.log
Enter email address or hit Enter to skip.
 (Enter 'c' to cancel): you@yourdomain.com

- - - - - - - - - - - - - - - - - - - - - - - - - - - - - - - - - - - - - - - -
Please read the Terms of Service at:
https://letsencrypt.org/documents/LE-SA-v1.8-July-06-2026.pdf
You must agree in order to register with the ACME server. Do you agree?
- - - - - - - - - - - - - - - - - - - - - - - - - - - - - - - - - - - - - - - -
(Y)es/(N)o: y

- - - - - - - - - - - - - - - - - - - - - - - - - - - - - - - - - - - - - - - -
Would you be willing, once your first certificate is successfully issued, to
share your email address with the Electronic Frontier Foundation, a founding
partner of the Let's Encrypt project and the non-profit organization that
develops Certbot? We'd like to send you email about our work encrypting the web,
EFF news, campaigns, and ways to support digital freedom.
- - - - - - - - - - - - - - - - - - - - - - - - - - - - - - - - - - - - - - - -
(Y)es/(N)o: n
Account registered.
Requesting a certificate for paperless.yourdomain.com

Successfully received certificate.
Certificate is saved at: /etc/letsencrypt/live/paperless.yourdomain.com/fullchain.pem
Key is saved at:         /etc/letsencrypt/live/paperless.yourdomain.com/privkey.pem
This certificate expires on 2026-10-12.
These files will be updated when the certificate renews.
Certbot has set up a scheduled task to automatically renew this certificate in the background.

Deploying certificate
Successfully deployed certificate for paperless.yourdomain.com to /etc/nginx/conf.d/paperless.conf
Congratulations! You have successfully enabled HTTPS on https://paperless.yourdomain.com

- - - - - - - - - - - - - - - - - - - - - - - - - - - - - - - - - - - - - - - -
If you like Certbot, please consider supporting our work by:
 * Donating to ISRG / Let's Encrypt:   https://letsencrypt.org/donate
 * Donating to EFF:                    https://eff.org/donate-le
- - - - - - - - - - - - - - - - - - - - - - - - - - - - - - - - - - - - - - - -
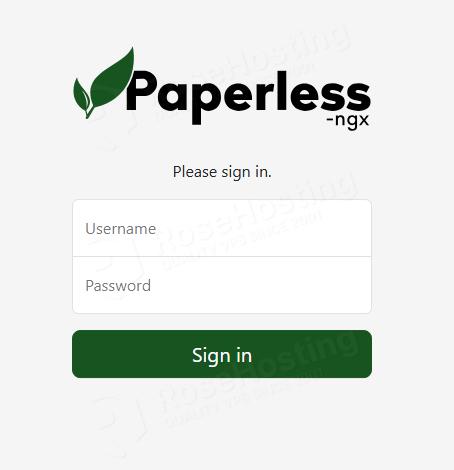
Finally, you should be able to access your Paperless NGX installation at https://paperless.yourdomain.com. You can now start working on it and uploading your files.
Conclusion
Of course, you don’t have to install Paperless NGX document management system on Debian 13 if you use one of our Managed VPS Hosting services, in which case you can simply ask our expert Linux administrators to install Paperless NGX on Debian 13 for you for free. They are available 24×7 and will address your request immediately. Managing WooCommerce websites is not just about the installation; we can help you optimize your WooCommerce installation if you have an active service with us.
If you liked this post about installing Paperless NGX on Debian 13, please share it with your friends or leave a comment below.