In this tutorial, we will show you how to install phpPgAdmin on a Debian 9 VPS.
 PhpPgAdmin is an open-source web administration interface used for managing PostgreSQL databases. PhpPgAdmin is written in PHP and it makes the administration of PostgreSQL databases easier, not to mention the web-based GUI making everything more user-friendly and easier to use. Let’s begin with the installation process.
Table of Contents
Prerequisites
In order to run phpPgAdmin on your Debian 9 VPS, the following requirements have to be met:
- PostgreSQL version 8.4 or higher
- Apache2
- PHP 5 or later installed on the server.
Step 1: Update OS packages
Before we can start with phpPgAdmin installation, we have to make sure that all Debian OS packages installed on the server are up to date. We can do this by executing the following commands:
sudo apt-get update
sudo apt-get upgrade
Step 2: Install PostgreSQL
sudo apt-get install postgresql postgresql-client postgresql-client-common postgresql-common postgresql-contrib
You’ll now need to set a password for the default PostgreSQL superuser account.
In order to set a password for the PostgreSQL superuser account (postgres), run the following commands:
sudo -u postgres psql
psql (9.6.10)
Type "help" for help.
postgres=#
psql
\password postgres      (Enter a new password twice)
psql \q
Enable md5 passwords for local connections by editing the PostgreSQL configuration file (/etc/postgresql/9.6/main/pg_hba.conf):
vi /etc/postgresql/9.6/main/pg_hba.conf
replace:
local   all             postgres                                peer
local   all             all                                     peer
with:
local   all             postgres                                md5
local   all             all                                     md5
Restart the PostgreSQL service for the changes to take effect:
service postgresql restart
Step 3: Install phpPgAdmin
There are two ways to install phpPgAdmin. We can use a debian package, or we can install phpPgAdmin from a source file. In this tutorial, we’ll be going over both installation methods. You can choose whichever is most suitable for your use case.
Method 1: Installing from a Repository
phpPgAdmin is available in the base Debian repository, so it can be easily installed using the following command:
apt-get install phppgadmin
In order to check the phpPgAdmin version installed using this method, run the following command:
dpkg -l | grep phppgadmin
The output should be similar to this:
ii phppgadmin 5.1+ds-2 all web-based administration tool for PostgreSQL
Method 2: Compiling from Source
Not only can we install the latest version of phpPgAdmin from the built-in repositories, but we can also compile the source code locally for our machine. phpPgAdmin is available to be downloaded at http://downloads.sourceforge.net.
Download phpPgAdmin and extract it to the /usr/share/phppgadmin/ directory on the server:
cd opt
wget -O phpPgAdmin.zip http://downloads.sourceforge.net/phppgadmin/phpPgAdmin-5.1.zip?download
unzip phpPgAdmin.zip
mv phpPgAdmin-5.1/ /usr/share/phppgadmin/
Create a new Apache configuration file for phpPgAdmin:
vi /etc/apache2/conf-enabled/phppgadmin.conf
Add the following lines:
Alias /phppgadmin /usr/share/phppgadmin

<Directory /usr/share/phppgadmin>
    <IfModule mod_dir.c>
        DirectoryIndex index.php
    </IfModule>
    AllowOverride None

    # Only allow connections from localhost:
    #Require local

    <IfModule mod_php.c>
        php_flag magic_quotes_gpc Off
        php_flag track_vars On
        #php_value include_path .
    </IfModule>
    <IfModule !mod_php.c>
        <IfModule mod_actions.c>
            <IfModule mod_cgi.c>
                AddType application/x-httpd-php .php
                Action application/x-httpd-php /cgi-bin/php
            </IfModule>
            <IfModule mod_cgid.c>
                AddType application/x-httpd-php .php
                Action application/x-httpd-php /cgi-bin/php
            </IfModule>
        </IfModule>
    </IfModule>
</Directory>
By default, phpPgAdmin is not accessible from a remote location, and is only accessible from localhost.
To change this and allow phpPgAdmin to be accessible from everywhere, we need to edit the Apache configuration for phpPgAdmin (found at /etc/apache2/conf-enabled/phppgadmin.conf):
vi /etc/apache2/conf-enabled/phppgadmin.conf
and then delete the following lines:
# Only allow connections from localhost:
Require local
Save and close that file, then restart the Apache service for the changes to take effect:
systemctl restart apache2.service
Also, we have to configure phpPgAdmin to allow users like the postgres user to log in via phpPgAdmin remotely. In order to do so, we have to edit the phpPgAdmin configuration file (found at /etc/phppgadmin/config.inc.php):
vi /etc/phppgadmin/config.inc.php
and replace:
$conf['extra_login_security'] = true;
with:
$conf['extra_login_security'] = false;
Save and exit the file. You should now be able to access the phpPgAdmin web client by entering http://server_ip in your preferred web browser.
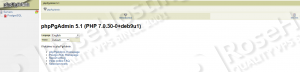
In order to log in to phpPgAdmin, we need to click on the ‘Servers’ button, then click on the ‘PostgreSQL’ link and enter postgres as username and the password of the postgres user that we set previously in this tutorial. If you created another database user in PostgreSQL, you can log in to the phpPgAdmin web interface using the login credentials of that particular database user.
We can now create, delete, and alter databases using the phpPgAdmin web interface. To create a new PostgreSQL database via phpPgAdmin, click on the ‘Create Database’ link, enter a database name, select database encoding (e.g. UTF8) and click on the ‘Create’ button. To delete a database, click on the PostgreSQL link, select the database you want to delete, click on the ‘Drop’ button and confirm that you want to delete that database. Those are the basics of using phpPgAdmin.
That is everything in terms of the install process. We have successfully installed and configured phpPgAdmin.
 Of course, you don’t have to set up and configure phpPgAdmin on Debian 9 yourself if you use one of our Managed Debian Hosting solutions, in which case you can simply ask our expert Linux admins to install and configure phpPgAdmin on your Debian 9 VPS for you. They are available 24×7 and will take care of your request immediately.
We also have a tutorial on how to install pgAdmin 4 on Debian 10, so have a look at it you require assistance with setting it up and configuring it on a newer Debian version.
PS. If you liked this post on how to install phpPgAdmin on a Debian 9 VPS, or if you found it helpful, please share it with your friends on the social networks using the share shortcuts, or simply leave a comment in the comment section down below. Thanks.