
pgAdmin is an open-source and one of the most widely used PostgreSQL database management systems. It comes with a simple and powerful web UI that can be used to write any SQL queries to perform database-related operations. It’s written in Python and supports many operating systems such as Linux, Windows, and Mac OS X.

pgAdmin is very useful for both beginners and experienced Postgres users to create, manage, maintain a database from a web browser. In this post, we will show you how to install pgAdmin4 on Debian 10 VPS.
Table of Contents
Prerequisites
- A Debian 10 VPS (we’ll be using our SSD 2 VPS plan)
- Access to the root user account (or access to an admin account with root privileges)
Step 1: Log in to the Server & Update the Server OS Packages
First, log in to your Debian 10 server via SSH as the root user:
ssh root@IP_Address -p Port_number
Once logged in, update your system packages with the following command:
apt-get update -y
Step 2: Install PostgreSQL
Before installing pgAdmin4, the PostgreSQL server must be installed on your server. If not installed you can install it using the following command:
apt-get install postgresql -y
After installing PostgreSQL, start the PostgreSQL service and enable it to start at system reboot:
systemctl start postgresql
systemctl enable postgresql
Next, check the status of the PostgreSQL service using the command below:
systemctl status postgresql
You should get the following output:
● postgresql.service - PostgreSQL RDBMS
   Loaded: loaded (/lib/systemd/system/postgresql.service; enabled; vendor preset: enabled)
   Active: active (exited) since Sat 2021-04-17 05:44:16 UTC; 18s ago
 Main PID: 2174 (code=exited, status=0/SUCCESS)
    Tasks: 0 (limit: 2359)
   Memory: 0B
   CGroup: /system.slice/postgresql.service

Apr 17 05:44:16 debian10 systemd[1]: Starting PostgreSQL RDBMS...
Apr 17 05:44:16 debian10 systemd[1]: Started PostgreSQL RDBMS.
By default, PostgreSQL listens on port 5432. You can check it using the following command:
ss -antpl | grep 5432
You should get the following output:
LISTEN    0         128              127.0.0.1:5432             0.0.0.0:*        users:(("postgres",pid=2505,fd=5))
LISTEN    0         128                  [::1]:5432                [::]:*        users:(("postgres",pid=2505,fd=3))
Step 3: Create a PostgreSQL Database and User
Next, connect to the PostgreSQL shell and create a database and user:
su - postgres
psql
Once you are connected, create a user and database with the following command:
postgres= CREATE USER pguser WITH PASSWORD 'password';
postgres= CREATE DATABASE pgdb;
Next, grant all the privileges to PostgreSQL database with the following command:
postgres= GRANT ALL PRIVILEGES ON DATABASE pgdb to pguser;
Next, exit from the PostgreSQL shell with the following command:
postgres= \q
exit
Step 4: Configure PostgreSQL Client Authentication
By default, PostgreSQL uses client authentication to control the database connections. You can change it by editing the file /etc/postgresql/11/main/pg_hba.conf.
nano /etc/postgresql/11/main/pg_hba.conf
Change the following lines:
host    all             all             127.0.0.1/32            md5
host    all             all             ::1/128                    md5
Save and close the file then restart the PostgreSQL service to apply the changes:
systemctl restart postgresql
Step 5: Install pgAdmin4
By default, pgAdmin4 is not included in the Debian 10 default repository. So you will need to add the pgAdmin4 repository to the APT.
First, install all the required dependencies using the following command:
apt-get install curl gnupg2 -y
Once all the dependencies are installed, download and add the GPG key with the following command:
curl https://www.pgadmin.org/static/packages_pgadmin_org.pub | apt-key add
Next, add the pgAdmin4 repository using the following command:
nano /etc/apt/sources.list.d/pgdg.list
Add the following line:
deb https://ftp.postgresql.org/pub/pgadmin/pgadmin4/apt/buster pgadmin4 main
Next, update the repository cache and install the latest version of pgAdmin4 with the following command:
apt-get update
apt-get install pgadmin4
Next, you will need to run a web setup script to configure the system to run in web mode. You can run it using the following command;
/usr/pgadmin4/bin/setup-web.sh
You will be asked to provide your Email and password to finish the configuration as shown below:
Setting up pgAdmin 4 in web mode on a Debian based platform...
Creating configuration database...
NOTE: Configuring authentication for SERVER mode.

Enter the email address and password to use for the initial pgAdmin user account:

Email address: admin@your-domain.com
Password:
Retype password:
pgAdmin 4 - Application Initialisation
======================================

Creating storage and log directories...
We can now configure the Apache Web server for you. This involves enabling the wsgi module and configuring the pgAdmin 4 application to mount at /pgadmin4. Do you wish to continue (y/n)? y
The Apache web server is running and must be restarted for the pgAdmin 4 installation to complete. Continue (y/n)? y
Apache successfully restarted. You can now start using pgAdmin 4 in web mode at http://127.0.0.1/pgadmin4
Step 6: Access pgAdmin4 Web Interface
Now, open your web browser and type the URL http://your-server-ip/pgadmin4 to access the pgAdmin4 web interface. You will be redirected to the pgAdmin4 login page:
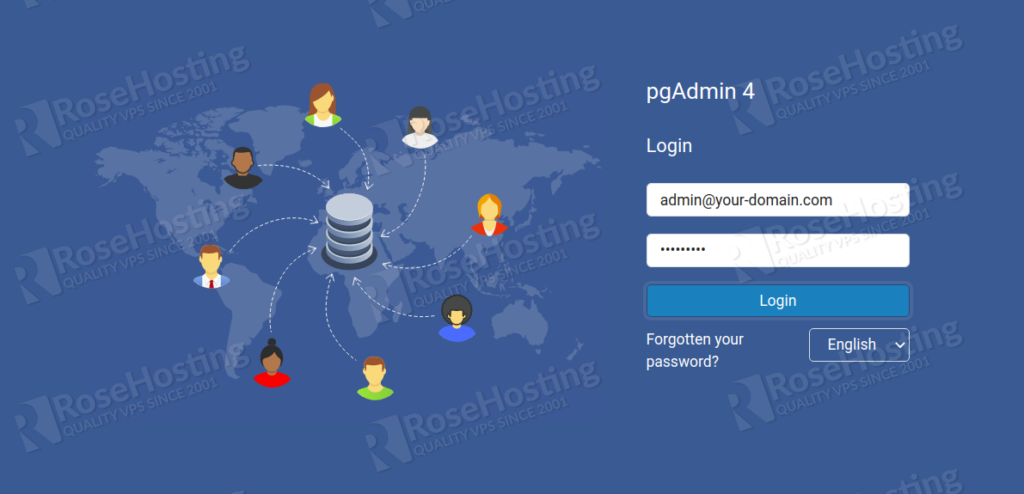
Provide your email address, and password, and click on the Login button. You should see the pgAdmin4 dashboard on the following page:
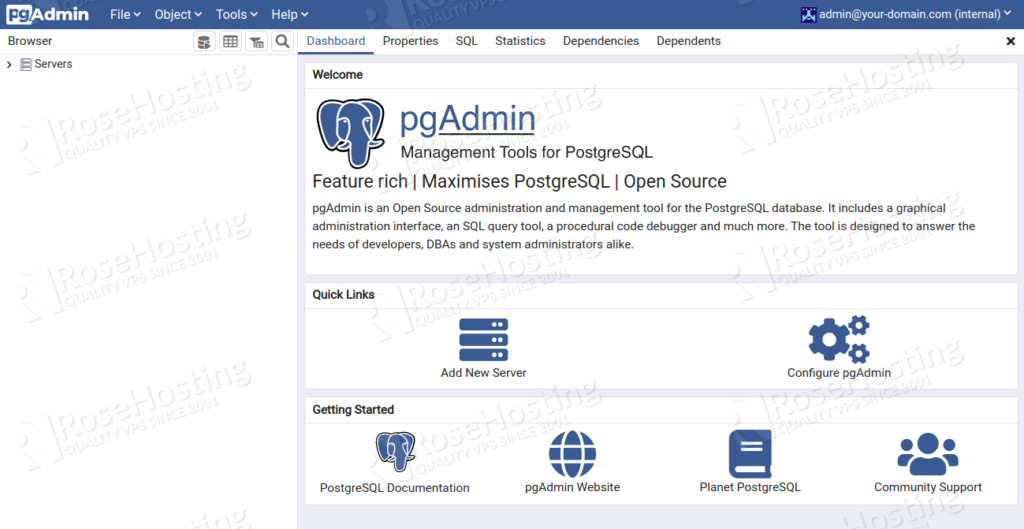
Next, click on the Add New Server to connect to the PostgreSQL server. You should see the following page:
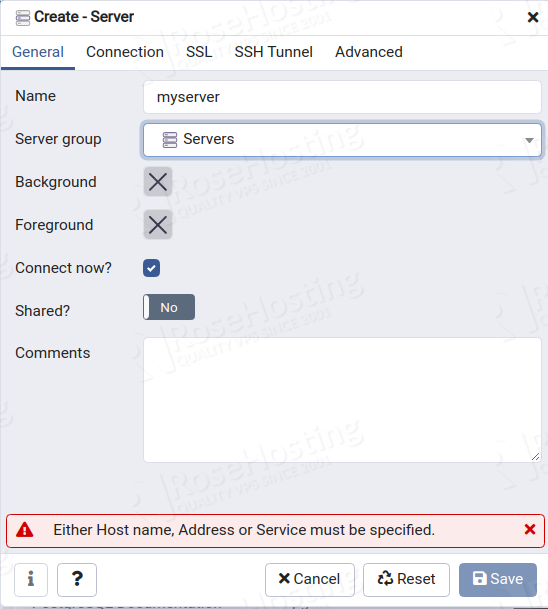
Provide your server name in General settings then click on the Connections tab. You should see the following page:
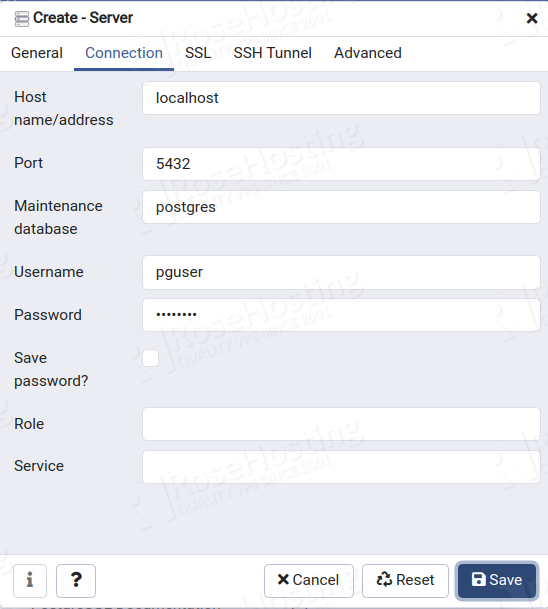
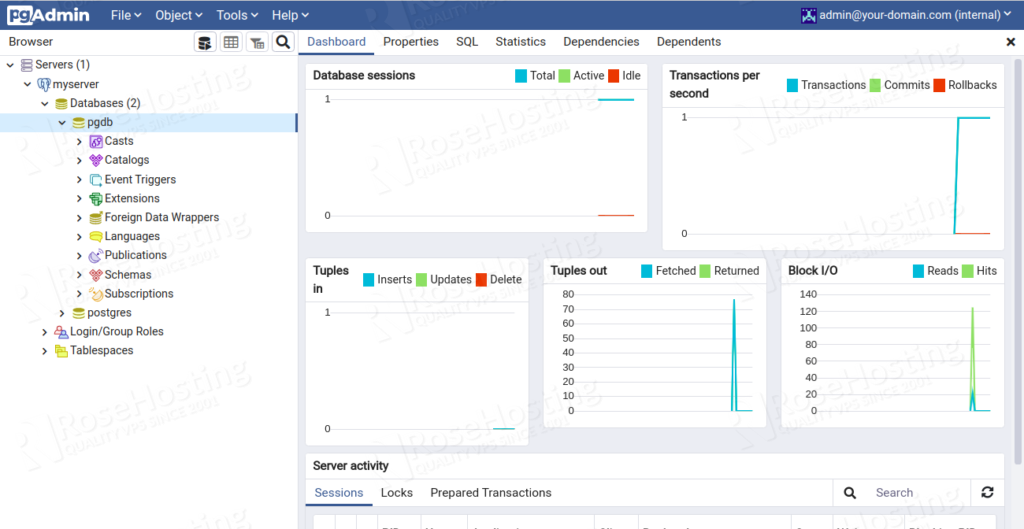
Provide your PostgreSQL host, database user, password and click on the Save button. Once the connection is established, you should see the following page:
Congratulations! You have now successfully installed pgAdmin4 on a Debian 10 VPS. If you’re looking to find a fully managed Debian VPS hosting solution, all our plans include free weekly backups, full root access, free website migration, 99.9% guaranteed uptime, and ultra-fast SSD storage. Learn more about our Debian hosting packages today!