
Prometheus is an open-source system and service monitoring and alerting tool used for recording real-time services and collecting metrics in a time-series database. It s written in Go and licensed under the Apache 2 License originally developed by SoundCloud.

In this tutorial, we will show you how to install Prometheus on Ubuntu 20.04 server, which can be done easily if you follow it step by step.
Table of Contents
Requirements:
- For the purposes of this tutorial, we will use an Ubuntu20.04 VPS.
- Access to the root user account (or a user with sudo privileges)
Step 1: Log in to the Server & Update the Server OS Packages
First, log in to your Ubuntu 20.04 server via SSH as the root user:

ssh root@IP_ADDRESS -p PORT_NUMBER
Don’t forget to replace IP_Address and Port_Number with your server’s actual IP address and the SSH port number. Also, you should replace ‘root’ with the username of the admin account if needed.
Once you are in, run the following commands to update the package index and upgrade all installed packages to the latest available version
apt-get update
apt-get upgrade
Step 2. Creating Prometheus System Users and Directory
The Prometheus server requires a service user account to run. You can name your user however you like, but we will create a user named prometheus. This user will be a system user (-r) who will be unable to get a shell (-s /bin/false)
useradd --no-create-home -rs /bin/false prometheus
Also, we need to create directories for configuration files and other Prometheus data.
mkdir /etc/prometheus
mkdir /var/lib/prometheus
Now we will have to update the group and user ownership on the newly created directories.
chown prometheus:prometheus /etc/prometheus
chown prometheus:prometheus /var/lib/prometheus
Step 3. Download Prometheus Binary File
Prometheus is included by default on the Ubuntu 20.04 repositories.
apt-cache policy prometheus
prometheus:
Installed: (none)
Candidate: 2.15.2+ds-2
Version table:
2.15.2+ds-2 500
500 http://us.archive.ubuntu.com/ubuntu focal/universe amd64 Packages
However, the Prometheus release version provided by the default Ubuntu repositories may not be up-to-date. At the time of writing this article, the latest stable version of Prometheus is 2.30.3.
But before downloading, visit the official Prometheus downloads page and check if there is a new version available.
You can download it using the following command:
wget https://github.com/prometheus/prometheus/releases/download/v2.30.3/prometheus-2.30.3.linux-amd64.tar.gz
Once the tarball is downloaded, verify the tarball checksum with the following command:
sha256sum prometheus-2.30.3.linux-amd64.tar.gz
You should see an output that looks similar to the one below:
1ccd386d05f73a98b69aa5e0ed31fffac95cd9dadf7df1540daf2f182c5287e2 prometheus-2.30.3.linux-amd64.tar.gz
Compare the hash value from the above output to the checksum value on the Prometheus download page. If they match, that means the file’s integrity is validated.
Now you have successfully downloaded the Prometheus file and now you will extract it to the /opt directory using the tar command:
tar xvzf prometheus-2.30.3.linux-amd64.tar.gz -C /opt
Next, you need to copy the binary files to /usr/local/bin directory and fix the permissions. This is done with the following commands:
mv /opt/prometheus-2.30.3.linux-amd64/prometheus /opt/prometheus-2.30.3.linux-amd64/promtool /usr/local/bin/
chown prometheus:prometheus /usr/local/bin/prometheus /usr/local/bin/promtool
Also, we need to copy the consoles and console_libraries directories to Prometheus configuration directory, /etc/prometheus
mv /opt/prometheus-2.30.3.linux-amd64/consoles /opt/prometheus-2.30.3.linux-amd64/console_libraries /etc/prometheus/
chown -R prometheus:prometheus /etc/prometheus/consoles /etc/prometheus/console_libraries
Step 4: Create Prometheus Configuration file
Prometheus configuration file has been prepared and available on the extracted archive folder, and you need just to copy it to the Prometheus configuration /etc/prometheus directory.
mv /opt/prometheus-2.30.3.linux-amd64/prometheus.yml /etc/prometheus/prometheus.yml
chown prometheus:prometheus /etc/prometheus/prometheus.yml
The content of theprometheus.yml file:
# my global config
global:
scrape_interval: 15s # Set the scrape interval to every 15 seconds. Default is every 1 minute.
evaluation_interval: 15s # Evaluate rules every 15 seconds. The default is every 1 minute.
# scrape_timeout is set to the global default (10s).

# Alertmanager configuration
alerting:
alertmanagers:
- static_configs:
- targets:
# - alertmanager:9093

# Load rules once and periodically evaluate them according to the global 'evaluation_interval'.
rule_files:
# - "first_rules.yml"
# - "second_rules.yml"

# A scrape configuration containing exactly one endpoint to scrape:
# Here it's Prometheus itself.
scrape_configs:
# The job name is added as a label `job=<job_name>` to any timeseries scraped from this config.
- job_name: "prometheus"

# metrics_path defaults to '/metrics'
# scheme defaults to 'http'.

static_configs:
- targets: ["localhost:9090"]
The configuration is set up to scrape every 15 seconds and Prometheus listens on port 9090.
Step 5: Create Prometheus Systemd Service file
Now we need to create a system service file.
nano /etc/systemd/system/prometheus.service
In that file, add the following content:
[Unit]
Description=Prometheus
Wants=network-online.target
After=network-online.target

[Service]
User=prometheus
Group=prometheus
Type=simple
ExecStart=/usr/local/bin/prometheus \
    --config.file /etc/prometheus/prometheus.yml \
    --storage.tsdb.path /var/lib/prometheus/ \
    --web.console.templates=/etc/prometheus/consoles \
    --web.console.libraries=/etc/prometheus/console_libraries

[Install]
WantedBy=multi-user.target
After adding the content save and close the file.
To use the newly created service you will have to reload the daemon services, Use the below command to reload daemon services.
systemctl daemon-reload
You can now start and enable Prometheus service using the below commands:
systemctl start prometheus
systemctl enable prometheus
To check and verify the status of your Prometheus service, run the following command:
systemctl status prometheus
Output :
● prometheus.service - Prometheus
Loaded: loaded (/etc/systemd/system/prometheus.service; enabled; vendor preset: enabled)
Active: active (running) since Sat 2021-10-23 19:15:21 UTC; 4s ago
Main PID: 9884 (prometheus)
Tasks: 1 (limit: 2245)
Memory: 336.0K
CGroup: /system.slice/prometheus.service
└─9884 /usr/local/bin/prometheus --config.file /etc/prometheus/prometheus.yml --storage.tsdb.path /var/lib/prometheus/ --web.console.templates=/etc/prometheus/consoles --web.console.libraries=/etc/prometheus/console_libraries
Prometheus installation and configuration is set up, You can see status Active: active(running)
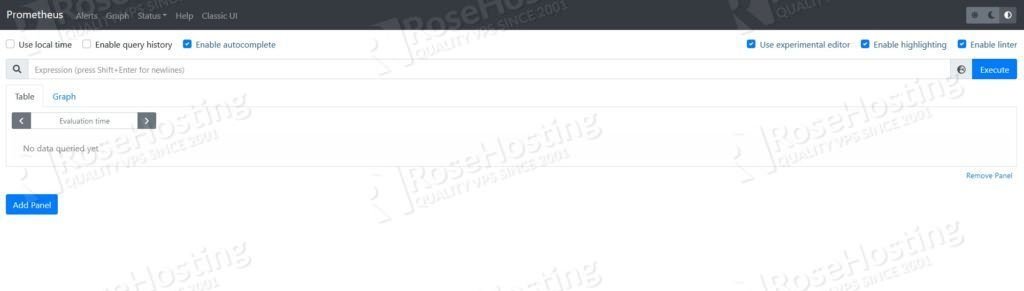
Now Prometheus service is up and running and you can access it from any web browser.
http://Your_server_IP:9090
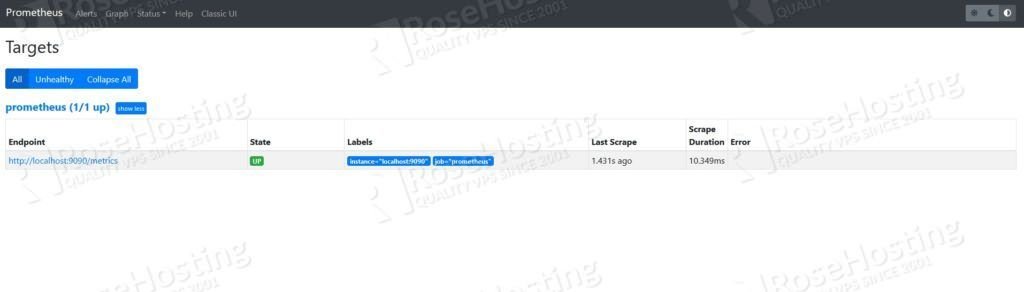
To check the status of your node, go to Status > Targets.
That’s it! The installation of Prometheus on Ubuntu 20.04 has been completed.
Of course, you don’t need to install Prometheus on Ubuntu 20.04 yourself if you use one of our fully managed Linux VPS Hosting services, in which case you can simply ask our expert Linux admins to install it for you. They are available 24×7 and will take care of your request immediately.
P.S. If you liked this post on how to install Prometheus on Ubuntu 20.04 please share it with your friends on the social networks by using the share shortcuts below, or simply leave a comment in the comments section. Thanks.