
Contao is a powerful open source content management system (CMS) that is easy to use, intuitive, and versatile and it allows you to create websites in multiple languages and themes. Contao can also be integrated into a regular Symfony application. In this tutorial, we will show you how to install Contao on Ubuntu 20.04.
Table of Contents
Prerequisites
- Ubuntu 20.04 VPS
- SSH root access or a regular system user with sudo privileges
Step 1. Log in via SSH and update the system
Log in to your Ubuntu 20.04 VPS with SSH as a root user or as a regular user with sudo privileges
ssh master@IP_Address -p Port_number
Remember to replace “master” with a user that has sudo privileges, or root. Additionally, replace “IP_Address” and “Port_Number” with your server’s IP address and SSH port.

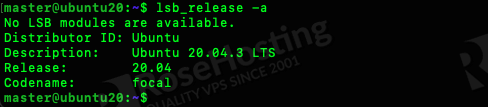
You can check whether you have the proper Ubuntu version installed on your server with the following command:
$ lsb_release -a
You should get this output:
No LSB modules are available.
Distributor ID: Ubuntu
Description: Ubuntu 20.04.3 LTS
Release: 20.04
Codename: focal
Now, run the following command to update all installed packages to the latest available version.
$ sudo apt update && sudo apt upgrade
Step 2. Install Apache
Apache is considered as the most widely-used and user-friendly web server software. It is fast, secure, reliable, and can be easily customized depending on your needs.
To install Apache on the server, run the following command:
$ sudo apt install apache2
After the installation is completed, you should enable Apache to start automatically upon server boot with:
$ sudo systemctl --now enable apache2
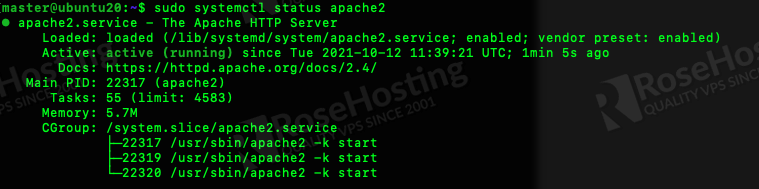
You can also check the status of your Apache service with the following command
$ sudo systemctl status apache2
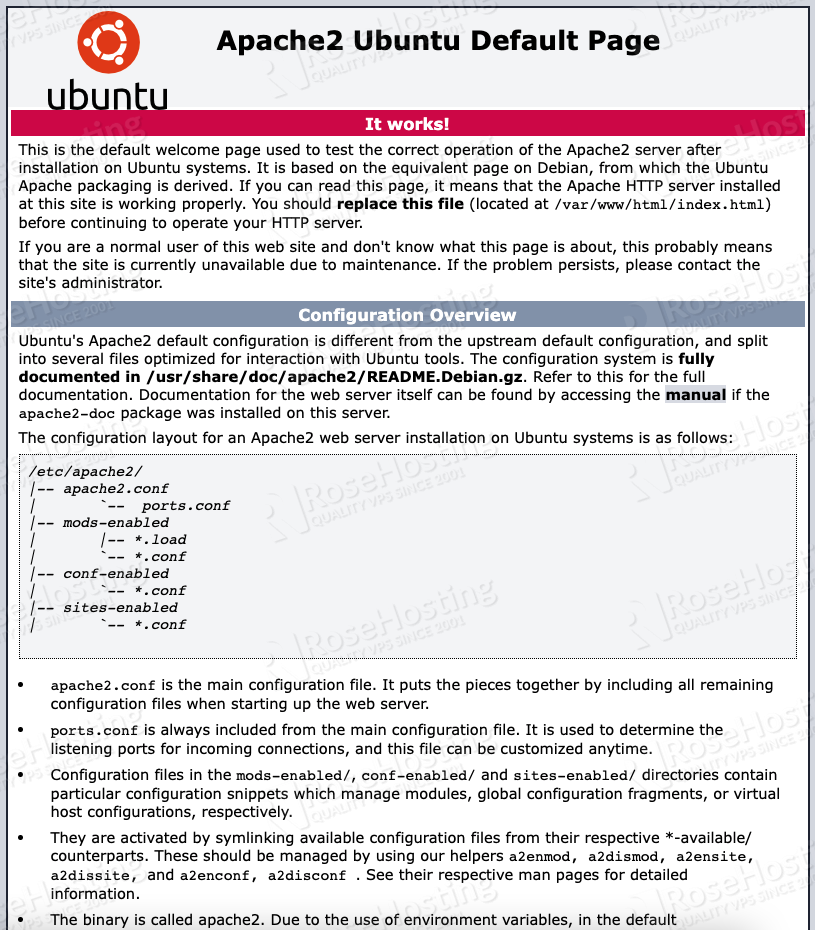
or, open your web browser and navigate to http://123.123.123.123, replace 123.123.123.123 with your Ubuntu 20.04 actual IP address. You should see a default page as shown in the picture below.
Create virtualhost
Let’s create an apache virtual host, you can change the file name and the domain name to reflect your actual domain name.
$ sudo nano /etc/apache2/sites-available/domain1.com.conf
The add the following to the file.
$ sudo mkdir -p /var/www/html/domain1.com/web
<VirtualHost *:80>

ServerAdmin admin@domain1.com
ServerName domain1.com
ServerAlias www.domain1.com
DocumentRoot /var/www/html/domain1.com/web

ErrorLog ${APACHE_LOG_DIR}/domain1.com_error.log
CustomLog ${APACHE_LOG_DIR}/domain2.com_access.log combined

<Directory  /var/www/html/domain1.com/web>
AllowOverride All
Require all granted
</Directory>

</VirtualHost>
Save the file then exit, then change the domain’s webroot permission with this command:
$ sudo chown -R www-data. /var/www/html/domain1.com/web
Contao requires us to activate the apache mod_rewrite. In Ubuntu, mod_rewrite is not enabled by default, we need to run this command below to enable it.
$ sudo a2enmod rewrite
Remember, always check your Apache configuration to make sure there is no type or other issues by running this command prior to restarting it.
$ sudo apache2ctl -t
$ sudo systemctl restart apache2
Step 3. Install MySQL
The most recent Contao requires MySQL 8 or higher, or the equivalent MariaDB server.
In Ubuntu 20.04, MySQL 8 is available in the repository and we will install the MySQL server. To do this, simply run the following command:
$ sudo apt install mysql-server -y
By running the command above, you will install MySQL 8 on your Ubuntu 20.04 server.
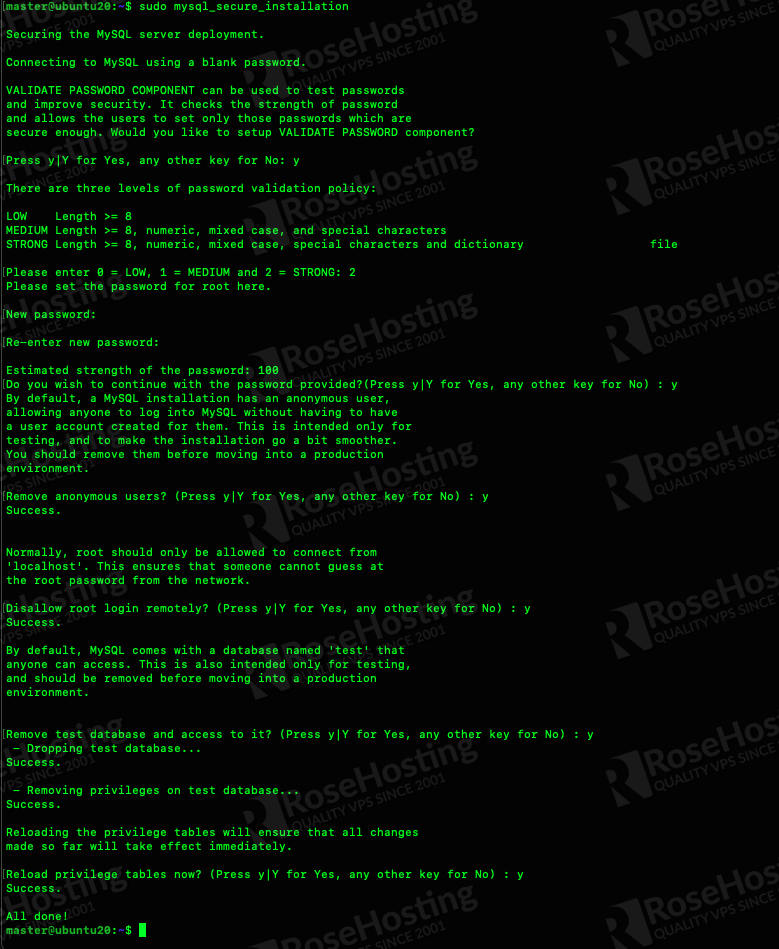
After the installation is completed, you can improve the security of your MySQL server, by running the mysql_secure_installation script:
$ sudo mysql_secure_installation
As seen in the picture below, we created a strong MySQL password and removed test database and removed anonymous users as well.
Create a Database
We have successfully installed and secured MySQL. Now, let’s create a new database for our Contao website. First, we need to connect to MySQL server by running the command:
$ sudo mysql -u root -p
You need to type or paste your MySQL root password that has been set when running the mysql_secure_installation command earlier in the previous step.
This will grant you access to the MySQL shell:
Welcome to the MySQL monitor. Commands end with ; or \g.
Your MySQL connection id is 24
Server version: 8.0.26-0ubuntu0.20.04.3 (Ubuntu)

Copyright (c) 2000, 2021, Oracle and/or its affiliates.

Oracle is a registered trademark of Oracle Corporation and/or its
affiliates. Other names may be trademarks of their respective
owners.


Type 'help;' or '\h' for help. Type '\c' to clear the current input statement.

mysql>
Then run these MySQL commands:
mysql> CREATE DATABASE contaodb;
Query OK, 1 row affected (0.00 sec)

mysql> CREATE USER 'contao'@'localhost' IDENTIFIED BY 'o21KDQpuHqRDl!#';
Query OK, 0 rows affected (0.01 sec)

mysql> GRANT ALL PRIVILEGES ON contaodb.* TO 'contao'@'localhost' WITH GRANT OPTION;
Query OK, 0 rows affected (0.00 sec)

mysql> FLUSH PRIVILEGES;
Query OK, 0 rows affected (0.01 sec)

mysql> \q
Step 4. Install PHP
PHP 7.4 is the minimum version you need to install to be able to run Contao on your server. To install PHP 7.4 and some PHP extensions required by Contao, run the following command:
$ sudo apt install php-{xml,pear,intl,common,json,curl,mbstring,mysql,gd,imagick,zip,opcache} libapache2-mod-php
Once installed, you can check the PHP version by invoking this command:
$ php -v
You will see an output like this:
PHP 7.4.3 (cli) (built: Aug 13 2021 05:39:12) ( NTS )
Copyright (c) The PHP Group
Zend Engine v3.4.0, Copyright (c) Zend Technologies
with Zend OPcache v7.4.3, Copyright (c), by Zend Technologies
Step 5. Install Composer
Composer is a dependency manager with which you can install packages. Composer will pull all the required libraries you need for your project.
First, we need to download it first.
$ sudo curl -sS https://getcomposer.org/installer -o composer-setup.php
Then, move the executable file to /usr/local/bin
$ sudo php composer-setup.php --install-dir=/usr/local/bin --filename=composer
That’s all. You have successfully installed Composer on your Ubuntu 20.04 server and have made it available for global use by storing it to /usr/local/bin/. To verify and check the Composer version you can run this command:
$ composer -V
Step 6. Install Contao
There are two methods to install Contao on your server, using Contao Manager and using the command line. In this tutorial, we will show you how to install Contao using Contao Manager.
First, let’s enter /var/www/html/domain1.com/web
$ cd /var/www/html/domain1.com/web
$ sudo -u www-data wget https://download.contao.org/contao-manager/stable/contao-manager.phar -O contao-manager.phar.php
Now, let’s open a web browser and navigate to http://domain1.com, you will see a page asking you to create a username and its password.
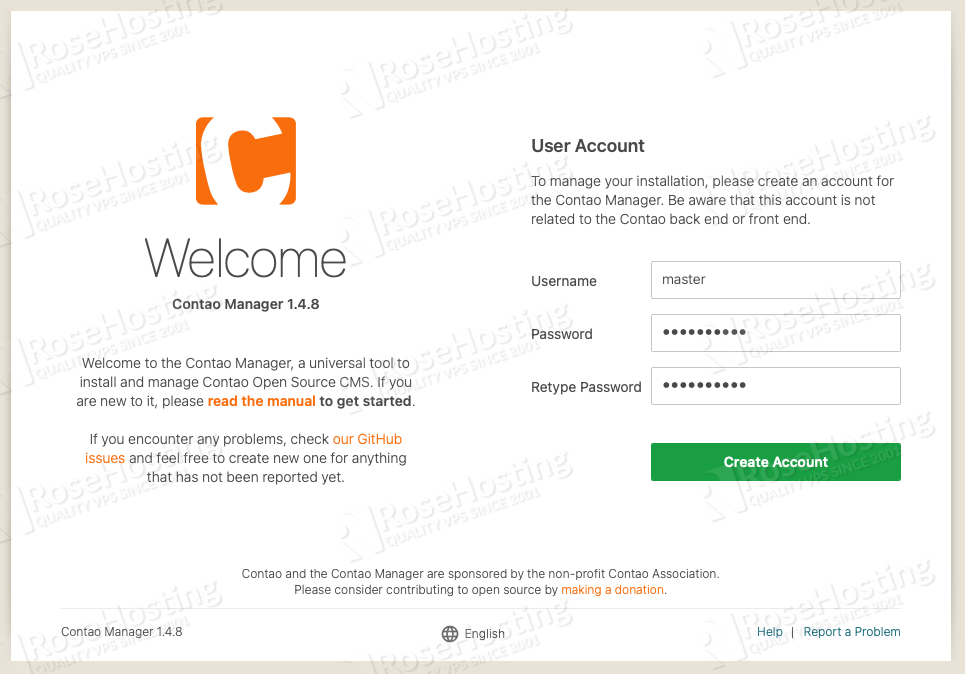
You would need to fill the forms to createan account. After clicking on the ‘Create Account’ button, the script will check your server and once finished you can click on the ‘Setup’ button as shown in the picture below.
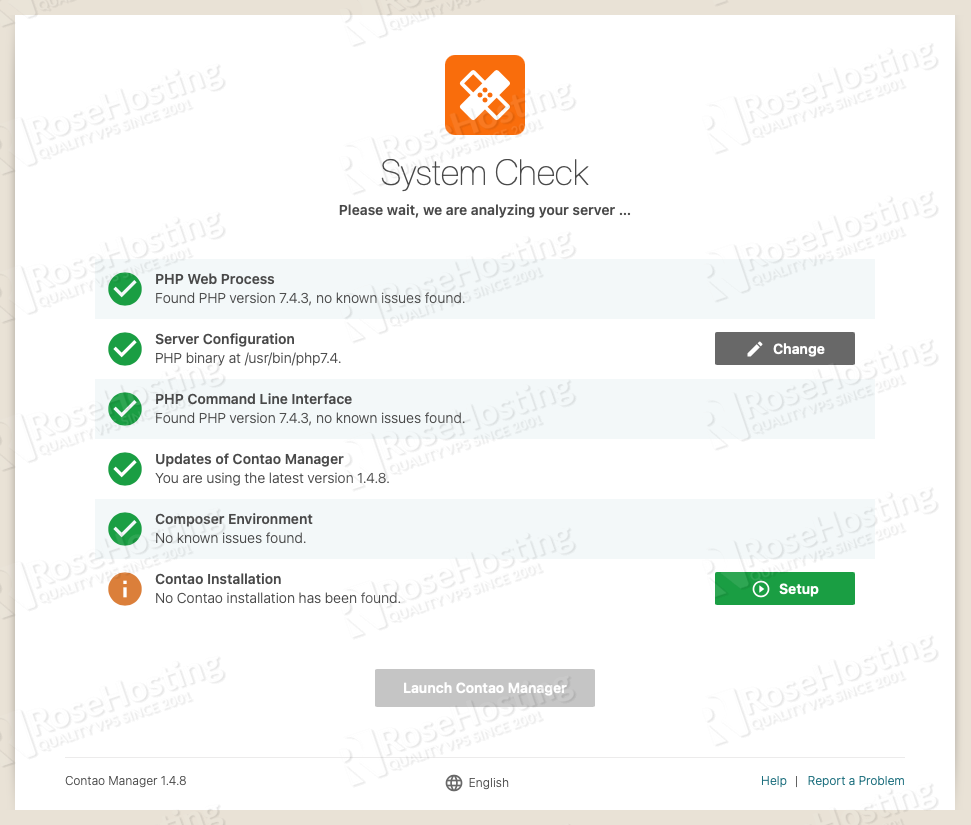
In the next step, you can choose which Contao version to install and the installation type, click on Finish.
The script will download Contao files and perform a composer install, this step will take a few minutes to complete.
If there is no issue, you will be brought to the next step and update the database.
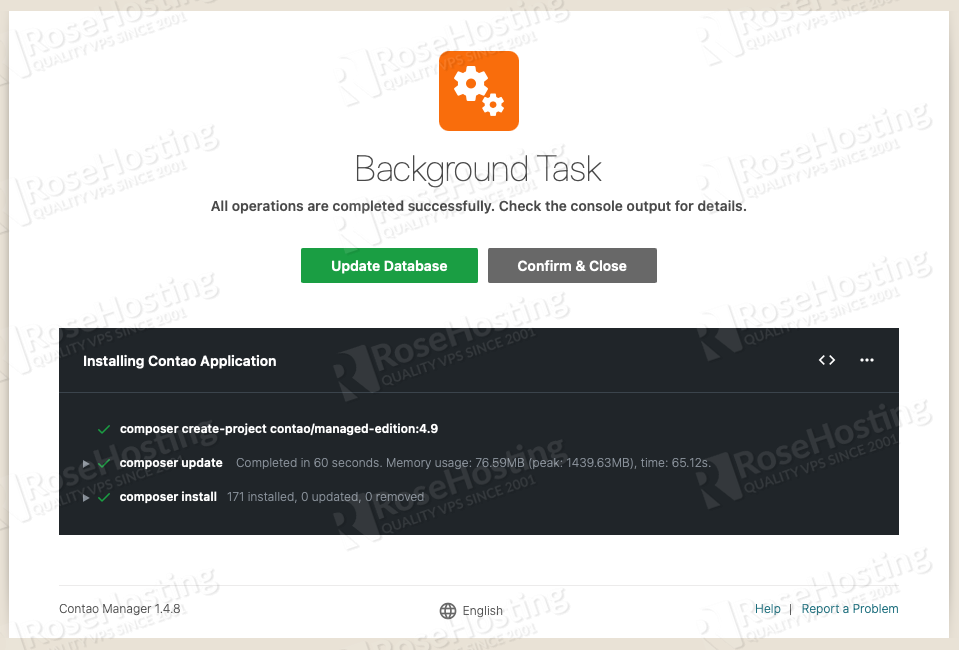
Okay, we shall continue this by clicking on the green ‘Update Database’ button. This action will bring you to http://domain1.com/contao/install.
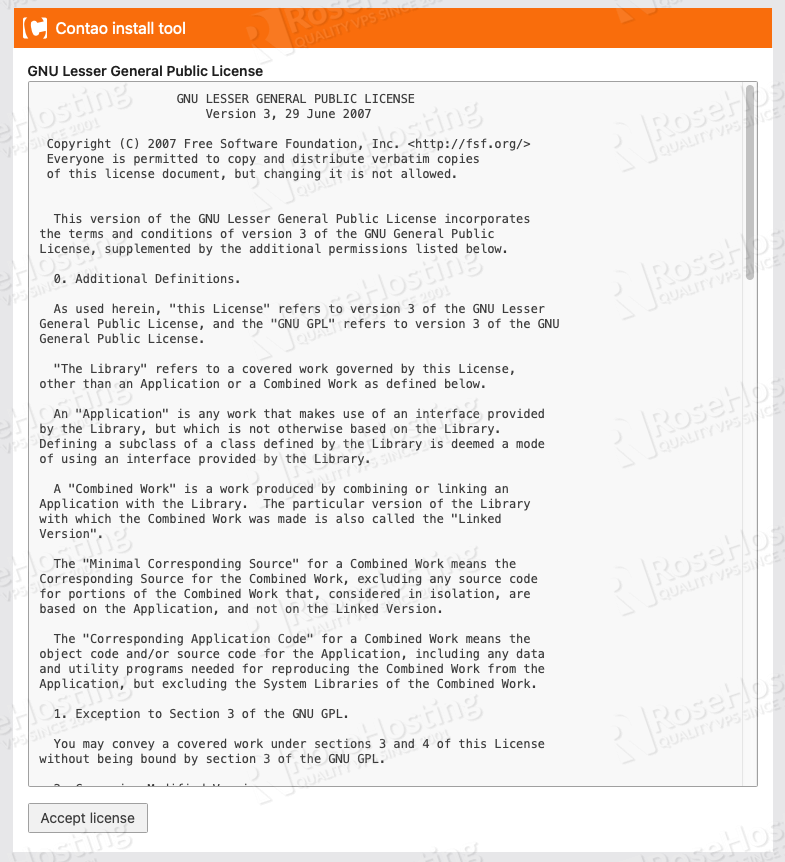
This is where the installation begins, you need to click on the Accept license button and follow the steps to finalize the installation. The installation process will ask you to fill the database credentials and create an administrator user and password.
Once completed, you can go to your Contao backend at http://domain1.com/contao using the credentials you created in the previous step.
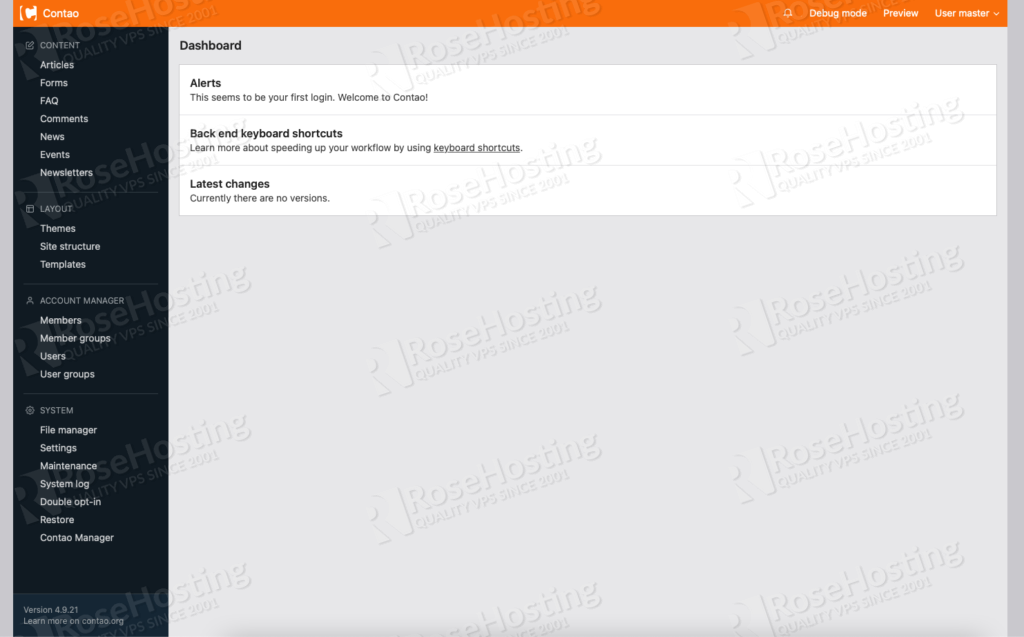
This is where you are now after logging in to the Contao backend. In this page, you can see some menus to navigate.
Unlike any other CMS-es, you need to create your own index page, and you can follow the documentation at https://docs.contao.org/manual/en/guides/add-first-index-page/
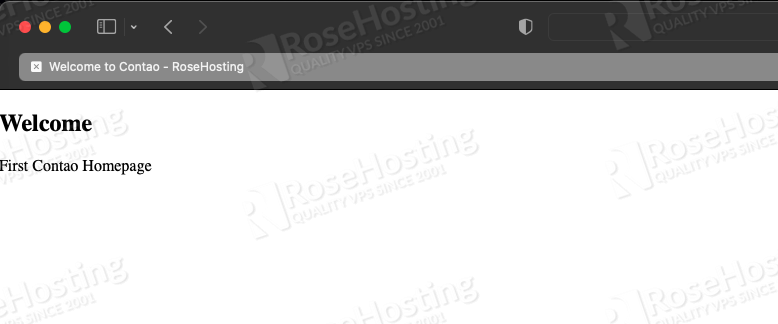
This is our simple index page.
That’s it. You have successfully installed Contao on your Ubuntu VPS. For more information about Contao, please refer to the Contao website. If you want to install a free SSL certificate for your Contao website, you can follow our blog post on How To Install Let’s Encrypt On Ubuntu 20.04 With Apache.
If you are one of our web hosting customers and use our optimized Linux Hosting, you don’t have to install Contao On Ubuntu 20.04, our expert Linux admins will set up and optimize your Contao VPS, for you. They are available 24×7 and will take care of your request immediately.
PS. If you liked this post, on how to install Contao On Ubuntu 20.04, please share it with your friends on the social networks using the buttons on the left or simply leave a reply below. Thanks.