In this article we will show you how to install Rocket.Chat on a CentOS 7 server and configure Apache as reverse proxy for the Rocket.Chat application. Rocket.Chat is a free team communication software, built with Meteor framework. Rocket.Chat is unlimited and open source software solution that replaces Slack and HipChat. Rocket.Chat supports audio and video communication with screen sharing, with complete access to the source code, you can fully customize, extend or add new functionality to meet your requirements. The Installation of Rocket.Chat on CentOS 7 is fairly easy task and it shouldn’t take more then 10 minutes to complete. Let’s get started!
Requirements
In order to run Rocket.Chat on your CentOS 7 VPS, we need the following requirements pre-installed:
MongoDB – most popular open source NoSQL database
NodeJS – an open source JavaScript run-time environment.
GraphicsMagick – a robust collection of tools and libraries about image processing. GraphicsMagick is a fork of ImageMagick.
Step 1: Log in via SSH on the CentOS server:
Log in to each VPS via SSH as user root
ssh roo@IP_Address -p Port_number
Step 2: Update all packages and install Development tools
Once you are logged, run the following command to make sure that all installed RPM packages are up to date
sudo yum clean all
sudo yum update
sudo yum groupinstall ‘Development Tools'
Step 3: Install EPEL and MongoDB repositories:
We need to install EPEL repository:
yum install epel-release
The default CentOS 7 repository does not contain a package for MongoDB, so we will need to use the official MongoDB repository to install MongoDB package.
At the time of writing this tutorial, the latest stable version of MongoDB is 4.0, so create a new file in the /etc/yum.repos.d/ directory named ‘mongodb-org-4.0.repo’:
vi /etc/yum.repos.d/mongodb-org-4.0.repo
Then, add the following lines:
[mongodb-org-4.0]
name=MongoDB Repository
baseurl=https://repo.mongodb.org/yum/redhat/$releasever/mongodb-org/4.0/x86_64/
gpgcheck=1
enabled=1
gpgkey=https://www.mongodb.org/static/pgp/server-4.0.asc
Step 4: Install MongoDB
Install MongoDB using the following commands:
sudo yum update
sudo yum install mongodb-org-server mongodb-org mongodb-org-mongos mongodb-org-shell mongodb-org-tools
Enable the MongoDB service to start automatically on boot:
sudo systemctl enable mongod
Start the MongoDB service:
sudo systemctl start mongod
Step 5: Install node.js and npm
sudo yum install nodejs npm
npm install -g inherits n
Download and set nodejs version 8.9.3:
sudo n 8.9.3
Check the node.js version:
# node --version
v8.9.3
Step 6: Install GraphicsMagick
Install GraphicsMagick using the following command:
yum install GraphicsMagick
Step 7: Install Rocket.Chat
Download the latest stable version of Rocket.Chat and extract it in the /opt directory on your server:
cd /opt
curl -L https://releases.rocket.chat/latest/download -o rocket.chat.tar
tar -xvf rocket.chat.tar
mkdir -p /var/www/html/rocket.chat
cd bundle
mv * .[^.]* /var/www/html/rocket.chat/
cd /var/www/html/rocket.chat/programs/server
npm install
cd ../../
export ROOT_URL=http://your-server_IP:3000/
export MONGO_URL=mongodb://localhost:27017/rocketchat
export PORT=3000
Run the following command to test the installation:
node main.js
You should be able to access Rocket.Chat at http://your-domain.com:3000/
Stop Rocket.Chat using CTRL+C.
We can configure Apache as reverse proxy so it can handle and pass the requests to Rocket.Chat and hide the port number in the URL.
Edit the ‘/etc/httpd/conf/httpd.conf’ Apache configuration file and uncomment the following line:
#NameVirtualHost *:80
Then, add the following virtual host at the end:
<VirtualHost *:80>
ServerName your-domain.com
DocumentRoot /var/www/html/rocket.chat
ServerAlias www.your-domain.com

ProxyRequests Off
<Proxy *>
Order deny,allow
Allow from all
</Proxy>

ProxyPass / http://your-server_IP:3000/
ProxyPassReverse / http://your-server_IP:3000/
<Location />
Order allow,deny
Allow from all
</Location>
ErrorLog /var/log/httpd/rocket.chat-error_log
CustomLog /var/log/httpd/rocket.chat-access_log common
</VirtualHost>
Make sure the mod_proxy module is enabled and restart the Apache service for the changes to take effect using the following command:
systemctl restart httpd
Create a new systemd service:
vi /usr/lib/systemd/system/rocketchat.service
Add the following lines:
[Unit]
  Description=The Rocket.Chat server
  After=network.target remote-fs.target nss-lookup.target nginx.target mongod.target
  [Service]
  ExecStart=/usr/local/bin/node /var/www/html/rocket.chat/main.js
  StandardOutput=syslog
  StandardError=syslog
  SyslogIdentifier=rocketchat
  User=root
  Environment=MONGO_URL=mongodb://localhost:27017/rocketchat ROOT_URL=http://your-domain.com:3000/ PORT=3000
  [Install]
  WantedBy=multi-user.target
Do not forget to replace ‘your-domain.com’ with the actual domain name.
Enable the Rocket.Chat service to start automatically on boot:
sudo systemctl enable rocketchat.service
Start the Rocke.Chat service:
sudo systemctl start rocketchat.service
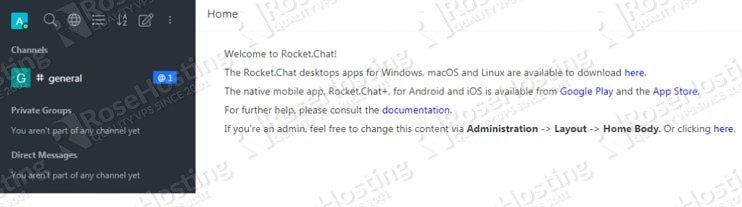
Open your favorite web browser and access the Rocket.Chat application by opening http://your-domain.com . Create a new
admin account and click on ‘Continue’ button. On the next page, enter the organization information, on the next page select ‘keep standalone’, and on the last page, click on ‘Go to your workspace’ button. Then, log in to Rocket.Chat with the newly created admin account, create new members and channels, manage their permissions, and customize Rocket.Chat according to your needs. Also, Rocket.Chat provides an extendable Webhook integration framework, so we can integrate Rocket.Chat with many other applications, through incoming and outgoing Webhook scripts.
That is it. Rocket.Chat has been successfully installed on your CentOS 7 VPS.
![]() Of course, you don’t have to install Rocket.Chat on CentOS 7, if you use one of our Managed CentOS Hosting plans, in which case you can simply ask our expert Linux admins to install Rocket.Chat on CentOS 7 for you. They are available 24×7 and will take care of your request immediately. For additional updates, you can also check our guide on How to Install Rocket.Chat on CentOS 8.
Of course, you don’t have to install Rocket.Chat on CentOS 7, if you use one of our Managed CentOS Hosting plans, in which case you can simply ask our expert Linux admins to install Rocket.Chat on CentOS 7 for you. They are available 24×7 and will take care of your request immediately. For additional updates, you can also check our guide on How to Install Rocket.Chat on CentOS 8.
PS. If you liked this post on how to install Rocket.Chat on CentOS 7, please share it with your friends on the social networks using the buttons on the left or simply leave a reply below. Thanks.
i encoutred a problem with filter module node js and i it was resolved by installing yum group install “Development Tools”.
hope this help centos 7 users.
thank you for the post.
I encounter error:
Error: Must pass options.rootUrl or set ROOT_URL in the server environment
at Object.Meteor.absoluteUrl (packages/meteor.js:1378:11)
at runWebAppServer (packages/webapp/webapp_server.js:771:18)
at packages/webapp/webapp_server.js:1178:1
at webapp_server.js (packages/webapp/webapp_server.js:1178:16)
at fileEvaluate (packages/modules-runtime.js:336:7)
at Module.require (packages/modules-runtime.js:238:14)
at require (packages/modules-runtime.js:258:21)
at /var/www/html/rocket.chat/programs/server/packages/webapp.js:1610:15
at /var/www/html/rocket.chat/programs/server/packages/webapp.js:1619:3
at /var/www/html/rocket.chat/programs/server/boot.js:398:38
at Array.forEach ()
at /var/www/html/rocket.chat/programs/server/boot.js:226:21
at /var/www/html/rocket.chat/programs/server/boot.js:461:7
at Function.run (/var/www/html/rocket.chat/programs/server/profile.js:280:14)
at /var/www/html/rocket.chat/programs/server/boot.js:460:13
Have you set up ROOT_URL environment variable?
export ROOT_URL=http://your-server_IP:3000/Please add the command “yum groupinstall ‘Development Tools'” as they are needed to install rocket.chat.
Thanks, we have added that command to the tutorial.
Is there any option to install RocketChat server offline?
You must have an Internet connection in order RocketChat to function properly.