Most of the time you’ll be installing packages with the built-in Linux package manager. For CentOS, that’s yum. For Debian, it’s apt-get and so on. If you’re lucky. Unfortunately, not all useful software is neatly packaged in repositories.

There’s a lot of it lying wild out there, just waiting to be compiled and installed. In this article, we’ll show you how to install tar.gz files using the traditional manner on a fresh CentOS install.
The RIGHT Way to Install tar.gz Files
One of the reasons why package managers like yum are so useful is that they take care of cleaning up after you’re done. To uninstall a package, we just need to type:
yum remove xyz
However, packages in the wild might not be well made. There might not be a default way to remove the package and all its files. Later on, we’ll show you a safe way to do this so that you can remove packages completely even without an uninstaller. But for now, we’re going to assume that the package you want to install is well made and adheres to the important coding standards.
Permissions to Compile and Install tar.gz Files
The final process of installing these files requires root permissions. If you’re not logged in as root (and ideally you shouldn’t be!), then you’ll need to use the “sudo” command. If you don’t have a user capable of running sudo, then either you create one, or log in as root yourself. So let’s get started!
Table of Contents
Step 1: Install the Development Tools
The Linux development tools are a bunch of around 100 packages (including dependencies) that are required to compile programs. You can check to see if they’re installed by typing something like:
gcc -v
If it says “command not found”, then you need to install the tools by typing:
sudo yum groupinstall "Development tools"
This is for CentOS. For Ubuntu, it’s called the “build-essential” package and so on. Installing these requires admin permissions:
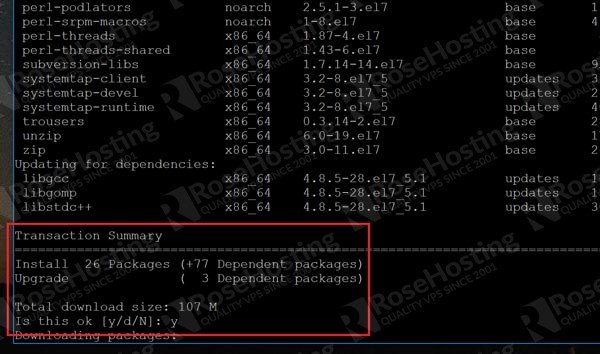
Once the dev tools have been installed, it’s time to compile!
Step 2: Get the URL of the tar.gz File to Download
For this example, we’re using the free sample “Hello World” packages at gnu.org located here:
http://ftp.gnu.org/gnu/hello/
We find the one we want, right click and copy the URL of the target file:
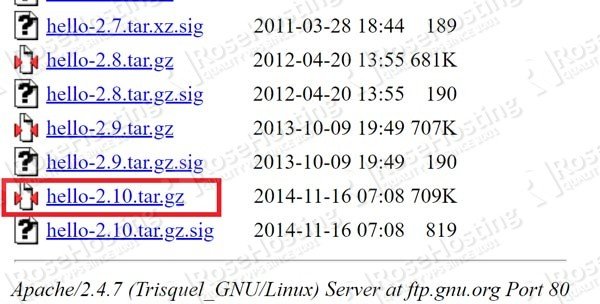
Once we have that, we download it.
Step 3: Download the File
For this, we just use the “wget” command with the file URL that we obtained in Step 2 like this:
wget http://ftp.gnu.org/gnu/hello/hello-2.10.tar.gz
This will initiate the transfer to our system:
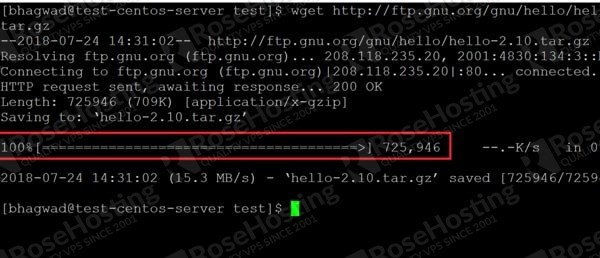
Once the transfer bar is complete, we have to unzip it.
Step 4: Unpacking tar.gz into a New Folder
The tar.gz file will now be in your current directory. We unpack it like this:
tar -zxf hello-2.10.tar.gz
This will create a new folder with the file name minus the extension as shown here:
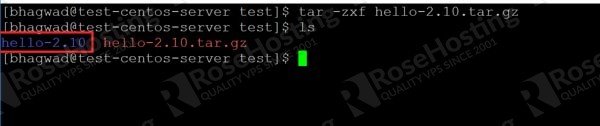
Navigate to this folder by typing;
cd hello-2.10
Now it’s time to install the package!
Step 5: Installing the Package
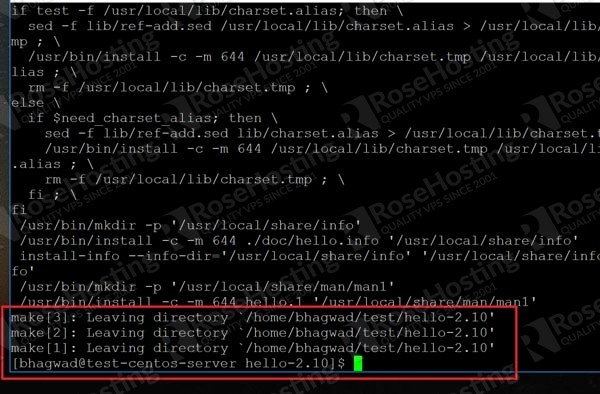
The installation process consists of these three commands one after the other:
./configure
make
sudo make install
Note that you need “sudo” permissions for the last one! Type them in one by one, wait for them to complete, and then proceed to the next command. At the end, it should compile and install without any errors:
Step 6: Running the Program
The package should have installed its binaries into the system and added the $PATH variables. So just type in the command as shown here:
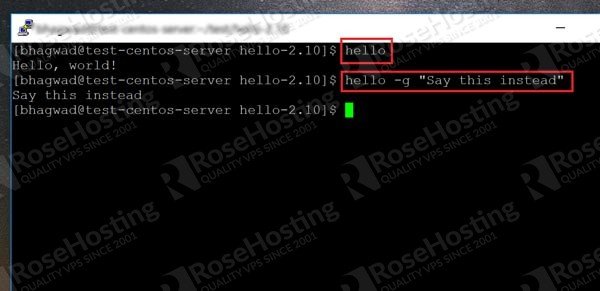
As you can see, it works! We’ve successfully compiled and installed a Linux package!
Step 7: Removing the Package
Here you’ll have to hope and pray that the package developer has included an uninstall script. If not, removing all the files that where installed can be a massive pain in the neck. If the code is good however, you should be able to navigate to the installation folder as in Step 4 and type:
sudo make uninstall
And this should remove the package from your system. Later on, you’ll see how to install packages so that you don’t have to rely on the good graces of the programmer for uninstallation. But right now, this is the “standard” way to install tar.gz files in Linux.
Of course, if you are one of our CentOS Hosting customers, you don’t have to Install tar.gz in CentOS, simply ask our admins, sit back and relax. Our admins will Install tar.gz in CentOS for you immediately.
PS. If you liked this post about How to Install tar.gz in CentOS, please share it with your friends on social networks or simply leave a comment in the comments section. Thanks.