
Vaultwarden, a password manager application, is an unofficial Bitwarden server alternative written in Rust. Vaultwarden supports connections through the Bitwarden client and is relatively resource-light compared to the official Bitwarden service. Caddy itself is a modern, easy-to-use web server known for its automated HTTPS management capabilities using Let’s Encrypt. Unlike web servers like Nginx or Apache, which require manual configuration for SSL certificates, Caddy can automatically download and renew SSL certificates without user intervention. This feature is very useful for users who want to secure Vaultwarden connections quickly and without the hassle of additional configuration. Furthermore, Caddy supports a built-in reverse proxy, making it ideal for routing HTTPS traffic to Vaultwarden services running in Docker containers. In this article, we will show you how to install Vaultwarden Password Manager on Ubuntu 24.04 on a Docker container.
Table of Contents
Prerequisites
- A fresh Ubuntu 24.04 server
- SSH root access or a user with sudo privileges is required
Conventions
# – given commands should be executed with root privileges either directly as a root user or by use of sudo command
$ – given commands should be executed as a regular user
Step 1. Install Dependencies
In this article, we are going to install Docker from Docker’s repository. To proceed with the installation, we need to install the dependencies first.
# apt install ca-certificates curl gnupg -yStep 2. Install Docker
In this step, we will install Docker from their repository. Before installing it, we need to add and configure the repository first.
install -m 0755 -d /etc/apt/keyrings
curl -fsSL https://download.docker.com/linux/ubuntu/gpg -o /etc/apt/keyrings/docker.asc
chmod a+r /etc/apt/keyrings/docker.asc
It’s time to add the repository to the apt sources:
# echo \
  "deb [arch=$(dpkg --print-architecture) signed-by=/etc/apt/keyrings/docker.asc] https://download.docker.com/linux/ubuntu \
  $(. /etc/os-release && echo "${UBUNTU_CODENAME:-$VERSION_CODENAME}") stable" | \
  tee /etc/apt/sources.list.d/docker.list > /dev/null
# apt update
We should be able to install Docker packages now. We will install the latest version.
# apt install docker-ce docker-ce-cli containerd.io docker-buildx-plugin docker-compose-plugin -yAfter the packages are installed, we can check the version of Docker installed with the following command:
# docker --versionYou will get the following output:
Docker version 28.3.3, build 980b856Step 3. Add a System User
In this article, we will use a specific system user to run Docker. Let’s create a new user called ‘master’
# useradd -G docker,sudo -s /bin/bash -m -d /opt/master masterNow, let’s give the user a password
# passwd masterWe will use this new system user to execute the commands in the next steps.
Step 4. Install Vaultwarden
In this step, let’s switch to the user ‘master’ we created earlier.
# su - master
Then, let’s create the directories we need.
$ mkdir ~/vaultwarden/{vw-data,caddy,caddy-config,caddy-data} -p
Now, go to the vaultwarden directory, then create a docker-compose.yaml file.
$ cd ~/vaultwarden
$ nano docker-compose.yaml
Insert the following into the file:
services:
  vaultwarden:
    image: vaultwarden/server:latest
    container_name: vaultwarden
    restart: always
    environment:
      - WEBSOCKET_ENABLED=true
    volumes:
      - ./vw-data:/data

  caddy:
    image: caddy:2
    container_name: caddy
    restart: always
    ports:
      - "80:80"
      - "443:443"
    volumes:
      - ./caddy:/etc/caddy:ro
      - ./caddy-config:/config
      - ./caddy-data:/data
    environment:
      - DOMAIN=https://vaultwarden.yourdomain.com
      - EMAIL=you@yourdomain.com
      - LOG_FILE=/data/access.log
Pay attention to the indentation, or else you will get an error later in the next step. Save the file, then exit from the editor. We can now run the Docker Compose command in detached mode.
Now, we need to create the Caddy configuration file.
$ nano ~/vaultwarden/caddy/Caddyfile
Insert this content below into the file.
{$DOMAIN}:443 {
  log {
    level INFO
    output file {$LOG_FILE} {
      roll_size 10MB
      roll_keep 10
    }
  }

  # Get a cert by using the ACME HTTP-01 challenge.
  tls {$EMAIL}
  encode gzip

  # Headers to improve security.
  header {
  # Enable HSTS
  Strict-Transport-Security "max-age=31536000;"

  # Enable cross-site filter (XSS)
  X-XSS-Protection "1; mode=block"

  # Disallow the site to be rendered within a frame (clickjacking protection)
  X-Frame-Options "DENY"

  # Prevent search engines from indexing
  X-Robots-Tag "none"

  # Remove Caddy branding
  -Server
  }

  # Redirect notifications to the WebSocket.
  reverse_proxy /notifications/hub vaultwarden:3012
  reverse_proxy vaultwarden:80 {
       header_up X-Real-IP {remote_host}
  }
}
That’s it! We can run the Docker Compose command in detached mode now.
$ docker compose up -dThe command will show you an output like this:
[+] Running 12/12
 ✔ vaultwarden Pulled                                                                                                                                            20.6s
   ✔ 59e22667830b Pull complete                                                                                                                                  11.7s
   ✔ cc18e03c8cd8 Pull complete                                                                                                                                  13.5s
   ✔ f6e0865da50e Pull complete                                                                                                                                  13.5s
   ✔ 6bec2bc6dc05 Pull complete                                                                                                                                  14.9s
   ✔ aa7aba5b8287 Pull complete                                                                                                                                  15.5s
 ✔ caddy Pulled                                                                                                                                                  15.6s
   ✔ 0368fd46e3c6 Pull complete                                                                                                                                   1.8s
   ✔ 6e3cbe9aede8 Pull complete                                                                                                                                   1.9s
   ✔ 50cbdd0ed56d Pull complete                                                                                                                                   1.9s
   ✔ 9e3479dbb610 Pull complete                                                                                                                                  10.5s
   ✔ 4f4fb700ef54 Pull complete                                                                                                                                  10.5s
[+] Running 2/3
 ✔ Network vaultwarden_default  Created                                                                                                                           0.1s
 ✔ Container caddy              Started                                                                                                                          1.0s
 ✔ Container vaultwarden        Started
That’s it, Vaultwarden has been successfully installed, and you can access it at https://vaultwarden.yourdomain.com
Step 5. Configure Vaultwarden
At this point, your Vaultwarden is accessible at https://vaultwarden.yourdomain.com, and you need to create an account before you can use it. Let’s open https://vaultwarden.yourdomain.com in a web browser.
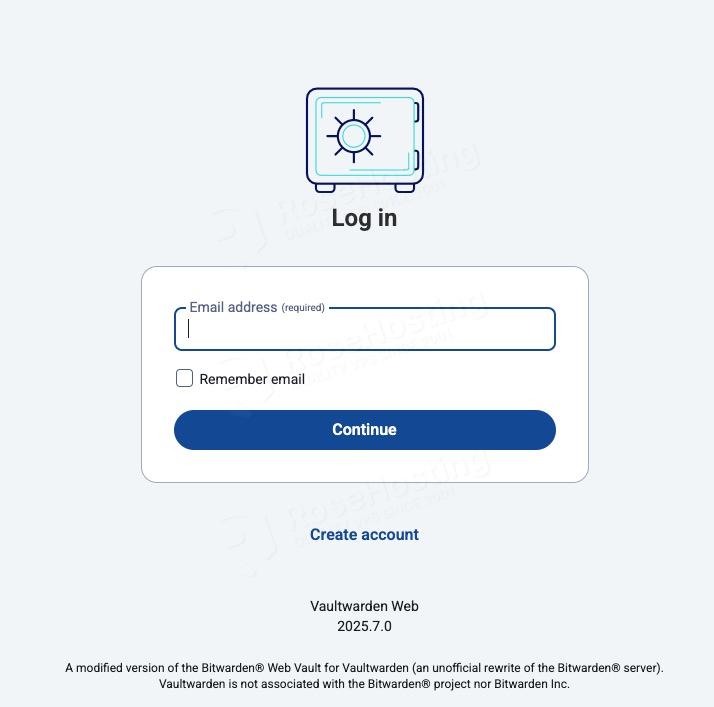
Click on the ‘Create Account’ link
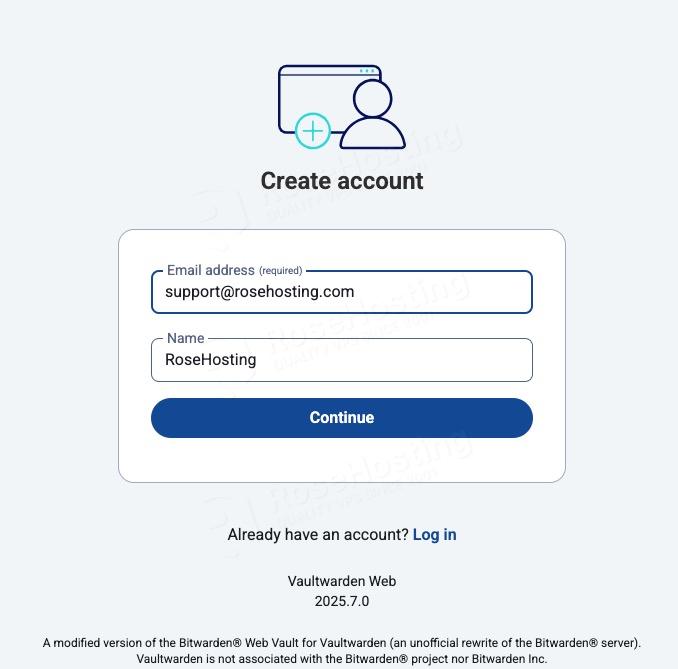
Fill them all and click Continue to proceed.
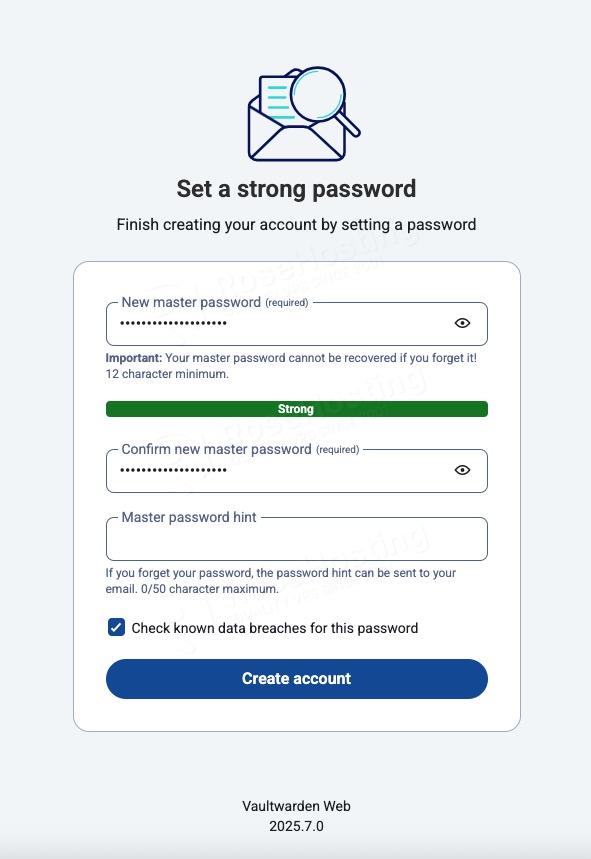
Create a strong password with a minimum of 12 characters, then click on the ‘Create Account’ button.
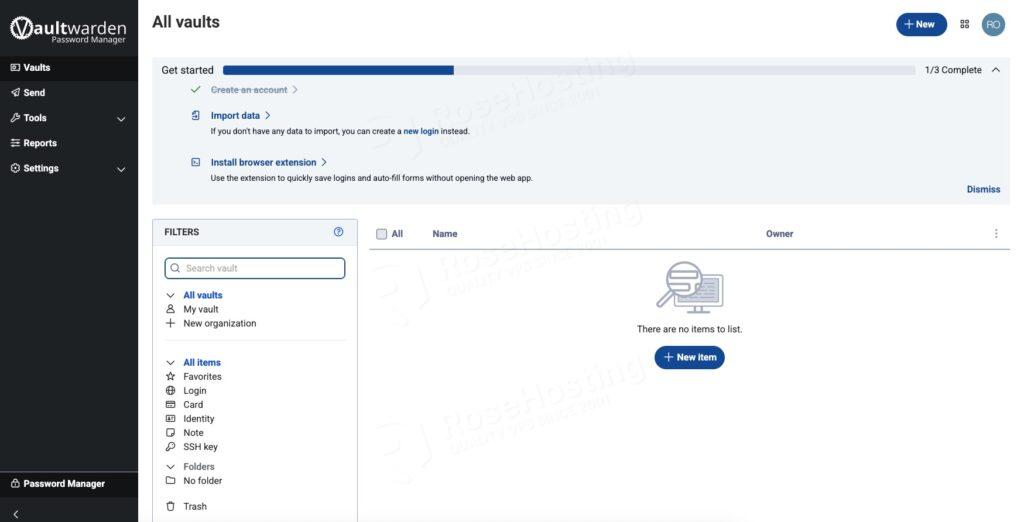
Once the new account is created, you will be redirected to the Vaultwarden dashboard. Here, you can start adding passwords to your vaults.
Step 6. Access Vaultwarden
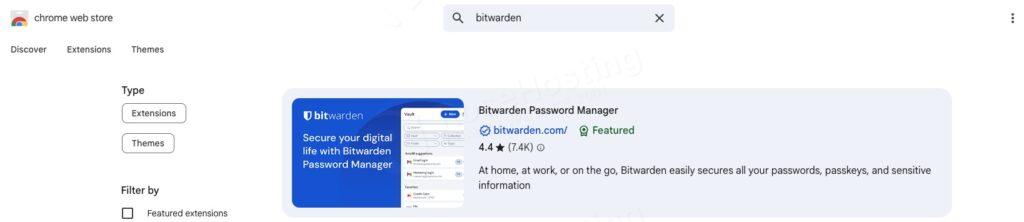
To make use of Vaultwarden, you can install the Vaultwarden client, such as the Vaultwarden extension for Chrome. You should be able to find the extension at https://chromewebstore.google.com/category/extensions
After installing the extension, you can connect it to your Vaultwarden server.

Make sure to choose the ‘self-hosted’ server to connect to your Vaultwarden server.

Once connected, you will see the empty vault.
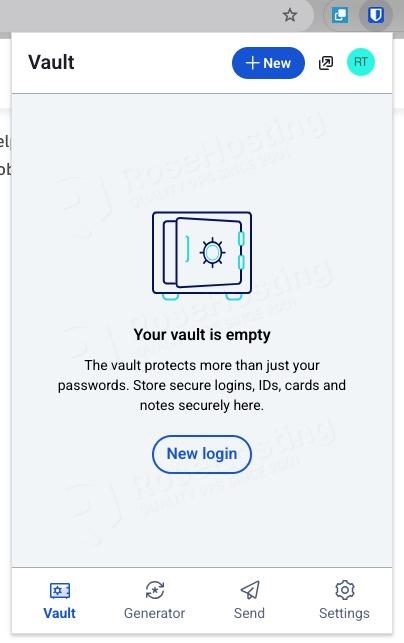
Since there is no password, it’s showing empty. You can add them later through the Vaultwarden dashboard at https://vaultwarden.yourdomain.com
Conclusion
That’s it all! You have successfully installed Vaultwarden on Ubuntu 24.04
If you are one of our web hosting customers and use our managed Ubuntu Hosting, you don’t have to follow this tutorial and install Vaultwarden on Ubuntu 24.04 yourself; our Linux admins will set up and configure a Vaultwarden hosting for you. They are available 24×7 and will take care of your request immediately. Simply submit a ticket. Installing Vaultwarden is not just about the installation; we can help you optimize and harden your Vaultwarden installation if you have an active service with us. For example, we can deactivate the registration, invitation, and password hint.
If you liked this post on how to install Vaultwarden Password Manager on Ubuntu 24.04, please share it with your friends or leave a comment below.