
In this tutorial, we will show you how to install WordPress on Ubuntu 26.04 OS. WordPress is a free, open-source content management system built with PHP. It is easy to use and provides a wide range of features, including numerous plugins and attractive themes, making it one of the most customizable CMS platforms available. The following sections will describe all the steps needed to set up a LAMP stack before installing WordPress.
Installing WordPress with the LAMP stack is a straightforward process that takes around 15 minutes. Let’s get started, so you can see just how simple the WordPress installation process on Ubuntu 26.04 can be!
Table of Contents
Prerequisites
- A server running Ubuntu 26.04 OS for your WordPress install
- User privileges: root or non-root user with sudo privileges
- A valid domain with a pointed A record to the server
Step 1. Update the System
Before we start installing the LAMP stack, we will update the system packages to their latest versions. Execute the following command for your planned WordPress on Ubuntu 26.04 installation:

apt update -y && apt upgrade -y
Step 2. Install LAMP stack
The LAMP stack represents a group of technologies—Linux, Apache, MySQL, and PHP—used together to create and run web applications. The first component to install is the Apache web server. To do this, run the following command:
apt install apache2 -y
After installing Apache, start the service and configure it to launch automatically when the system boots on your Ubuntu 26.04 server, where WordPress will be installed.
systemctl start apache2 && systemctl enable apache2
You can then confirm that the Apache service is active by checking its current status:
systemctl status apache2
If everything has been configured correctly, the output should look similar to this.
root@host:~# systemctl status apache2
● apache2.service - The Apache HTTP Server
     Loaded: loaded (/usr/lib/systemd/system/apache2.service; enabled; preset: enabled)
     Active: active (running) since Tue 2026-04-07 05:05:12 CDT; 11s ago
 Invocation: 2909e44c66504e9fb9bc3af4b7d8427d
       Docs: https://httpd.apache.org/docs/2.4/
   Main PID: 2183 (apache2)
     Status: "Total requests: 0; Idle/Busy workers 100/0;Requests/sec: 0; Bytes served/sec:   0 B/sec"
      Tasks: 55 (limit: 4027)
     Memory: 5.8M (peak: 6.1M)
        CPU: 103ms
     CGroup: /system.slice/apache2.service
The next component in the LAMP stack is the MariaDB database server. To install it, run the following command to prepare for the WordPress installation on Ubuntu 26.04.
apt install mariadb-server -y
After the installation is complete, start the MariaDB service and enable it to run automatically at system startup.
systemctl start mariadb && systemctl enable mariadb
To make sure the service is running correctly, check its status with the following command.
systemctl status mariadb
If everything is working properly, you should see output similar to the following:
root@host:~# systemctl status mariadb
● mariadb.service - MariaDB 11.8.6 database server
     Loaded: loaded (/usr/lib/systemd/system/mariadb.service; enabled; preset: enabled)
     Active: active (running) since Tue 2026-04-07 05:10:10 CDT; 17s ago
 Invocation: 2215c39d315e4d71970bf204e3b4740a
       Docs: man:mariadbd(8)
             https://mariadb.com/kb/en/library/systemd/
   Main PID: 3238 (mariadbd)
     Status: "Taking your SQL requests now..."
      Tasks: 15 (limit: 26579)
     Memory: 94M (peak: 98.4M)
        CPU: 4.263s
     CGroup: /system.slice/mariadb.service
             └─3238 /usr/sbin/mariadbd
The final component of the LAMP stack is PHP, along with the required extensions. To install PHP and its extensions, run the command below.
apt install php8.5 libapache2-mod-php8.5 php8.5-fpm php8.5-mysql php8.5-xml php8.5-mbstring php8.5-curl -y
After the installation is complete, you can confirm that PHP is installed correctly by running the following command, ensuring your Ubuntu 26.04 environment is ready for WordPress.
php -v
If the installation was successful, you should see output similar to the following:
root@host:~# php -v
PHP 8.5.2 (cli) (built: Jan 21 2026 17:35:28) (NTS)
Copyright (c) The PHP Group
Built by Ubuntu
Zend Engine v4.5.2, Copyright (c) Zend Technologies
    with Zend OPcache v8.5.2, Copyright (c), by Zend Technologies
Step 3. Create a WordPress database and user
To set up a database and user for WordPress, run the following commands individually within the MySQL terminal; these steps are essential for your WordPress on Ubuntu 26.04 installation.
CREATE DATABASE wpdb;
CREATE USER 'wpuser'@'localhost' IDENTIFIED BY 'StrongPasswordHere!!!';
GRANT ALL ON wpdb.* TO 'wpuser'@'localhost' WITH GRANT OPTION;
FLUSH PRIVILEGES;
EXIT;
Step 4. Download and Install WordPress
With the LAMP stack in place and the database configured, we can proceed to download and install WordPress. Run the following commands to download and extract the WordPress package for your Ubuntu 26.04 setup.
cd /var/www/html && wget https://wordpress.org/latest.zip

unzip latest.zip -d /var/www/html

rm latest.zip
After extraction, assign the correct permissions to the files and directories. This ensures that your WordPress installation runs smoothly.
chown -R www-data:www-data /var/www/html/wordpress/

cd /var/www/html/wordpress/

find . -type d -exec chmod 755 {} \;

find . -type f -exec chmod 644 {} \;
The next step is to configure the WordPress wp-config.php file using the database details created in Step 3. Open the file with your preferred text editor and update it as shown below; these updates are required for this installation.
First, rename the sample configuration file in preparation for your WordPress Ubuntu 26.04 installation.
cd /var/www/html/wordpress

mv wp-config-sample.php wp-config.php
Then open the file in your editor and modify the database settings, confirming your WordPress on Ubuntu 26.04 is properly configured.
// ** Database settings - You can get this info from your web host ** //
/** The name of the database for WordPress */
define( 'DB_NAME', 'wpdb' );

/** Database username */
define( 'DB_USER', 'wpuser' );

/** Database password */
define( 'DB_PASSWORD', 'StrongPasswordHere!!!' );
Once you have made the changes, save the file and exit the editor.
Step 5. Create Apache Virtual Host File
To create an Apache configuration file, run the following command. This step helps finalize the process to install WordPress on Ubuntu 26.04.
touch /etc/apache2/sites-available/wordpress.conf
Open the file for your WordPress on Ubuntu 26.04 configuration.
nano /etc/apache2/sites-available/wordpress.conf
Paste the following configuration into the file, adjusting for your WordPress installation on Ubuntu 26.04 OS.
ServerName yourdomain.com
DocumentRoot /var/www/html/wordpress


AllowOverride All


ErrorLog ${APACHE_LOG_DIR}/error.log
CustomLog ${APACHE_LOG_DIR}/access.log combined
Save the file and exit the editor.
Enable the Apache configuration for WordPress along with the rewrite module; this is needed when you install WordPress on Ubuntu 26.04.
a2enmod rewrite

a2ensite wordpress.conf
Verify the Apache configuration syntax on your Ubuntu 26.04 system for your WordPress install.
apachectl -t
You should see output similar to the following.
root@host:/var/www/html/wordpress# apachectl -t
Syntax OK
If there are no errors, restart the Apache service to finalize installation of WordPress on Ubuntu 26.04.
systemctl restart apache2
Finally, open your browser and complete the WordPress installation by visiting http://yourdomain.com, finishing your WordPress install on Ubuntu 26.04.
Step 6. Finish WordPress Installation
The final step of this tutorial is completing the WordPress setup. To start, visit your WordPress site at https://YourDomainNameHere, where you’ll finish installing WordPress on Ubuntu 26.04.
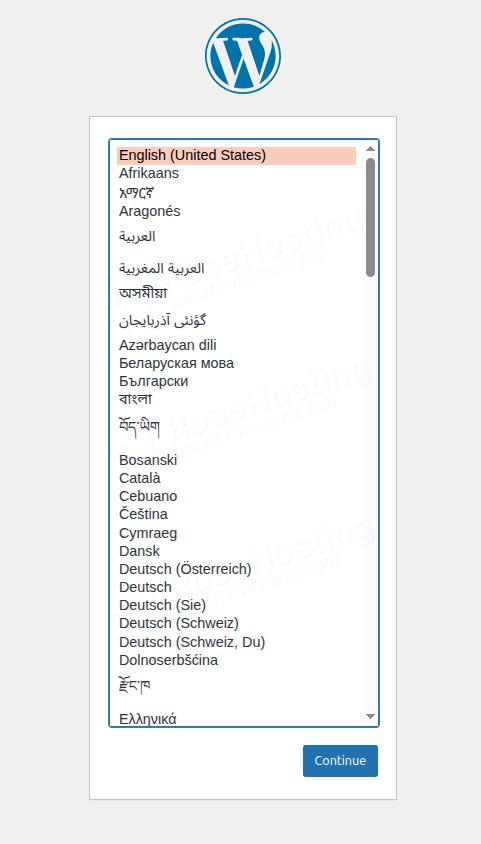
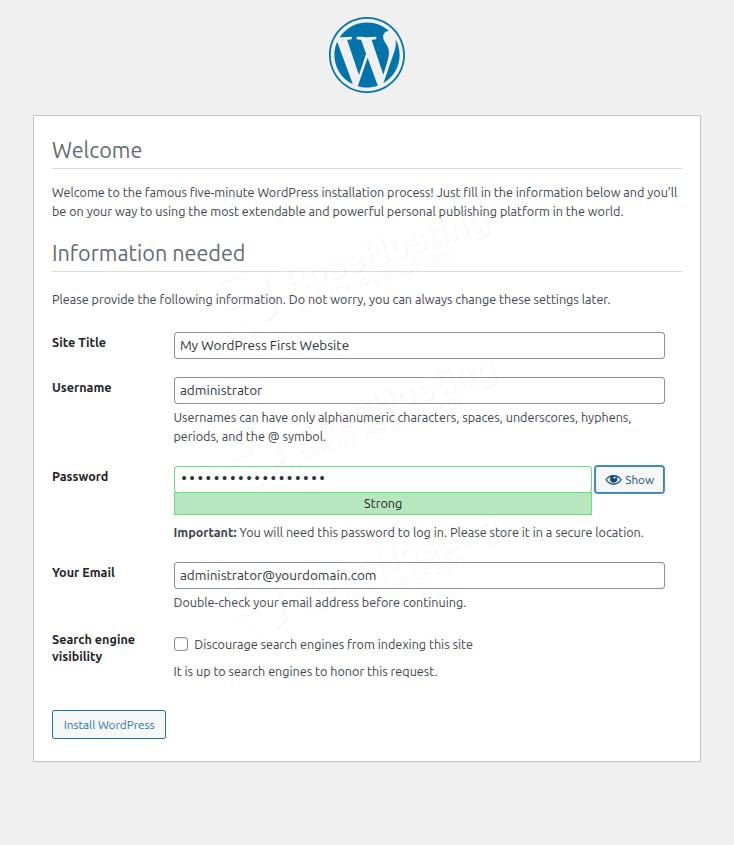
Next, click the Continue button and enter the username and password you wish to use for your WordPress account. When ready, click Install WordPress to complete the process on Ubuntu 26.04.
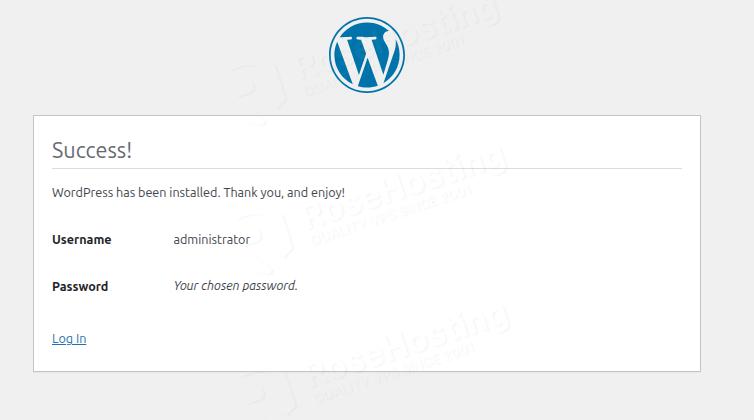
Once the installation is complete, you will see the following confirmation screen for your Ubuntu 26.04 WordPress install:
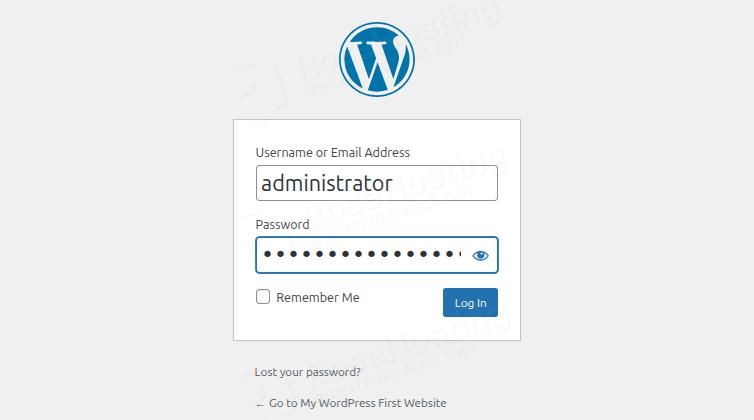
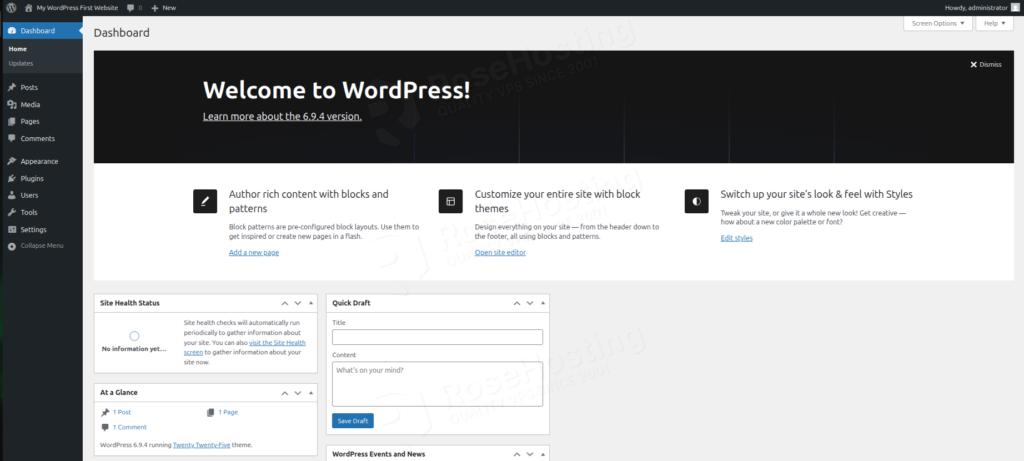
Click Log in, enter the credentials you just created, and you will be taken to your WordPress dashboard on Ubuntu 26.04.
Bringing It All Together
That’s it. You successfully installed the latest WordPress with the LAMP stack on Ubuntu 26.04.
Of course, you don’t have to do this yourself. If you have difficulties and you are not familiar with Linux. You can always contact our technical support. You only need to sign up for one of our WordPress VPS plans and submit a support ticket. We are available 24/7 and will take care of your request immediately, so you can get WordPress installed on Ubuntu 26.04 hassle-free.
If you liked this post about installing WordPress with LAMP stack on Ubuntu 26.04, please share it with your friends or leave a comment down below.