
WordPress is a free, open-source, and most popular content management system that allows you to create a blog on the Internet. It powers more than a third of websites including 33% of the top 10 million websites. WordPress comes with powerful features, beautiful designs and gives you the freedom to build anything you want.
In this tutorial, we will show you how to install WordPress with Nginx on Ubuntu 20.04 VPS.
Table of Contents
Prerequisites
- An Ubuntu 20.04 VPS (we’ll be using our SSD 2 VPS plan)
- Access to the root user account (or access to an admin account with root privileges)
Step 1: Log in to the Server & Update the Server OS Packages
First, log in to your Ubuntu 20.04 server via SSH as the root user:
ssh root@IP_Address -p Port_number
You will need to replace ‘IP_Address’ and ‘Port_number’ with your server’s respective IP address and SSH port number. Additionally, replace ‘root’ with the username of the admin account if necessary.
Before starting, you have to make sure that all Ubuntu OS packages installed on the server are up to date. You can do this by running the following commands:
apt-get update -y
apt-get upgrade -y
Step 2: Install LEMP Server
WordPress is written in PHP and uses MariaDB as a database backend. So LEMP server must be installed on your server. You can install nginx, MariaDB, PHP and all the required PHP extensions with the following command:
apt-get install nginx mariadb-server php php-curl php-mysql php-gd php-intl php-mbstring php-soap php-xml php-xmlrpc php-zip php-fpm -y
Once the LEMP server is installed, start the Nginx and MariaDB service with the following command:
systemctl start nginx
systemctl start mariadb
Step 3: Create a WordPress Database
Next, you will need to create a database and user for WordPress. First, connect to the MariaDB shell with the following command:
mysql
Once connected, create a database and user using the following command:
MariaDB [(none)]> CREATE DATABASE wpdb;
MariaDB [(none)]> GRANT ALL PRIVILEGES ON wpdb.* TO 'wpuser'@'localhost' IDENTIFIED BY  'securepassword';
Next, flush the privileges and exit from the MariaDB with the following command:
MariaDB [(none)]> FLUSH PRIVILEGES;
MariaDB [(none)]> EXIT;
At this point, MariaDB is installed and configured for WordPress. You can now proceed to install WordPress.
Step 4: Download WordPress
First, change the directory to the Nginx default web root and download the latest version of WordPress with the following command:
cd /var/www/html
wget http://wordpress.org/latest.tar.gz
Once the download is completed, extract the downloaded file with the following command:
tar -xzvf latest.tar.gz
Next, change the directory to wordpress and rename the sample configuration file:
cd wordpress
mv wp-config-sample.php wp-config.php
Next, edit the configuration file and define your database settings:
nano wp-config.php
Change the following lines:
/** The name of the database for WordPress */
define('DB_NAME', 'wpdb');

/** MySQL database username */
define('DB_USER', 'wpuser');

/** MySQL database password */
define('DB_PASSWORD', 'securepassword');
Save and close the file then set proper permission and ownership of the wordpress directory:
chown -R www-data:www-data /var/www/html/wordpress
Once you are finished, you can proceed to configure Nginx to host WordPress.
Step 5: Configure Nginx for WordPress
Next, you will need to create an Nginx virtual host configuration file to host your WordPress website.
nano /etc/nginx/conf.d/wp.conf
Add the following lines:
server {
        listen 80;
        root /var/www/html/wordpress;
        index  index.php index.html index.htm;
        server_name yourdomain.com;

        error_log /var/log/nginx/yourdomain.com_error.log;
        access_log /var/log/nginx/yourdomain.com_access.log;

        client_max_body_size 100M;
        location / {
                try_files $uri $uri/ /index.php?$args;
        }
        location ~ \.php$ {
                include snippets/fastcgi-php.conf;
                fastcgi_pass unix:/run/php/php7.4-fpm.sock;
                fastcgi_param   SCRIPT_FILENAME $document_root$fastcgi_script_name;
        }
}
Save and close the file then verify the Nginx for any syntax error with the following command:
nginx -t
Next, restart the Nginx service to apply the configuration changes:
systemctl restart nginx
Step 6: Access WordPress
Now, open your web browser and start the WordPress installation using the URL http://yourdomain.com. You will be redirected to the following page:
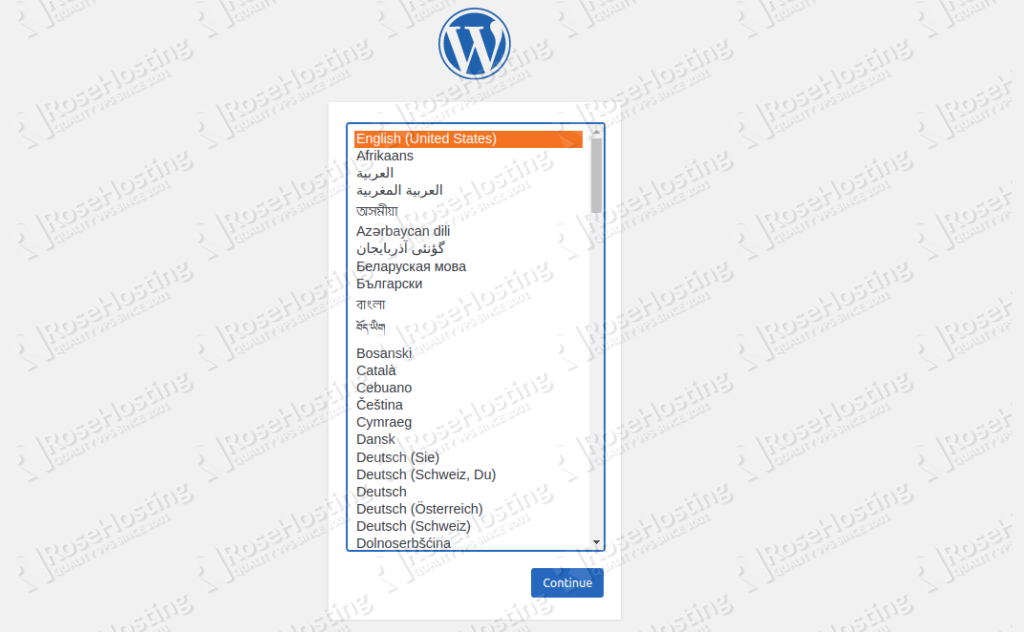
Select your language and click on the Continue button. You will be redirected to the WordPress setup page:
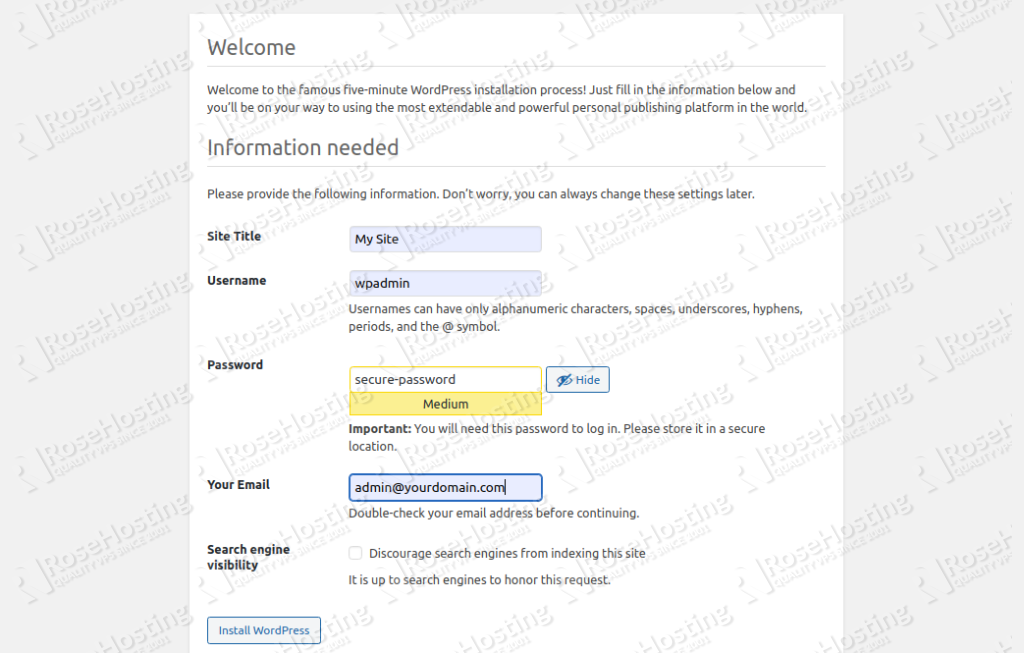
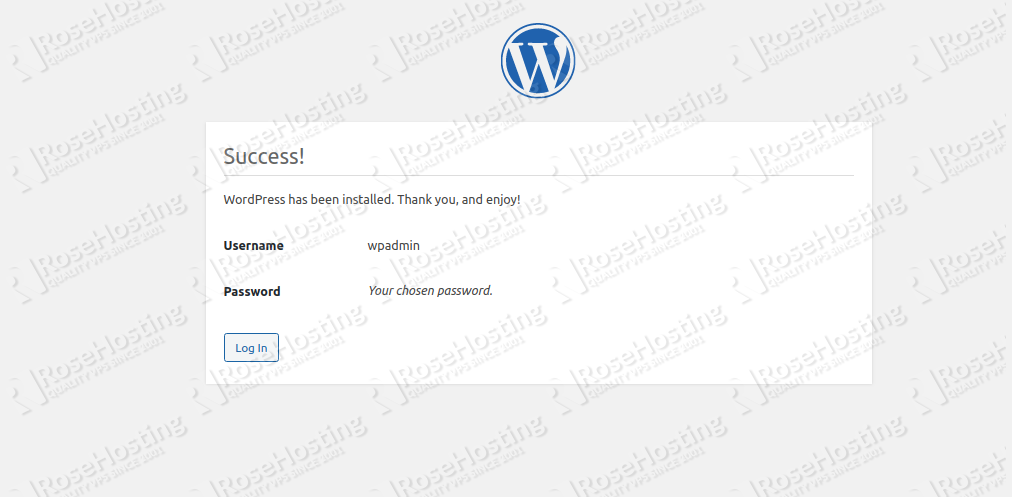
Provide your site title, admin username, password and click on the Install WordPress button. Once the installation is complete, you should see the following page:

Click on the Log in button. You should see the WordPress login page:
Provide your admin username, password and click on the Log In button. You should see the WordPress dashboard:
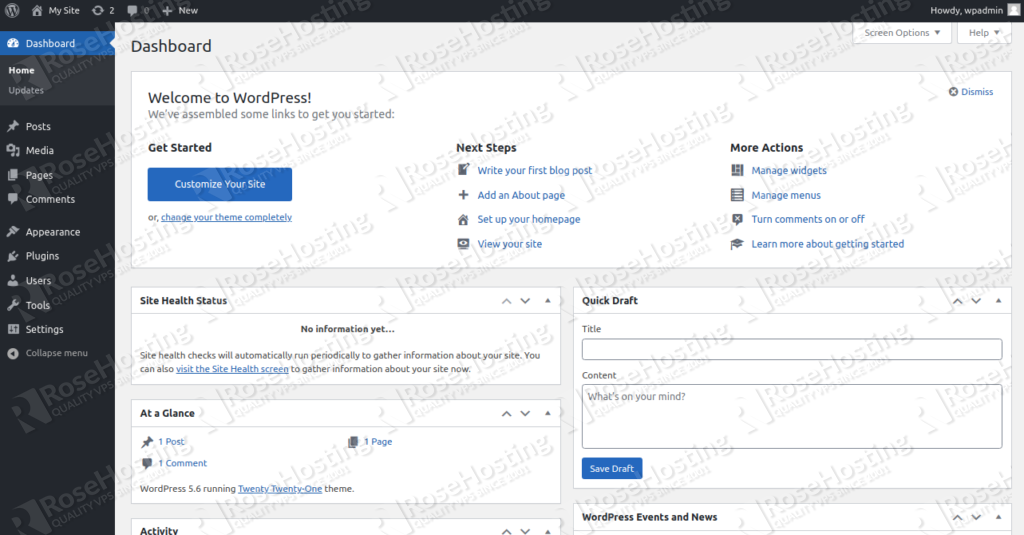
Congratulations! you have successfully installed WordPress on Ubuntu 20.04 VPS.
Of course, you don’t have to do any of this if you use our Managed WordPress Hosting, in which case you can simply ask our expert Linux admins to setup this for you. They are available 24×7 and will take care of your request immediately.
PS. If you liked this post please share it with your friends on the social networks using the buttons on the left or simply leave a reply below. Thanks.