Zabbix is an open-source monitoring software tool. This software offers real-time monitoring of thousands of metrics collected from servers, virtual machines, network devices, and web applications. Zabbix metrics can help you assess the health of your IT infrastructure and detect problems with software and hardware components before customers complain. This information is stored in a database, allowing you to analyze data over time and improve the quality of your services. Zabbix stores data in a relational database supported by MySQL, PostgreSQL, or Oracle. You can also store historical data in NoSQL databases like Elasticsearch and TimescaleDB. In this article, we will show you how to install Zabbix server and agent on Ubuntu 26.04
Table of Contents
Prerequisites
- An Ubuntu 26.04 server
- SSH root access or a regular system user with sudo privileges
Conventions
# – given commands should be executed with root privileges either directly as a root user or by use of sudo command
$ – given commands should be executed as a regular user
Step 1. Update the System
Let’s log in to your Ubuntu 26.04 VPS through SSH as a root user or as a regular user with sudo privileges.
ssh root@IP_Address -p Port_numberIf you cannot log in as root, remember to substitute “root” with a user that has sudo privileges. Additionally, change “IP_Address” and “Port_Number”; make sure they match your server’s respective IP address and SSH port.

You can check whether you have the correct Ubuntu version installed on your server with the following command:
# lsb_release -aYou should get this output:
No LSB modules are available.
Distributor ID: Ubuntu
Description:    Ubuntu 26.04
Release:    26.04
Codename:   resolute
That’s it; the system package information should be updated now.
Step 2. Install PHP and Nginx
Zabbix supports Apache and Nginx. In this article, we will use Nginx. Let’s install PHP and its extensions, and Nginx from the default Ubuntu APT repository.
# apt install php-{cli,fpm,common,mysql,zip,gd,mbstring,curl,xml,bcmath,ldap,gd,pgsql} nginx Once installed, the PHP-FPM service will start automatically and should be configured to run on server reboot. Now, let’s edit the php.ini file.
# nano /etc/php/8.5/fpm/php.iniCheck the following PHP variables and make sure you meet the following requirements; you can match the value or get them higher.
memory_limit = 128M
post_max_size = 16M
upload_max_filesize = 2M
max_execution_time = 300
max_input_time = 300
session.auto_start = 0
Once finished editing the file, we need to restart PHP-FPM to apply the changes.
# systemctl restart php8.5-fpmStep 3. Add Zabbix Repository
To install Zabbix on Ubuntu 26.04, we will need to download the Zabbix repository configuration package first.
# wget https://repo.zabbix.com/zabbix/7.4/release/ubuntu/pool/main/z/zabbix-release/zabbix-release_latest_7.4+ubuntu26.04_all.deb
# dpkg -i zabbix-release_latest_7.4+ubuntu26.04_all.deb
# apt update
Zabbix APT repository has been added. There should be some new files under the /etc/apt/sources.list.d/ directory.
Step 4. Install Zabbix
Now that the Zabbix APT repository is installed on our Ubuntu machine, we can run the command below to install Zabbix server, its frontend, and agent.
# apt install zabbix-server-pgsql zabbix-frontend-php zabbix-sql-scripts zabbix-agent Step 5. Install PostgreSQL Server and Create a Database
To configure Zabbix with a functional database, we need to create a PostgreSQL database and fill it with basic information. We will also need to create a unique user for this database.
# apt install postgresqlPostgreSQL server has been installed, and it should be up and running. Now, let’s run the commands below to create a PostgreSQL database and user.
# sudo -u postgres createuser --pwprompt zabbix
# sudo -u postgres createdb -O zabbix zabbix
The first command should prompt us to enter a password. Make sure to create a strong password.
Now, let’s import the database from the installation package to the empty database we created earlier.
# zcat /usr/share/zabbix/sql-scripts/postgresql/server.sql.gz | sudo -u zabbix psql zabbixStep 6. Configure Zabbix
We created the database and its user in the previous step. Now, enter the database password we created earlier. For Zabbix to use the database, we need to set the database password in the Zabbix configuration file.
# nano /etc/zabbix/zabbix_server.conf
In the “# DBPassword=” section, enter the database password and remove the “#” symbol. Adjust the password to match the one we created earlier. Then, save the settings and exit.
The result will look like this:
DBPassword=m0d1fyth15Step 7. Configure Nginx
Now, let’s install the following package from the Zabbix APT repository to get the automatic configuration package to configure Nginx automatically:
# apt install zabbix-nginx-confOnce installed, we should be able to see the configuration file at /etc/zabbix/nginx.conf, and also a symbolic link to it in the Nginx configuration directory /etc/nginx/conf.d/zabbix.conf. The installation of this package also generates a PHP FPM pool file at /etc/zabbix/php-fpm.conf
Next, we need to make some necessary changes to the /etc/zabbix/nginx.conf file.
# nano /etc/zabbix/nginx.confThis file contains an Nginx server configuration automatically generated by Nginx. It includes two lines which determine the server’s name as well as what port it listens on:
server {
#        listen          8080;
#        server_name     example.com;
Uncomment the listen and server_name lines and replace example.com with your domain or subdomain name, and replace port 8080 with port 80 if needed:
server {
        listen          80;
        server_name     zabbix.yourdomain.com;
Step 8. Start Zabbix
Now, everything is configured. We can restart the services below to apply the changes we made.
# systemctl restart zabbix-server zabbix-agent nginx php8.5-fpmThe services have been restarted, we can proceed with the next steps.
Step 9. Complete Installation
At this point, we should be able to access Zabbix and complete the installation at http://zabbix.yourdomain.com
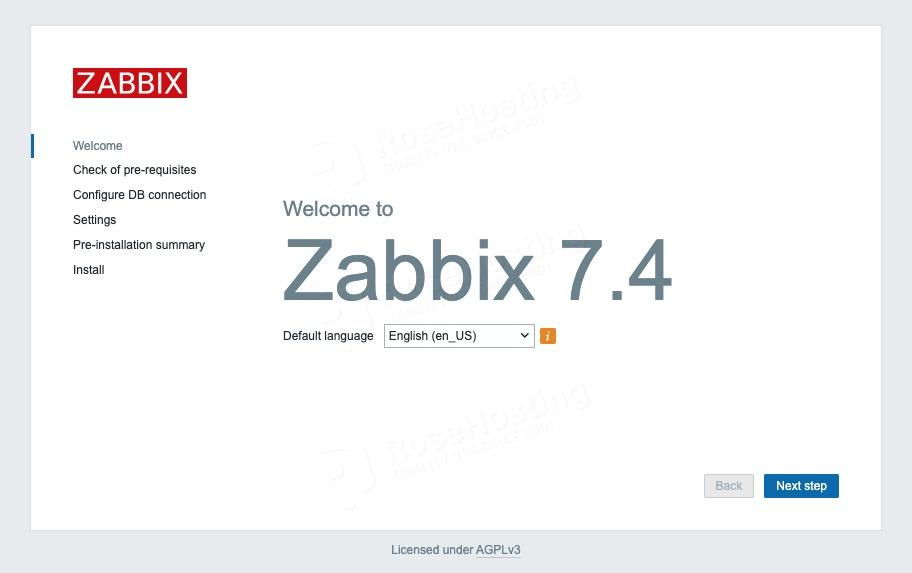
Click on the Next step button to continue.
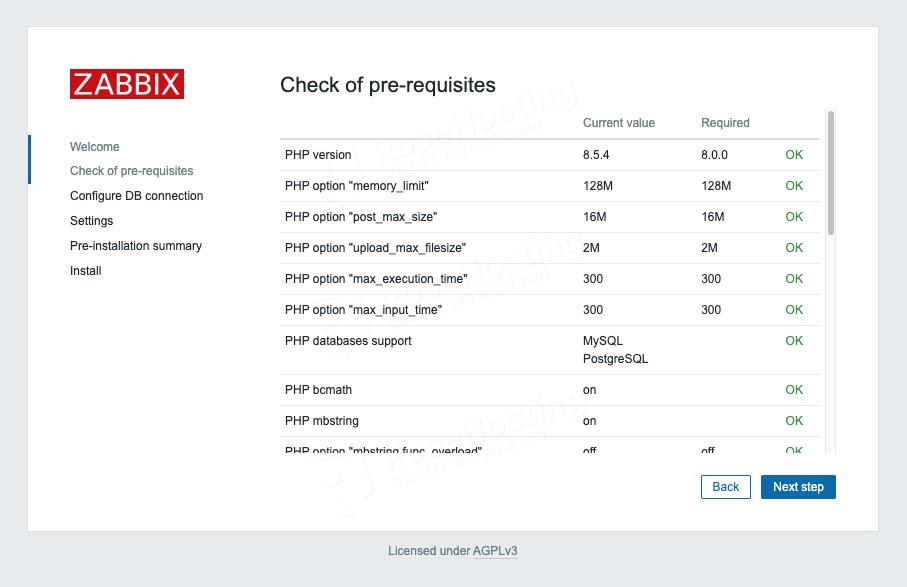
Scroll down and check the requirements, in case we missed something. Then, click the Next step button.
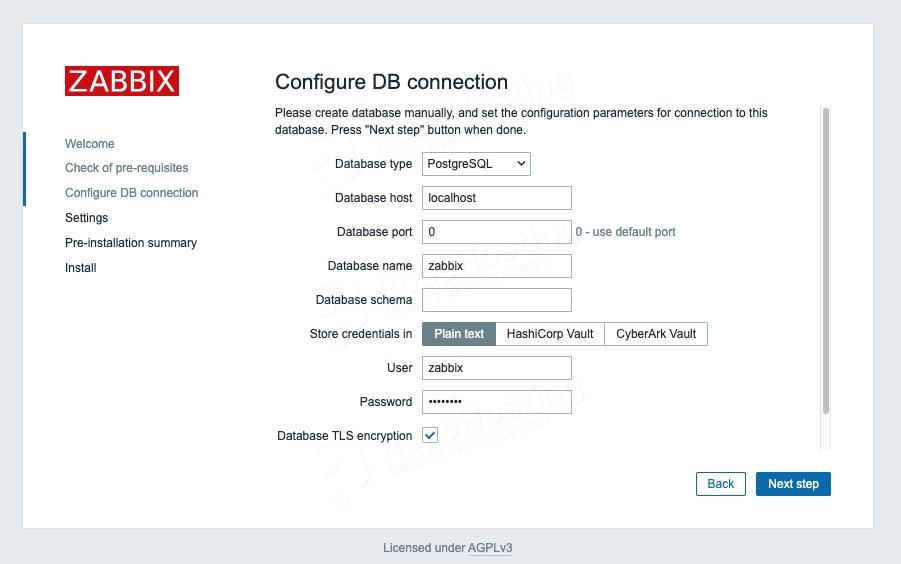
Fill in all, make sure to use the correct credentials then click Next step to proceed.
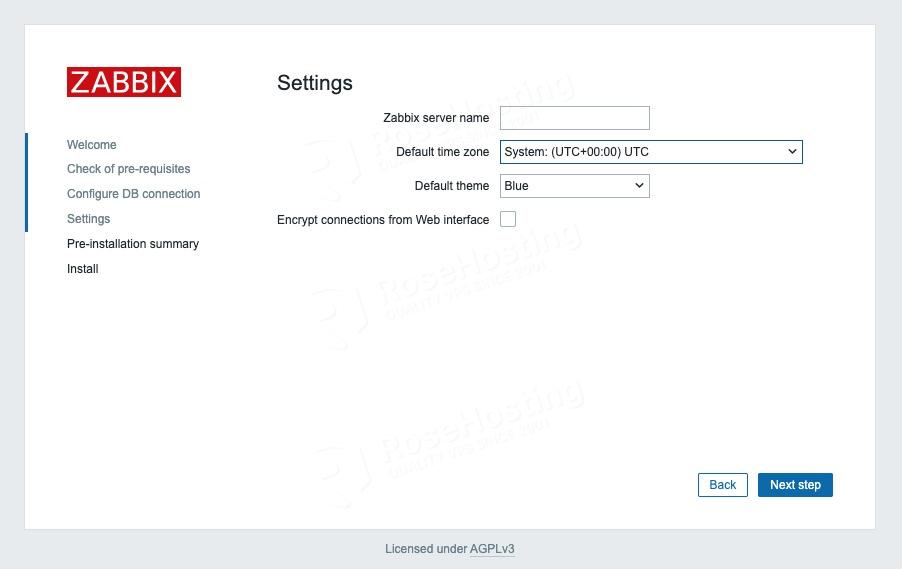
Again, fill in all the fields, then click the Next step button to continue.
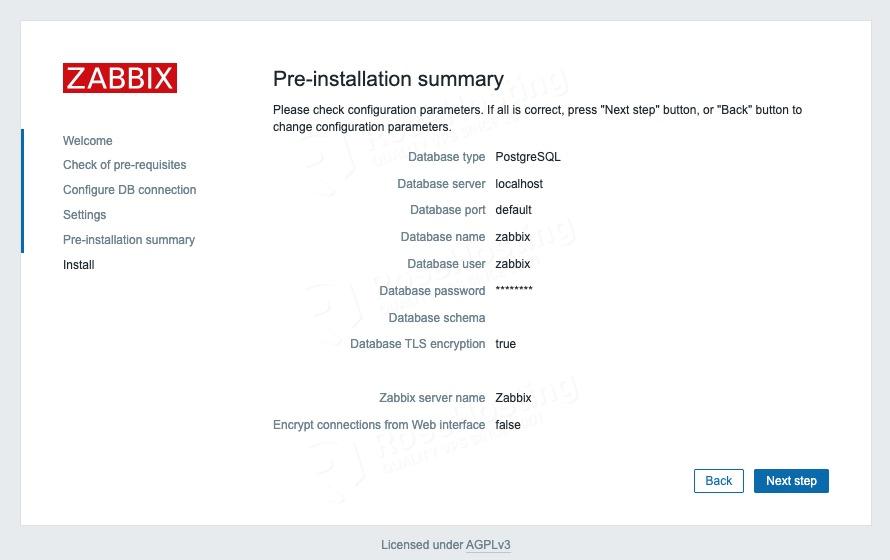
Check that everything is correct; you can go back if you want to make changes. If you think everything is okay, click the Next step button.
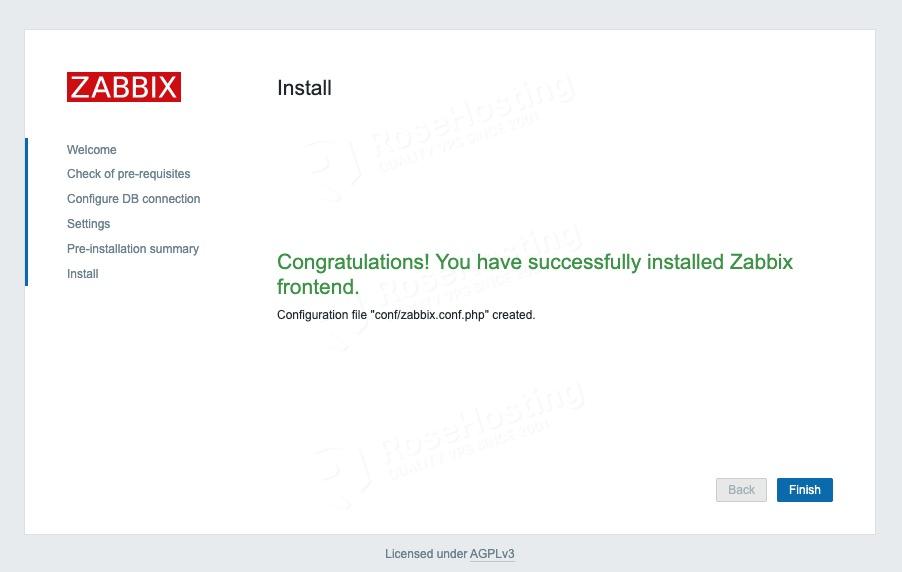
Finally, you have completed the installation. Click on the Finish button and you will be redirected to the login page.
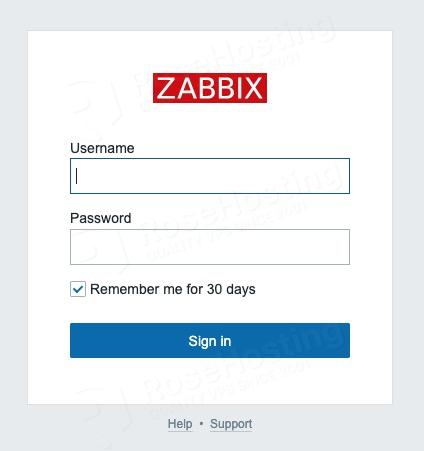
You can now log in with ‘Admin’ as the username and ‘zabbix’ as the password. After logging in, do not forget to change the password to a stronger one.
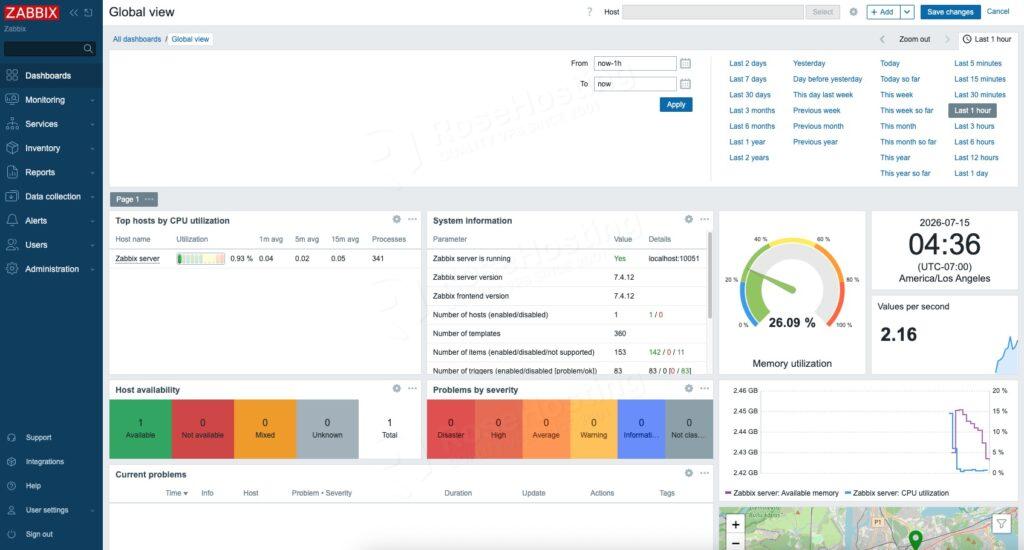
At this point, our Zabbix server has one agent. If you want to add a new server to monitor, follow the next steps.
Step 10. Install and Configure Zabbix Agent
On a server you want to monitor, you have to complete step 3 in this article. Execute these commands:
# wget https://repo.zabbix.com/zabbix/7.4/release/ubuntu/pool/main/z/zabbix-release/zabbix-release_latest_7.4+ubuntu26.04_all.deb
# dpkg -i zabbix-release_latest_7.4+ubuntu26.04_all.deb
# apt update
Then, it is time to install the agent
# apt install zabbix-agentNext, we need to modify a file.
# nano /etc/zabbix/zabbix_agentd.confFind these lines:
Server=
ServerActive=
Hostname=
In Server and ServerActive, make sure to input your Zabbix_Server_IP_Address. And in Hostname, you need to specify your server’s hostname; it should match the Hostname you will define in the Zabbix GUI. For example, it should look like this:
Server=123.123.123.123
ServerActive=123.123.123.123
Hostname=ubuntu.yourdomain.com
After making changes to/etc/zabbix/zabbix_agentd.conf, we should restart the Zabbix agent.
# systemctl restart zabbix-agentThe last steps to complete in your Zabbix server GUI:
- Log in to your Zabbix Server Dashboard.
- Navigate to Data Collection > Hosts > Create host.
- In the Host name field, type the EXACT name you configured in zabbix_agentd.conf.
- Add the host to a Templates group (e.g., Ubuntu Zabbix agent).
- Under Interfaces, click Add > Agent, enter your Ubuntu machine’s IP address, and click Add or Save
Congratulations
That’s it all! You have followed this article and you have successfully installed Zabbix Server and Agent on Ubuntu 26.04.
Of course, you don’t have to install Zabbix on Ubuntu 26.04 if you use one of our managed VPS Hosting services, in which case you can simply ask our expert Linux admins to install Zabbix Server and Agent on Ubuntu 26.04, for you. Our experienced administrators are available 24×7 and will take care of your request immediately.
If you liked this post on installing Zabbix on Ubuntu 26.04, please share it with your friends or leave a comment below.