Normally, if you create a folder on your site, you can access all the files inside it just by visiting the file’s URL. Sometimes however, you want to password protect directories in cPanel – either you’re testing a new design that you’re not ready to show the world, or it’s a staging area for your site. Or maybe you just want to prevent unauthorized access to sensitive parts your site. Like the “wp-admin” area of WordPress for example.
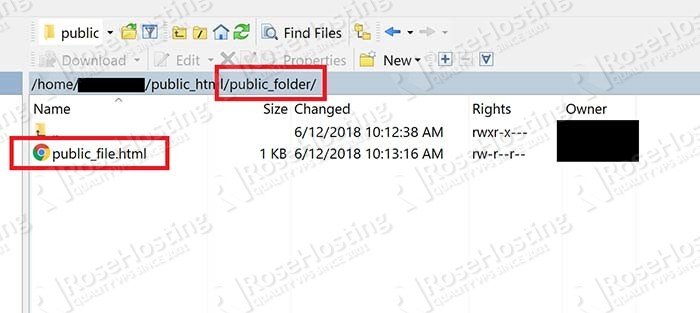
Whatever the reason, this tutorial will show you how to achieve this. First, I’ll create a test folder and file on my site via FTP:
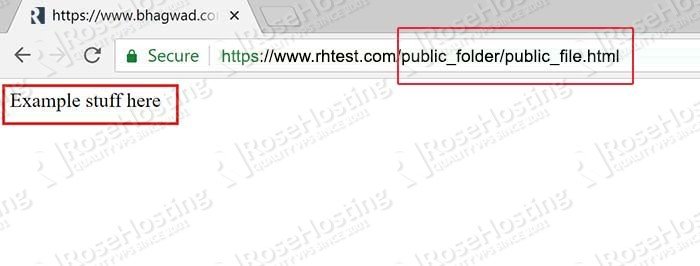
As you can see, I can view this file simply by typing in the URL as shown below:
Now we’ll see how to protect this folder with a password.
Table of Contents
Step 1: Log into cPanel and Choose the “Password Protect” Icon
Logging into cPanel is easy. Use either:
https://[yourdomainname]:2083
or
https://[yourdomainname]/cpanel
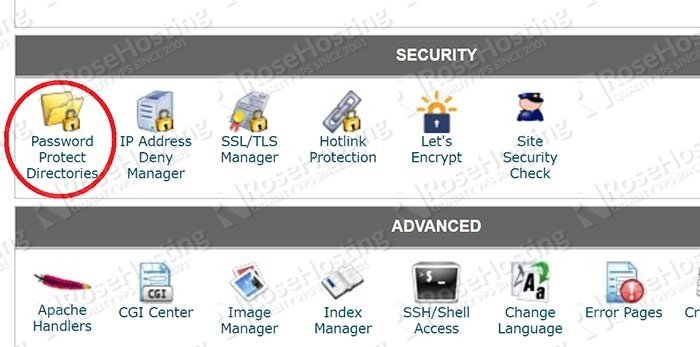
Type in the login credentials for your site and scroll down till you reach the “Security” section and click on the icon labelled “Password Protect Directories” as shown here:
Step 2: Choose the Folder to Password Protect
This will bring up a dialogue box asking if you want to open your root folder, or the folder of one of your sites.
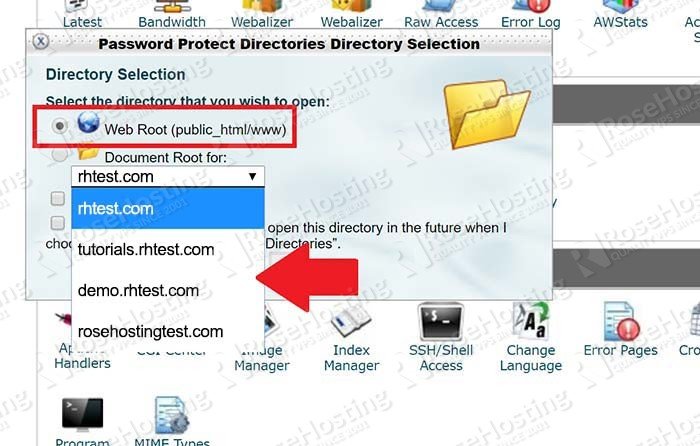
In our example, We’ve placed the directory in the root folder so we choose the first option. But if you’ve created a new site to which you want to restrict access, then it’s easier to go directly to the folder. Whatever you choose, the next screen will show you a list of folders in your selected directory like this:
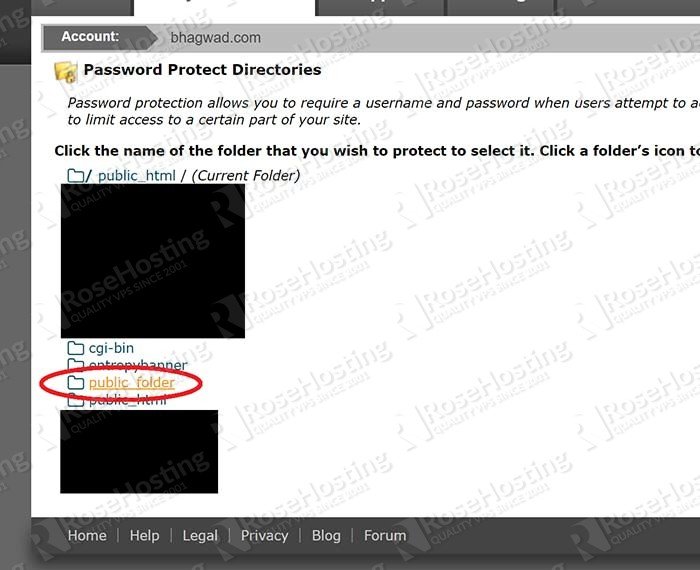
Find the folder you want to protect and click it.
Step 3: Give the Folder a Name
In the next screen, tick the box labelled “Password protect this directory”. Also, give the folder a name that is distinct from the actual folder name:
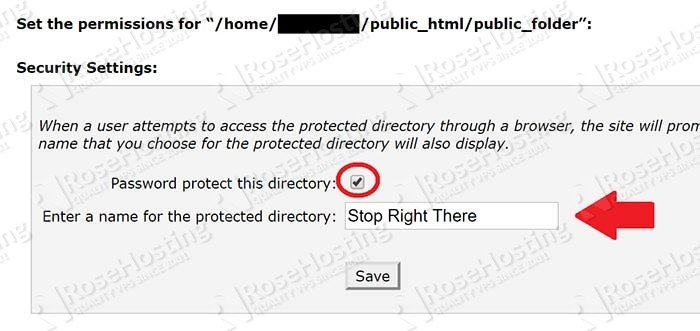
Now click the “Save” button. This will lead you to a new screen telling you that the access permissions for the folder have been saved. Hit “Go Back” and you’ll be sent back to the previous screen. The folder is now inaccessible from the public web. Right now however, no one can view the files inside it! We need to create a username and password to allow people through.
Step 4: Create Usernames and Passwords
Now under “Create User”, enter a username and password which will be used to access the folder and its contents:
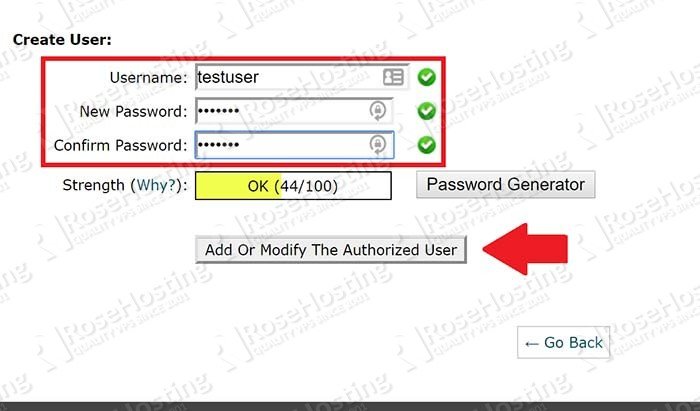
In the image above, I haven’t created a very strong password because this is just for demo purposes. In practice however, make sure that the strength bar is “green”. Even better, click the “Password Generator” button which will create a strong password for you. Once you’ve copied and pasted the password into both fields, click the button “Add or Modify The Authorized User”.
This will bring up a notification that the user has been created. It’ll also show you the username and password in plain text on the screen so you can confirm it (It’s another matter whether or not passwords should be shown on the screen in plain text!).
If you click “Go Back”, you’ll see a new section called “Authorized Users:
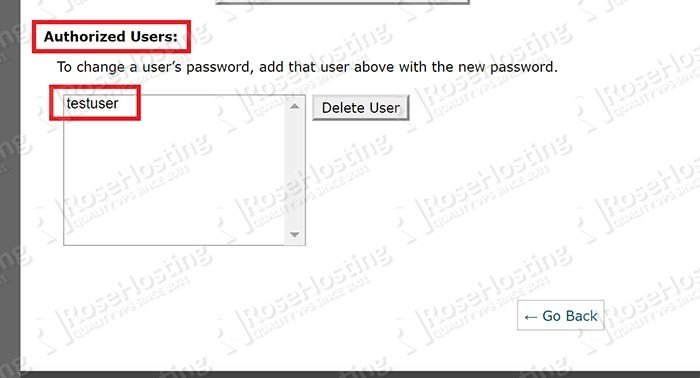
You can create multiple username/password pairs. This might be useful to give someone temporary access to your site. Once their work is done, you can just delete their username from the authorized users list and you’re protected again!
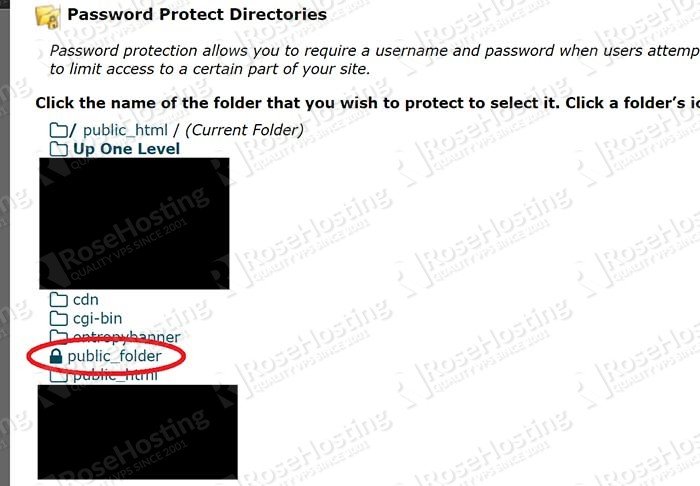
If you open the list of folders, this time you’ll see a “lock” icon next to the directory we just protected with a password:
Step 5: Testing to See if it Works
Now that our folder is password protected, let’s navigate to the file again and see what happens:
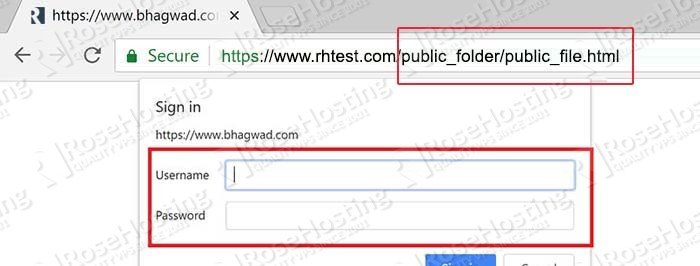
As you can see, it now shows me a pop up asking for my login credentials. We’ve successfully protected our folder with a password from cPanel!
Of course, you don’t have to Password Protect Directories in cPanel if you use one of our Blazing-Fast cPanel Servers, in which case you can simply ask our expert Linux admins to password protect any files or folders in cPanel for you. They are available 24×7 and will take care of your request immediately.
PS. If you liked this post, on how to password protect directories in cPanel, please share it with your friends on the social networks using the buttons on the left or simply leave a reply below. Thanks.