Before hosting any application on the RoseHosting Cloud platform, you will need to create an environment with the required isolated containers. RoseHosting PaaS comes with a simple and user-friendly web UI that helps you to create and configure an environment based on your specific needs.
In this guide, we will explain how to create and configure an environment on the RoseHosting PaaS Platform. We will also give an explanation of each feature.
Table of Contents
Create an Environment on RoseHosting PaaS
First, log in to the RoseHosting Cloud Platform as shown below:

Now, click on the New Environment button to create a new environment for your application. This will open the Topology wizard as shown below:
From here, you can set up and customize your environment based on your application needs. I would recommend customizing the environment in the following order:
- Select the programming language or other deployment solution based on your application needs.
- Add the required software stacks.
- Configure nodes, resources, and scaling limit.
- Specify environment name, review all settings and click on the Create button to create an environment.
Now, we will give you a brief explanation of each point with all available possibilities.
Select Programming Language or Specific Deployment Option
Before creating an environment, you will need to select the programming language or deployment solution for your project. RoseHosting PaaS provides several options to host and deploy an application that is suitable for all clients’ needs.
- One of the best and recommended options for deploying an application is certified containers. These application stacks are configured and managed by RoseHosting. They provide all major features including, scaling, automated deployment, redeploy, and SSL for easy and smooth hosting and development.

You can click on the specific tab based on your required programming language like, Java, PHP, Node.js, Python, Ruby, .NET, or Go.
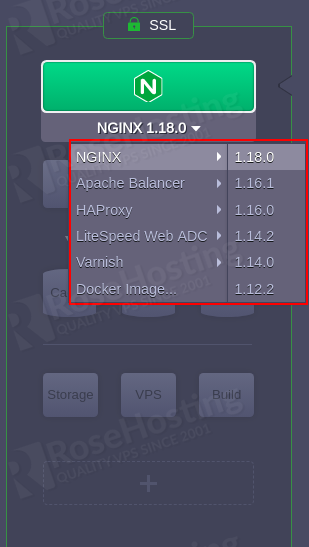
- You can click on the Docker tab to list the other deployment options as shown below:
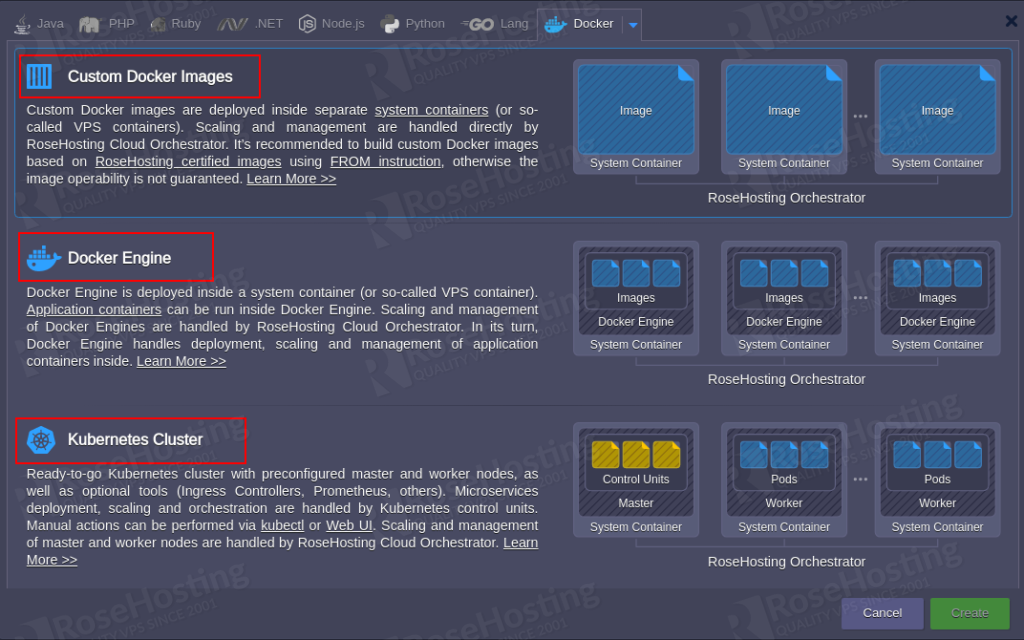
Here, you can utilize the basic RoseHosting OS container. Which will helps you to make them compatible with most of the platforms.
- Custom Docker Images: Docker image is used to create an application container. This option will allow you to search a specific image from the Docker Hub registry or your own private registry. However, the content is managed by respective image maintainers so it cannot give a guarantee for compatibility and platform support. It is always recommended to build a custom Docker image using the FROM instruction.
- Docker Engine: It is a containerization technology for building applications into the system container. It allows you to access Docker’s native functionality, including deployment, scaling, and managing application containers.
- Kubernetes Cluster: It provides pre-configured master and worker nodes based on the system containers. Where the Kubernetes control unit will handle the deployment, scaling, and orchestration of the microservices. While scaling and management of master and worker nodes are handled by RoseHosting.
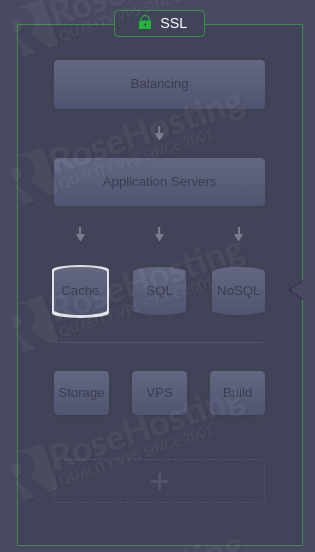
Configure Topology
On the RoseHosting Cloud dashboard, you can configure environment topology in the left side pane. You will need to understand the following blocks before configuring topology.
- Load Balancer: Used to distribute the load of all incoming requests among multiple nodes.
- Application Servers: You can choose your preferred web servers to run your application.
- Databases: Choose specific database software to store and manage data.
- Cache Node: Choose a Memcached caching system to reduce the application load by storing data objects in dynamic memory.
- Shared Storage: Storage node with NFSv4 support.
- Elastic VPS: Select VPS servers on the top of the Ubuntu, CentOS, Debian, and Windows OS.
- Build Node: Used to automate your Java-based applications.
- RoseHosting PaaS provides all popular options for each section. You can enable any blocks required for your environment and choose a suitable stack for the role.
- You can also configure the SSL protection for your environment using the same section. There are two options available for SSL:
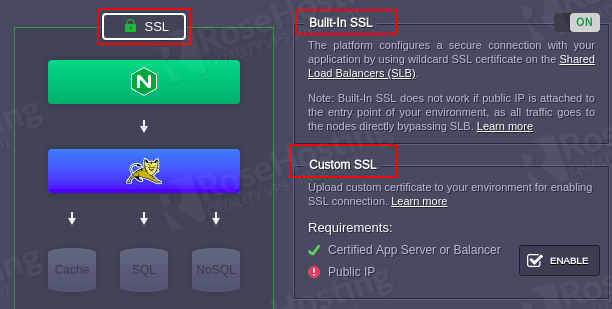
- Built-In SSL: This will use an already trusted SSL certificate and save your time. But it is only configured with the environment default domain name. It does not work if the public IP is attached to the server.
- Custom SSL: This allows you to configure your custom SSL certificates for the environment. You can also install the Let’s Encrypt SSL add-on to issue and integrate a free SSL certificate automatically.
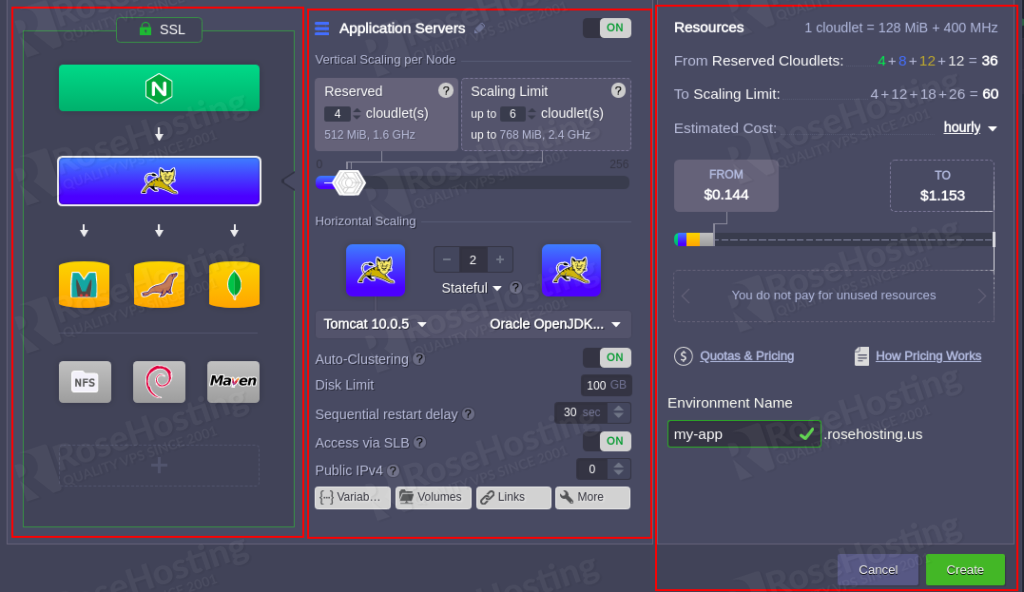
Configure Nodes Resources and Specifics
After configuring the topology for your environment, you will need to configure each layer from the central part of the wizard.
Enable or disable the application layer or provide a custom name.

You can configure the vertical scaling by setting up a number of reserved cloudlets and defining the scaling limit.
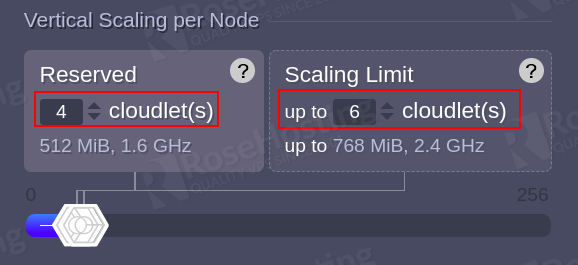
You don’t need to worry about charges. Because you only need to pay for consumed resources.
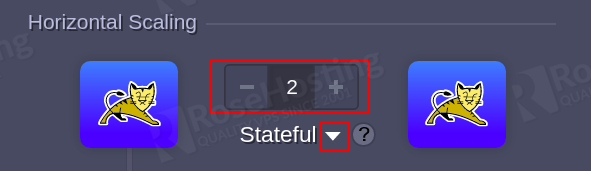
The Horizontal Scaling section will allow you to choose a number of nodes and select your preferred scaling mode.
You will also need to configure additional settings using the following section:
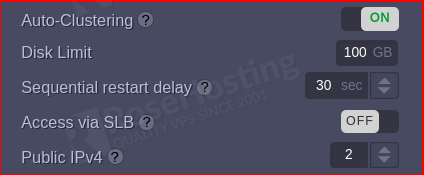
- Auto-Clustering: This allows you to enable auto clustering on specific application templates. After enabling this option, you will see other options like master-slave, master-master, or galera.
- Disk Limit: You can define the amount of space reserved per node.
- Sequential restart delay: This option is used to avoid downtime. You can specify a delay between the restart operation completion on one node and the start on the other. If you want to simultaneously restart all nodes then you will need to set it to -1.
- Public IPv4/IPv6: You can attach additional IPv4 and IPv6 public IP to each node.
This section will provide the container configuration tools.

- Variables: You can review and manage all environment variables within this layer.
- Links: Used to interconnect layers inside the environment.
- Volumes: used to manage all data volumes.
- Ports: You can see the information of all container ports.
- CMD / Entry Point: You can configure the container’s Entry Point and Run Command.
Review and Confirm Environment Creation
After configuring all the sections, you can review the allocated resources and estimate the cost of the environment.
The main units for measuring resources are cloudlets. You can see the number of reserved cloudlets and the scaling limit for the environment.
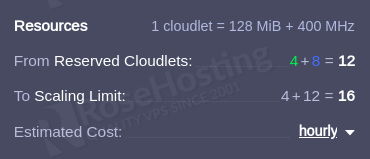
You can understand the scaling limit based on the color code as shown below:
- green: load balancers
- blue: application servers
- orange: databases and cache nodes
- gray: all other stacks
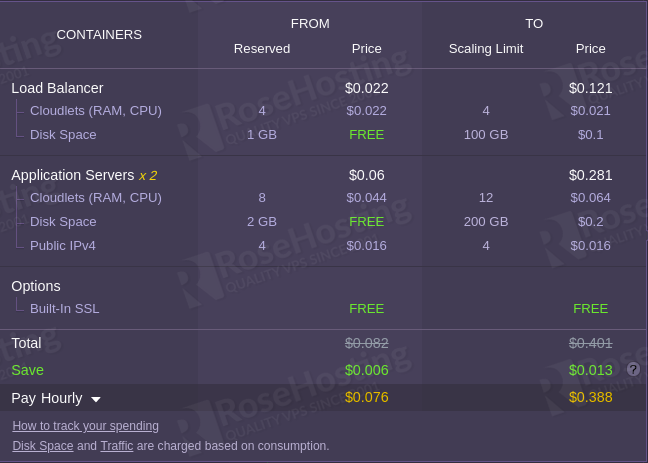
You can view the estimated cost of your environment in the following section.
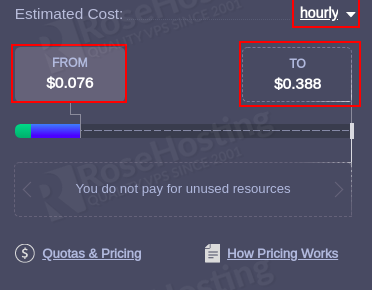
The FROM tab shows the full price and also covers reserved resources. The TO tab shows the maximum possible price if all nodes are fully consumed with all resources.
You can hover your mouse over the pricing widget to see more information on the estimated cost calculation:
Finally, provide a name for your environment and click on the Create button.

Once the environment has been created. You should see the following page:
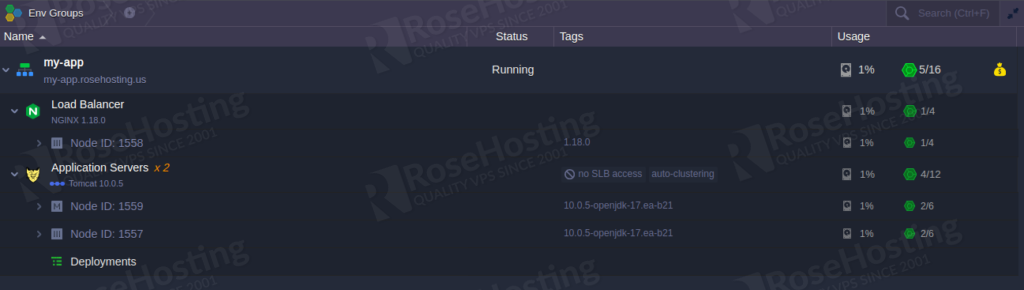
You can now proceed to deploy your application on the RoseHosting PaaS.
You don’t have to Set Up an Environment with RoseHosting Cloud PaaS if you use one of our Managed Cloud Paas Hosting, in which case you can ask one of our expert system admins to install and configure it for you. They are available 24/7, 365 days a year, ready to assist with any configuration.
If you liked this post, don’t forget to show us support by sharing it with your friends on social media. Thanks!