Let’s start with the installation procedure. Please refer to the following article about how to set up a LEMP server. Make sure your Debian VPS is up-to-date:
sudo apt-get update
sudo apt-get upgrade
The ‘apt-get update’ command will refresh the package list so it is all up to date, then the ‘apt-get upgrade’ command will upgrade any packages that have newer versions. Plone 4.3.2 requires Python development environment version 2.7 or greater, built with support for Expat, SSL and Zlib. Install the required dependencies using the following command:
sudo apt-get install build-essential python-dev python-setuptools poppler-utils git wv libssl-dev libxml2-dev libreadline-dev libjpeg62-dev libxslt1-dev libbz2-dev
Download the latest stable version of Plone available at http://plone.org/products/plone/releases/
cd /opt/
wget --no-check-certificate https://launchpad.net/plone/4.3/4.3.2/+download/Plone-4.3.2-UnifiedInstaller.tgz
Extract the downloaded file containing the Zope application server and the Plone Content Management System:
tar -xvzf Plone-4.3.2-UnifiedInstaller.tgz
cd Plone-4.3.2*
Run the ‘install.sh’ script using the following command:
./install.sh standalone
Please note, the installation script have other options, so use the following command:
./install.sh --help
to discover them. Once the installation is complete, you will receive the administrator login credentials that will be used to access the Zope management interface. Add the following lines to the Nginx configuration file:
 server {
  server_name your-domain.com;
  listen 80;

  location / {
    rewrite ^/(.*)$ /VirtualHostBase/http/your-domain.com:80/Plone/VirtualHostRoot/$1 break;
    proxy_pass http://127.0.0.1:8080;
  }
  location ~* manage_ {
    deny all;
  }
}

server {
  server_name your-domain.com;
  listen 80;
  access_log off;
  rewrite ^(/.*)$  http://your-domain.com$1 permanent;
}
Test the modified Nginx configuration file:
sudo service nginx configtest
If everything is OK with the Nginx configuration, reload the Nginx service for the changes to take effect:
sudo service nginx reload
To start Plone, execute the following command:
sudo -u plone_daemon /usr/local/Plone/zinstance/bin/plonectl start
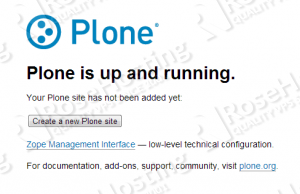
That’s it, you now have a fully functional Plone CMS ready for deployment. Open http://your-domain.com:8080/ in your favorite web browser so you can create a new Plone website or enter the Zope management interface using the administrator login credentials created during setup:
Of course you don’t have to do any of this if you use one of our Linux VPS Hosting services, in which case you can simply ask our expert Linux admins to install Plone for you. They are available 24×7 and will take care of your request immediately.
PS. If you liked this post please share it with your friends on the social networks using the buttons on the left or simply leave a reply below. Thanks.
