Exponent is very user friendly and flexible content management software that allows website pages to be edited on the page as it is displayed. To install and run Exponent CMS on a Linux virtual server follow the very easy steps described below.
This install guide assumes that Apache, MySQL and PHP are already installed and configured on your virtual server. At the time of writing this tutorial, the latest stable version is Exponent CMS 2.2.3 and it requires:
- PHP >= 5.2.1 with the following PHP extensions enabled: GD Graphics Library version 2.0.x+, MySQLi, XML (Expat) and Zlib. Also, safe mode and open_basedir settings should be disabled;
- Apache Web Server >= 2.0 compiled with mod_rewrite module and ‘AllowOverride All’ directive set in order to enable search engine friendly URLs;
- MySQL >= 5.0 installed on your Linux virtual server.
Download Exponent CMS 2.2.3 available at http://www.exponentcms.org/get-exponent.htm to the server and extract it using the following commands:
cd /root
wget http://downloads.sourceforge.net/project/exponentcms/exponent-2.2.3.zip
unzip exponent-2.2.3.zip -d /root/exponentcms
Create a new MySQL database for Exponent CMS on your server:
mysql -u root -p
mysql> CREATE DATABASE exponentdb;
mysql> GRANT ALL PRIVILEGES ON exponentdb.* TO 'exponentuser'@'localhost' IDENTIFIED BY 'your-password' WITH GRANT OPTION;
mysql> FLUSH PRIVILEGES;
mysql> quit
Create a new virtual host directive in Apache. For example, edit your Apache configuration file (/etc/httpd/conf/httpd.conf by default) and uncomment the following line:
#NameVirtualHost *:80
then, add the following lines at the end:
ServerAdmin admin@your-domain.com
DocumentRoot /var/www/html/exponent-cms/
ServerName www.your-domain.com
<Directory /var/www/html/exponent-cms/>
	Options FollowSymLinks
        AllowOverride All
</Directory>
ErrorLog logs/your-domain.com-error_log
CustomLog logs/your-domain.com-access_log common
Locate the php configuration file using the following command:
#php -i | grep php.ini
Configuration File (php.ini) Path => /etc
Loaded Configuration File => /etc/php.ini
Edit the ‘php.ini’ file and add/modify the following lines:
post_max_size = 50M
upload_max_filesize = 50M
file_uploads = On
register_globals = off
allow_url_fopen = off
memory_limit = 256M
safe_mode = Off
Restart the Apache web server for the changes to take effect. Move the Exponent CMS installation files to the document root directory defined in the virtual host directive above:
mv /root/exponentcms/ /var/www/html/exponent-cms
Also, the webserver user (Apache) needs to be able to write to ‘files’, ‘themes’ and ‘tmp’ directories and the ‘.htaccess’ file, so you can easily accomplish that by executing the following command:
chown apache:apache -R /var/www/html/exponent-cms/
Open http://your-domain.com/install/index.php in your popular web browser and follow the easy instructions:
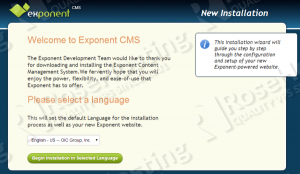
Select the language you want to install, check if system requirements are met and on the next page enter your MySQL database name, username and password, then click on the ‘install database’ button. If the database tests pass, click on the ‘continue installation’ button. On the next page, enter the site configuration settings, pick your theme, create an administrator account and that is it. The Exponent CMS installation is now complete.
Of course you don’t have to do any of this if you use one of our Linux VPS Hosting services, in which case you can simply ask our expert Linux admins to install Exponent CMS for you. They are available 24×7 and will take care of your request immediately.
PS. If you liked this post please share it with your friends on the social networks using the buttons on the left or simply leave a reply below. Thanks.

Exponent CMS installation on Linux virtual server was a tough job for me until I saw this article. I got a very detailed information about it and the PHP configuration helped me a lot.