
Nagios is a free, open-source, and powerful monitoring tool that helps you to monitor your entire IT infrastructure, servers, services, and applications from the central location. It is based on a client-server architecture.

So you will need to install the Nagios agent on the client system and add it to the Nagios server for monitoring. If you are looking for a monitoring solution then Nagios is an essential tool for any production server environment.
Is there a way to do it by yourself? Of course there is. In this tutorial, we will show you how to install Nagios 4 and monitor your server on Ubuntu 20.04.
Table of Contents
Prerequisites
- Two Ubuntu 20.04 VPS one for Nagios server and one for Nagios client.
- Access to the root user account (or access to an admin account with root privileges)
Step 1: Log in to the Server & Update the Server OS Packages
First, log in to your Ubuntu 20.04 server via SSH as the root user:
ssh root@IP_Address -p Port_number
You will need to replace ‘IP_Address’ and ‘Port_number’ with your server’s respective IP address and SSH port number. Additionally, replace ‘root’ with the username of the admin account if necessary.
Before starting, you have to make sure that all Ubuntu OS packages installed on the server are up to date. You can do this by running the following commands:
apt-get update -y
apt-get upgrade -y
Step 2: Install Required Dependencies
Before starting, you will need to install some dependencies required to install Nagios in your system. You can install all of them with the following command:
apt-get install autoconf bc gawk dc build-essential gcc libc6 make wget unzip apache2 php libapache2-mod-php libgd-dev libmcrypt-dev make libssl-dev snmp libnet-snmp-perl gettext -y
Once all the dependencies are installed, you can proceed to download the Nagios 4 core.
Step 3: Download and Install Nagios 4
First, download the latest version of Nagios 4 from its official website using the following command:
wget https://assets.nagios.com/downloads/nagioscore/releases/nagios-4.4.6.tar.gz
Once the download is completed, extract the downloaded file with the following command:
tar -xvzf nagios-4.4.6.tar.gz
Next, change the directory to the extracted directory and configure it with the following command:
cd nagios-4.4.6
./configure --with-httpd-conf=/etc/apache2/sites-enabled
You should get the following output:
        Nagios user/group:  nagios,nagios
       Command user/group:  nagios,nagios
             Event Broker:  yes
        Install ${prefix}:  /usr/local/nagios
    Install ${includedir}:  /usr/local/nagios/include/nagios
                Lock file:  /run/nagios.lock
   Check result directory:  /usr/local/nagios/var/spool/checkresults
           Init directory:  /lib/systemd/system
  Apache conf.d directory:  /etc/apache2/sites-enabled
             Mail program:  /bin/mail
                  Host OS:  linux-gnu
          IOBroker Method:  epoll

 Web Interface Options:
 ------------------------
                 HTML URL:  http://localhost/nagios/
                  CGI URL:  http://localhost/nagios/cgi-bin/
 Traceroute (used by WAP):


Review the options above for accuracy.  If they look okay,
type 'make all' to compile the main program and CGIs.
Next, build the Nagios with the following command:
make all
Next, create a Nagios user and group and add it to the www-data group with the following command:
make install-groups-users
usermod -a -G nagios www-data
Next, run the following command to install Nagios binaries, daemon and command mode:
make install
make install-daemoninit
make install-commandmode
Next, install sample script config and Apache web configuration using the following command:
make install-config
make install-webconf
Next, enable the rewrite and cgi module with the following command:
a2enmod rewrite cgi
Next, restart the Apache service to apply the changes:
systemctl restart apache2
Step 4: Create a Nagios Admin User
Next, you will need to create a Nagios user to access the Nagios web interface. You can create it with the following command:
htpasswd -c /usr/local/nagios/etc/htpasswd.users nagiosadmin
You will be asked to set a password as shown below:
New password:
Re-type new password:
Adding password for user nagiosadmin
Step 5: Configure Nagios
Before configuring Nagios, you will need to install the Nagios Plugins and NRPE Plugins. You can install them with the following command:
apt-get install monitoring-plugins nagios-nrpe-plugin -y
Once all the packages are installed, create a directory to store all configuration:
mkdir -p /usr/local/nagios/etc/servers
Next, edit the Nagios configuration file and define the server directory:
nano /usr/local/nagios/etc/nagios.cfg
Change the following line:
cfg_dir=/usr/local/nagios/etc/servers
Next, edit the Nagios resource.cfg and define the Nagios plugins path:
nano /usr/local/nagios/etc/resource.cfg
Change the following line:
$USER1$=/usr/lib/nagios/plugins
Save and close the file then edit the contacts.cfg and define your contact name and email address:
nano /usr/local/nagios/etc/objects/contacts.cfg
Change the following lines as per your needs:
define contact {

    contact_name            nagiosadmin             ; Short name of user
    use                     generic-contact         ; Inherit default values from generic-contact template (defined above)
    alias                   Nagios Admin            ; Full name of user
    email                   nagios@localhost ; <<***** CHANGE THIS TO YOUR EMAIL ADDRESS ******
}
Save and close the file then edit the commands.cfg and define the nrpe check commands:
nano /usr/local/nagios/etc/objects/commands.cfg
Add the following lines at the end of the file:
define command{
        command_name check_nrpe
        command_line $USER1$/check_nrpe -H $HOSTADDRESS$ -c $ARG1$
}
Save and close the file then start the Nagios service and enable it to start at system reboot:
systemctl start nagios
systemctl enable nagios
You can also verify the status of Nagios service with the following command:
systemctl status nagios
Output:
● nagios.service - Nagios Core 4.4.6
     Loaded: loaded (/lib/systemd/system/nagios.service; enabled; vendor preset: enabled)
     Active: active (running) since Sat 2021-02-06 13:37:33 UTC; 19s ago
       Docs: https://www.nagios.org/documentation
   Main PID: 25820 (nagios)
      Tasks: 6 (limit: 2353)
     Memory: 2.7M
     CGroup: /system.slice/nagios.service
             ├─25820 /usr/local/nagios/bin/nagios -d /usr/local/nagios/etc/nagios.cfg
             ├─25821 /usr/local/nagios/bin/nagios --worker /usr/local/nagios/var/rw/nagios.qh
             ├─25822 /usr/local/nagios/bin/nagios --worker /usr/local/nagios/var/rw/nagios.qh
             ├─25823 /usr/local/nagios/bin/nagios --worker /usr/local/nagios/var/rw/nagios.qh
             ├─25824 /usr/local/nagios/bin/nagios --worker /usr/local/nagios/var/rw/nagios.qh
             └─25840 /usr/local/nagios/bin/nagios -d /usr/local/nagios/etc/nagios.cfg

Feb 06 13:37:33 nagiosserver nagios[25820]: qh: Socket '/usr/local/nagios/var/rw/nagios.qh' successfully init
Finally, restart the Apache service to apply the changes:
systemctl restart apache2
Step 6: Access Nagios Web UI
Now, open your web browser and access the Nagios web interface using the URL http://nagios-server-ip/nagios/. You will be asked to provide admin username and password as shown below:
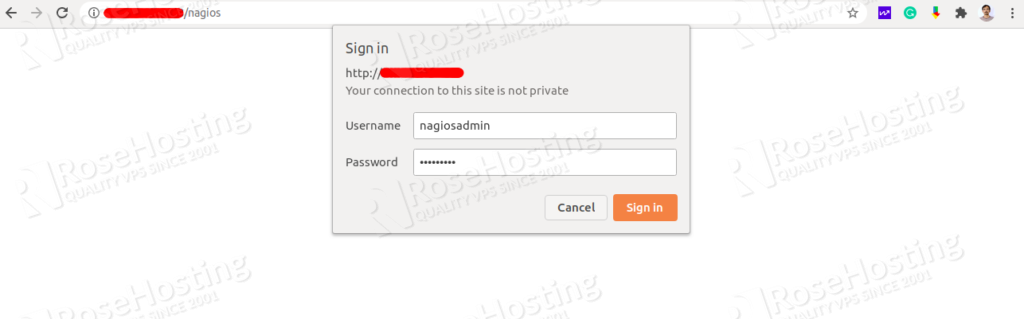
Provide your Nagios admin username, password and click on the Sign In button. You should see the Nagios dashboard on the following page:
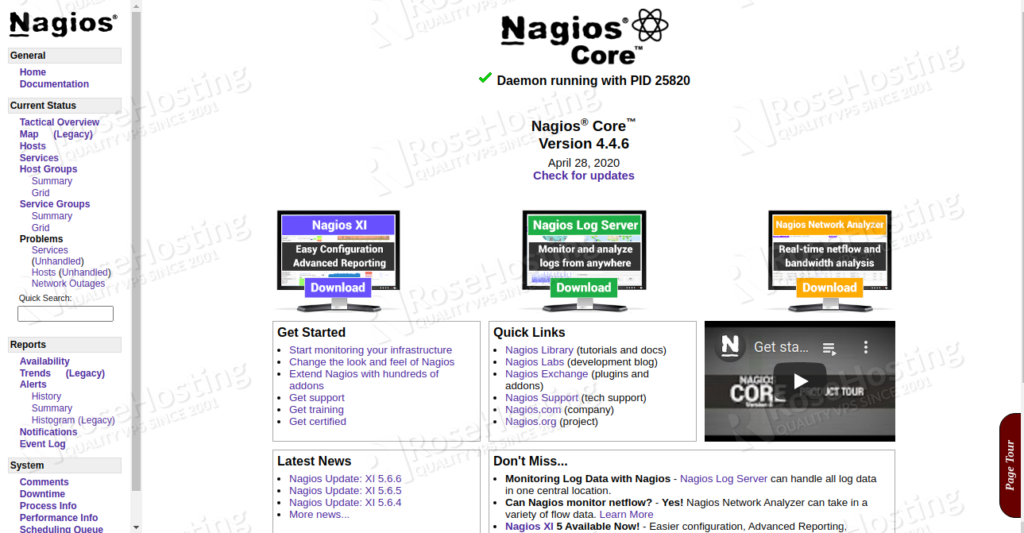
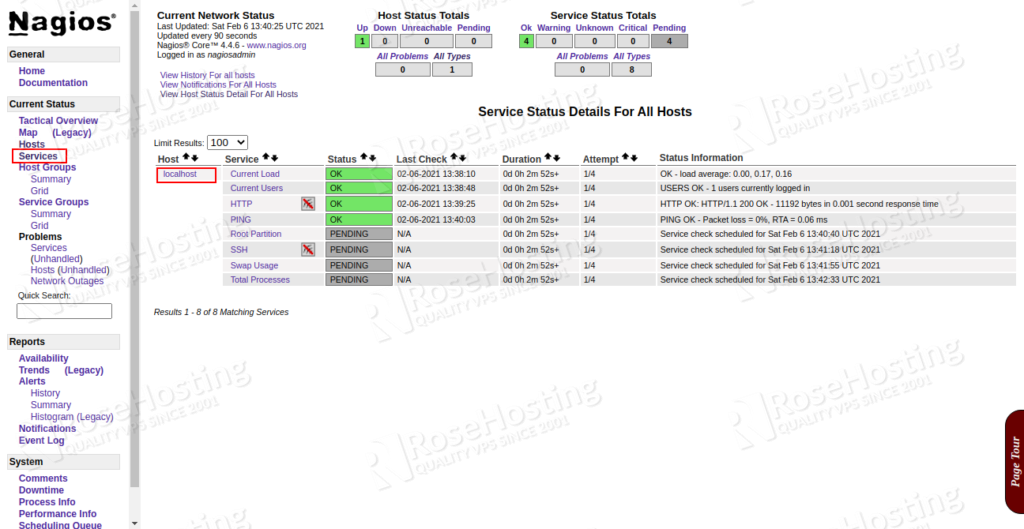
Click on the services in the left pane, you should see all services on the following page:
Step 7: Add Monitoring Hosts to Nagios Server
Next, you will need to install the Nagios agent on the client system and add it to the Nagios server.
First, install the Nagios and NRPE package on the client system with the following command:
apt-get install nagios-nrpe-server monitoring-plugins -y
Once installed, edit the nrpe.cfg file and define your Nagios server IP and CLient IP:
nano /etc/nagios/nrpe.cfg
Change the following lines that match your server and client IP:
server_address=client-ip-address
allowed_hosts=127.0.0.1,::1,server-ip-address
Save and close the file. Then edit the nrpe_local.cfg:
nano /etc/nagios/nrpe_local.cfg
Add or change the following lines:
command[check_root]=/usr/lib/nagios/plugins/check_disk -w 20% -c 10% -p /
command[check_ping]=/usr/lib/nagios/plugins/check_ping -H client-ip-address -w 100.0,20% -c 500.0,60% -p 5
command[check_http]=/usr/lib/nagios/plugins/check_http -I client-ip-address
command[check_ssh]=/usr/lib/nagios/plugins/check_ssh -4 client-ip-address
Save and close the file then restart the Nagios NRPE service and enable it to start at system reboot:
systemctl restart nagios-nrpe-server
systemctl enable nagios-nrpe-server
You can check the status of the service with the following command:
systemctl status nagios-nrpe-server
Output:
● nagios-nrpe-server.service - Nagios Remote Plugin Executor
     Loaded: loaded (/lib/systemd/system/nagios-nrpe-server.service; enabled; vendor preset: enabled)
     Active: active (running) since Sat 2021-02-06 13:51:40 UTC; 16s ago
       Docs: http://www.nagios.org/documentation
   Main PID: 5966 (nrpe)
      Tasks: 1 (limit: 1145)
     Memory: 688.0K
     CGroup: /system.slice/nagios-nrpe-server.service
             └─5966 /usr/sbin/nrpe -c /etc/nagios/nrpe.cfg -f

Feb 06 13:51:40 nagiosclient systemd[1]: Started Nagios Remote Plugin Executor.
Feb 06 13:51:40 nagiosclient nrpe[5966]: Starting up daemon
Feb 06 13:51:40 nagiosclient nrpe[5966]: Server listening on 104.245.33.71 port 5666.
Feb 06 13:51:40 nagiosclient nrpe[5966]: Listening for connections on port 5666
Feb 06 13:51:40 nagiosclient nrpe[5966]: Allowing connections from: 127.0.0.1,::1,nagios-server-ip
Step 8: Add Client Hosts to the Nagios Server
Next, you will need to add client host to the Nagios server and define the service that you want to monitor.
On the Nagios server, create a new file named nagiosclient.cfg:
nano /usr/local/nagios/etc/servers/nagiosclient.cfg
Add the following lines:
define host {
        use                          linux-server
        host_name                    nagiosclient
        alias                        Ubuntu Host
        address                      client-ip-address
        register                     1
}

define service {
      host_name                       nagiosclient
      service_description             PING
      check_command                   check_nrpe!check_ping
      max_check_attempts              2
      check_interval                  2
      retry_interval                  2
      check_period                    24x7
      check_freshness                 1
      contact_groups                  admins
      notification_interval           2
      notification_period             24x7
      notifications_enabled           1
      register                        1
}

define service {
      host_name                       nagiosclient
      service_description             Check Users
      check_command                   check_nrpe!check_users
      max_check_attempts              2
      check_interval                  2
      retry_interval                  2
      check_period                    24x7
      check_freshness                 1
      contact_groups                  admins
      notification_interval           2
      notification_period             24x7
      notifications_enabled           1
      register                        1
}

define service {
      host_name                       nagiosclient
      service_description             Check SSH
      check_command                   check_nrpe!check_ssh
      max_check_attempts              2
      check_interval                  2
      retry_interval                  2
      check_period                    24x7
      check_freshness                 1
      contact_groups                  admins
      notification_interval           2
      notification_period             24x7
      notifications_enabled           1
      register                        1
}

define service {
      host_name                       nagiosclient
      service_description             Check Root / Disk
      check_command                   check_nrpe!check_root
      max_check_attempts              2
      check_interval                  2
      retry_interval                  2
      check_period                    24x7
      check_freshness                 1
      contact_groups                  admins
      notification_interval           2
      notification_period             24x7
      notifications_enabled           1
      register                        1
}

define service {
      host_name                       nagiosclient
      service_description             Check HTTP
      check_command                   check_nrpe!check_http
      max_check_attempts              2
      check_interval                  2
      retry_interval                  2
      check_period                    24x7
      check_freshness                 1
      contact_groups                  admins
      notification_interval           2
      notification_period             24x7
      notifications_enabled           1
      register                        1
}
Save and close the file then restart the Nagios service to apply the changes:
systemctl restart nagios
At this point, Nagios server and client are installed and configured.
Step 9: Verify Nagios
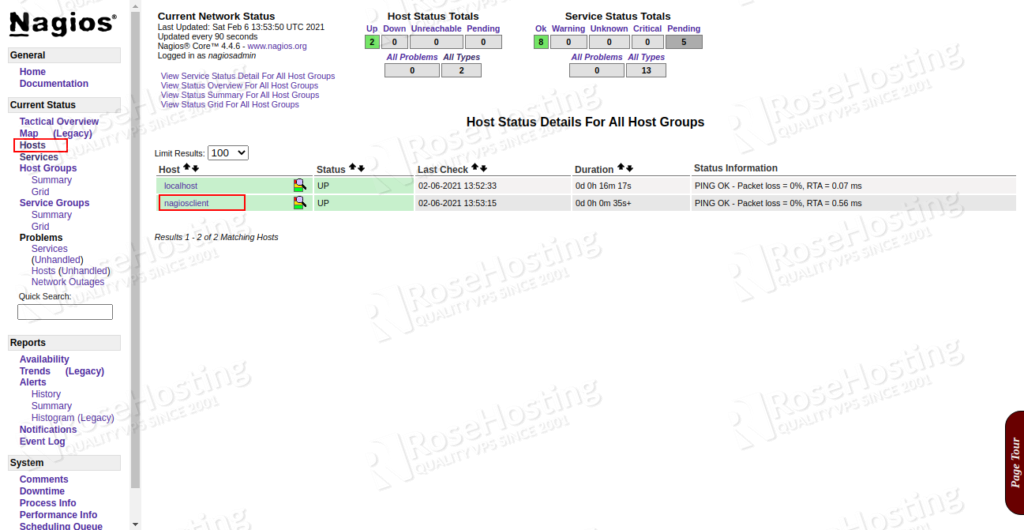
Now, go back to Nagios web interface and click on the hosts in the left pane, you should see all newly added client host in the following page:
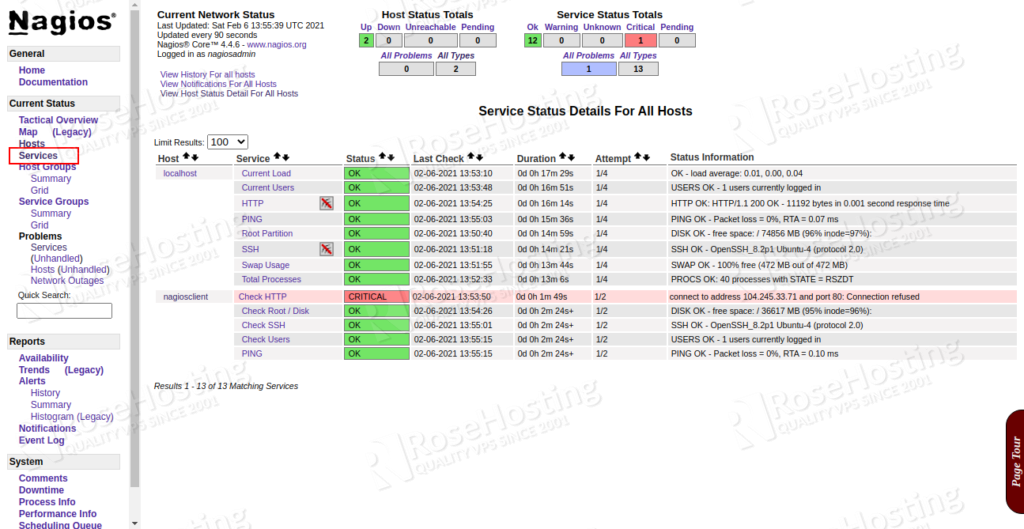
Now, click on the service tab in the left pane, you should see all services in the following page:
Of course, you don’t have to install Nagios on Ubuntu if you use one of our Managed hosting services, in which case you can simply ask our expert Linux admins to install this for you. They are available 24×7 and will take care of your request immediately.
PS. If you liked this post on how to install Nagios on Ubuntu, please share it with your friends on the social networks using the buttons on the left or simply leave a reply below. Thanks.
Hi,
In what order or what line do you change your IP here? If you can provide example that would be great.
server_address=client-ip-address
allowed_hosts=127.0.0.1,::1,server-ip-address
Also, do you need to change your IP here?
nano /etc/nagios/nrpe_local.cfg
And here?
nano /usr/local/nagios/etc/servers/nagiosclient.cfg
Thanks,
Peter
Change the word “server-ip-address” to your actual server IP address.
Why do you suggest people download and install manually from an upstream tarball, rather than using the existng nagios4 packages already included in the official Ubuntu repos?
Steps 2, 4 and first half of step 5 can be entirely replaced with an «apt install nagios4 nagios-plugins-contrib nagios-nrpe-plugin monitoring-plugins» command.
Then All «/usr/local/nagios/etc/» paths when editing can be replaced with «/etc/nagios4/».
The only thing needed from step 5 would be the configuring of the contact name and email address, and adding clients using the nrpe editing lines.
There is No need to download and manually configure all of the above steps listed, when they are mostly automated by installing the nagios packages from the official Ubuntu repositores.
The latest versions of Nagios may not always be available on the Ubuntu repository. Following this tutorial, you can install the latest version or choose a specific version that you want to install of Nagios. But, of course, you can install it using the official repository of Ubuntu, if you prefer.