![]() This tutorial will show you how to install GlassFish 4 and JDK (Java SE Development Kit) on a VPS with Ubuntu 14.04 installed on it.
This tutorial will show you how to install GlassFish 4 and JDK (Java SE Development Kit) on a VPS with Ubuntu 14.04 installed on it.
GlassFish is an open source application server that implements the newest features in the Java EE 7 platform. GlassFish 4 requires JDK version 1.7 installed on your Linux VPS.
To install Oracle JDK 1.7 on your server, use the following commands:
sudo apt-get update
sudo apt-get install python-software-properties software-properties-common
sudo add-apt-repository ppa:webupd8team/java
sudo apt-get update
sudo apt-get install oracle-java7-installer
Verify that JDK is installed on your Ubuntu VPS:
#javac -version
javac 1.7.0_60
The next step is to download and unpack the GlassFish archive. At the time of writing this tutorial, the latest stable version is GlassFish 4.0 . Once you have the package, unpack it into the directory of your choice (in this tutorial we use ‘/opt’ for the GlassFish 4 installation). So, download and unpack GlassFish 4:
cd /opt/
wget http://download.java.net/glassfish/4.0/release/glassfish-4.0.zip
unzip glassfish-4.0.zip
It is recommended practice to run GlassFish as its own user and to do this we will create a GlassFish user:
useradd glassfish
chown -R glassfish:glassfish /opt/glassfish4
In order to make an init script for the GlassFish service, create a ‘glassfish’ file to the ‘/etc/init.d’ directory on your server:
vi /etc/init.d/glassfish
Add the following lines:
#!/bin/bash
#
# description: Startup script for Glassfish Application Server
# processname: glassfish

GLASSFISH_HOME=/opt/glassfish4/glassfish
export GLASSFISH_HOME
GLASSFISH_USER=glassfish
export GLASSFISH_USER

start() {
echo -n "Starting Glassfish: "
su $GLASSFISH_USER -c "$GLASSFISH_HOME/bin/asadmin start-domain domain1"
sleep 2
echo "done"
}

stop() {
echo -n "Stopping Glassfish: "
su $GLASSFISH_USER -c "$GLASSFISH_HOME/bin/asadmin stop-domain domain1"
echo "done"
}

case "$1" in
start)
start
;;
stop)
stop
;;
restart)
stop
start
;;
*)
echo $"Usage: glassfish {start|stop|restart}"
exit
esac
If you want to add this service to be started on boot up, you can simply use the following command:
update-rc.d glassfish defaults
Make the ‘glassfish’ script executable:
chmod 755 /etc/init.d/glassfish
To start GlassFish, use the following command:
sudo /etc/init.d/glassfish start
To stop GlassFish, use the following command:
sudo /etc/init.d/glassfish stop
In case you encounter problems while stopping the GlassFish service, you can always use the kill command:
sudo killall -9 java
The GlassFish service can be restarted by either issuing a combination of stop and start commands or using:
sudo /etc/init.d/glassfish restart
Open your favorite web browser and access GlassFish using http://your-domain.com:8080
You could download a sample WAR file:
cd /opt
wget https://glassfish.java.net/downloads/quickstart/hello.war
To deploy the downloaded application, copy ‘hello.war’ file to the ‘/opt/glassfish4/glassfish/domains/domain1/autodeploy’ directory on your server, or execute the following command:
cd /opt/glassfish4/glassfish/bin
./asadmin deploy hello.war
Open http://your-domain.com:8080/hello and test the sample web application.
To turn the remote administration on and access the GlassFish admin console via web browser, execute the following commands:
cd /opt/glassfish4/glassfish/bin
./asadmin --user admin
asadmin> change-admin-password
./asadmin --host your-domain.com --port 4848 enable-secure-admin
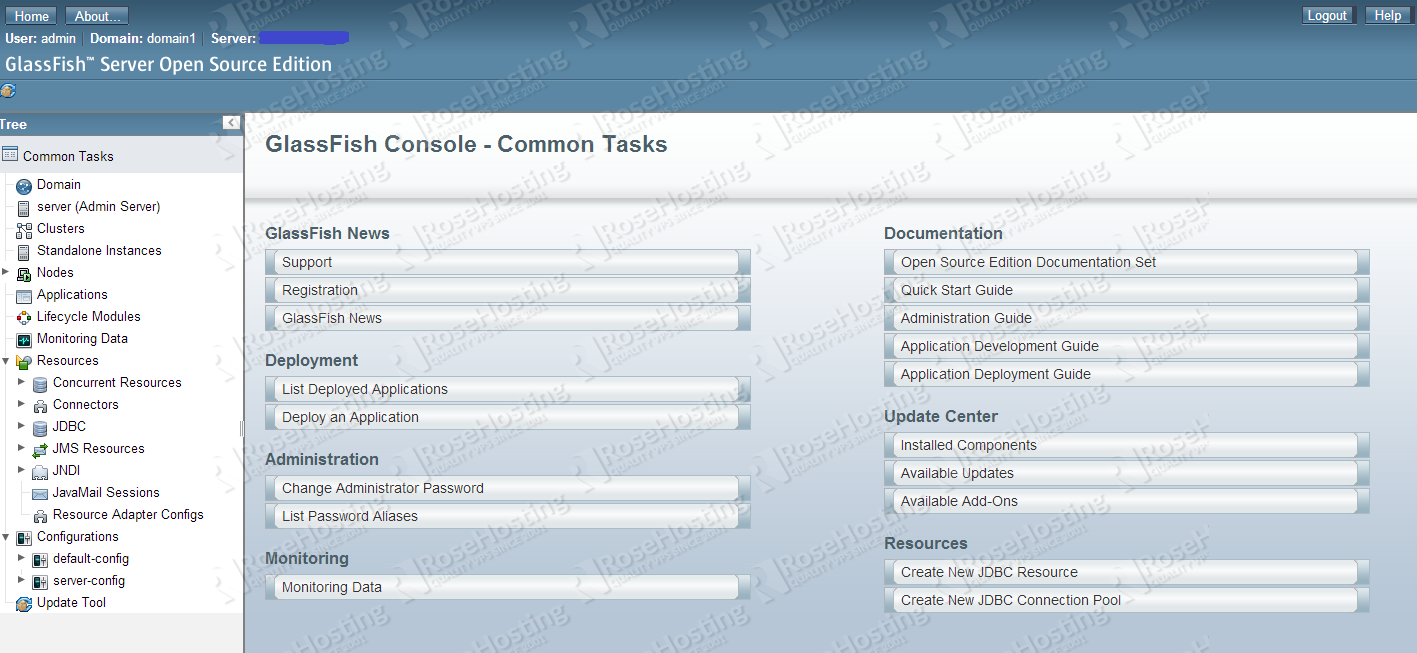
Now you can access the GlassFish admin console using https://your-domain.com:4848
Of course you don’t have to do any of this if you use one of our Linux VPS Hosting services, in which case you can simply ask our expert Linux admins to install GlassFish for you. They are available 24×7 and will take care of your request immediately. For new updates, you can also try reading How to Install GlassFish on Ubuntu 18.04.
PS. If you liked this post please share it with your friends on the social networks using the buttons on the left or simply leave a reply below. Thanks.
Thanks a lot…
Really informative and helpful.
I have yet to test it, but even if these commands dosn’t work, I know now the general structure of the proccess.
Thanksss