
HTTPS is the secure version of Hypertext Transfer Protocol (HTTP). HTTPS uses the SSL/TLS protocol for encryption and authentication, and for securing the communication between the browser and the web server. It encrypts HTTP requests and responses to prevent someone from sniffing the information that is shared between your browser and the web server. Without HTTPS, someone would be able to sniff and collect your website visitors’ sensitive information such as login credentials and credit card details.
In this tutorial, we will show you how to enable HTTPS protocol with Apache2 on our managed Ubuntu VPS. By default, if you install Apache on your Ubuntu 20.04 server, it will create an apache virtual host for your server’s hostname, and it only listens on the non-secure port (HTTP/80). This means, that if you navigate to your server’s hostname using a web browser, you will see the default page of Apache2 Ubuntu, and if you access it through HTTPS, it will throw an error message as Apache2 is not listening on port 443 and no SSL certificate is configured.
Table of Contents
Prerequisites
- A server with Ubuntu 20.04 and Apache.
- A root user access or regular user with sudo privileges.
Step 1: Log in via SSH and Update Packages
Log in to your Ubuntu 20.04 VPS through SSH:
ssh sshuser@IP_Address -p Port_number
Replace “sshuser” with a user that has sudo privileges, or root. Additionally, replace “IP_Address” and “Port_Number” with your server’s respective IP address and SSH port.
Once logged in, you can check whether you have the proper Ubuntu 20.04 version installed on your server with the following command:
$ sudo lsb_release -a
You should get this output:
No LSB modules are available.
Distributor ID: Ubuntu
Description: Ubuntu 20.04.3 LTS
Release: 20.04
Codename: focal
Then, run the following command to make sure that all installed packages on the server are updated to their latest available versions:
$ sudo apt update && sudo apt upgrade
This ensures compatibility between packages.
Step 2: Enable Mod SSL
Before starting, we need to enable the Apache SSL module, run this command:
$ sudo a2enmod ssl
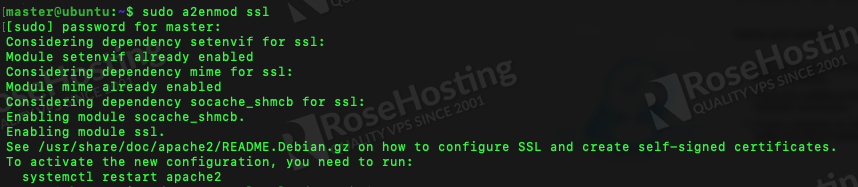
As seen in the message after running the command, we need to restart Apache to activate the changes.
$ sudo systemctl restart apache2
Step 3: Create a Self-Signed SSL Certificate
A self-signed SSL certificate is a good option to choose when you are trying or testing things out on your Apache server. While your personal certificate won’t mean anything to browsers, and visitors will still get a warning message if they visit your site directly, you can at least be sure that you’re protected against “man-in-the-middle” attacks. If you already have a paid SSL certificate, you can skip this step and continue.
Run this command to generate a self-signed SSL certificate.
$ sudo openssl req -x509 -nodes -days 365 -newkey rsa:2048 -keyout /etc/ssl/private/server.yourdomain.com.key -out /etc/ssl/certs/server.yourdomain.com.crt
When running the command above, you will need to answer the prompts.
Country Name (2 letter code) [AU]:
State or Province Name (full name) [Some-State]:
Locality Name (eg, city) []:
Organization Name (eg, company) [Internet Widgits Pty Ltd]:
Organizational Unit Name (eg, section) []:
Common Name (e.g. server FQDN or YOUR name) []:
Email Address []:
Make sure you type the domain/subdomain you want to install the SSL certificate for. For instance, you can type server.yourdomain.com
The command above will store the private key at /etc/ssl/private/server.yourdomain.com.key and the certificate file at /etc/ssl/certs/server.yourdomain.com.crt
Step 4: Enable HTTPS and Install an SSL Certificate
In this tutorial, we will use a separate Apache virtual host file instead of the default configuration file. We assume that you already have a working apache virtual host for your domain. We can run the command below to copy yourdomain.com.conf configuration file to yourdomain.com-ssl.conf. Please change yourdomain.com to your own .conf file in the command to make sure it runs properly.
$ sudo cp -a /etc/apache2/sites-available/yourdomain.com{.conf,-ssl.conf}
Let’s edit the new file.
$ sudo nano /etc/apache2/sites-available/yourdomain.com-ssl.conf
Replace
<VirtualHost *:80>
in the first line with
<VirtualHost *:443>
Then, add these three lines:
SSLEngine on
SSLCertificateKeyFile /etc/ssl/private/server.yourdomain.com.key
SSLCertificateFile /etc/ssl/certs/server.yourdomain.com.crt
Save the file then exit.
After this, we need to enable the SSL version of your site. We can run this command to enable the site:
$ sudo a2ensite yourdomain.com-ssl.conf

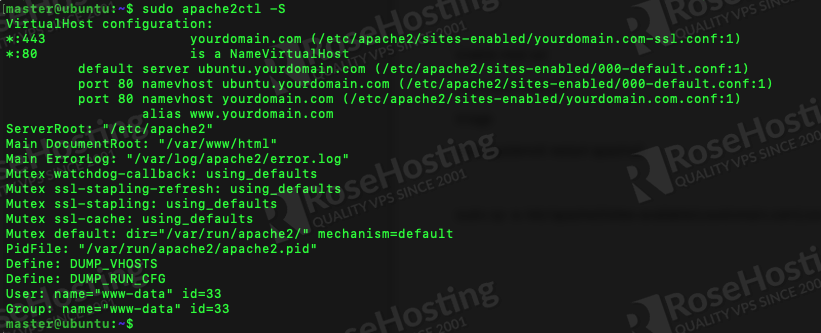
At last, check your apache2 configuration by running this command:
$ sudo apache2ctl -t
If everything is okay then you would see “Syntax OK” message, you can restart Apache.
$ sudo systemctl restart apache2
Please note, if you already have a paid SSL certificate, you can edit the SSLCertificateKeyFile and SSLCertificateFile directives and point them to the correct path of your SSL certificate file and its private key.
You can also run the command below to check if the SSL version of your website is enabled or not.
That is all! When Apache restarts, it will be configured to allow SSL connections by using the generated self-signed SSL certificates. When you navigate to your website via HTTPS, you’ll be warned that it’s not a trusted certificate. That’s okay. We know this since we signed it ourselves! Just proceed and you will see your actual website. This will not happen if you use a paid SSL certificate or an SSL certificate provided by Letsencrypt.
Congratulations! At this point, you should be able to enable HTTPS protocol with Apache2 on Ubuntu 20.04.
Of course, you don’t have to know how to enable HTTPS protocol with Apache2 on Ubuntu 20.04 if you have an Ubuntu 20.04 VPS hosted with us. You can simply ask our support team to enable HTTPS protocol with Apache2 on Ubuntu 20.04 for you. They are available 24/7 and will be able to help you with the HTTPS protocol configuration.
PS. If you enjoyed reading this blog post on how to enable HTTPS protocol with Apache2 on Ubuntu 20.04, feel free to share it on social networks or simply leave a comment in the comments section. Thank you.
Usefull
confusing … does not work.
What do you mean by this!!:
Country Name (2 letter code) [AU]:
State or Province Name (full name) [Some-State]:
Locality Name (eg, city) []:
Organization Name (eg, company) [Internet Widgits Pty Ltd]:
Organizational Unit Name (eg, section) []:
Common Name (e.g. server FQDN or YOUR name) []:
Email Address []:
Make sure you type the domain/subdomain you want to install the SSL certificate for. For instance, you can type server.yourdomain.com
IT does not ask for it: “type the domain/subdomain”
You need to type a valid domain or subdomain instead of server.yourdomain.com
Many thanks, easy fix for a test server!
Excellent! Super helpful.
Worked perfectly for setting up my test machine. Thanks!
Glad we could be of help. :)
I get the following response, when trying to call the site in Firefox: ns_error_module_security, MOZILLA_PKIX_ERROR_SELF_SIGNED_CERT.
That means that you successfully installed the Self-Signed certificate. That is a warning by on the Firefox browser, that can not be avoided.