
Ghost is a content management system (CMS) designed for content creators and bloggers. It utilizes the latest Node.js technology, enabling optimal power, flexibility, and performance. Ghost specifically designed to facilitate content creation, publishing, and distribution with a simple and intuitive interface. Compared to other CMSs like WordPress, Ghost CMS focuses more on speed, security, and author experience. One of Ghost CMS’s strengths is its lightweight and fast approach. This allows content creators to focus on their content without being burdened by the complexities or technical limitations of larger content management platforms. In this article, we will show you how to install Ghost on AlmaLinux 10.
Table of Contents
Prerequisites
- An AlmaLinux 10 VPS
- SSH root access or a regular system user with sudo privileges
Conventions
# – given commands should be executed with root privileges either directly as a root user or by use of sudo command
$ – given commands should be executed as a regular user
Step 1: Log in to your server via SSH
First, you will need to log in to your AlmaLinux 8 VPS via SSH as the root user:
ssh root@IP_Address -p Port_number
You will need to replace ‘IP_Address’ and ‘Port_number’ with your server’s respective IP address and SSH port number. Additionally, replace ‘root’ with the username of the system user with sudo privileges.

You can check whether you have the proper AlmaLinux version installed on your server with the following command:
# cat /etc/almalinux-releaseIt will return an output like this.
AlmaLinux release 10.2 (Lavender Lion)We will use ‘root’ in this article when running the shell commands. If you want to use your regular user with sudo privileges to run the commands, make sure to append ‘sudo’ in front of the commands.
Step 2. Create a System User
In this step, we are going to create a new system user to run Ghost. Let’s execute the command below; you can substitute ‘ghost’ with any username you like.
# useradd -ms /bin/bash ghost
# passwd ghost
Now, add this user to the sudoers file to grant them sudo privileges.
# usermod -aG wheel ghostFrom now on, we will switch to the ‘ghost’ user and complete the installation.
# su - ghostStep 3. Install NodeJS
For this tutorial purpose, we are going to install NodeJS version 22. The LTS version of NodeJS currently is 24, and Ghost v6.52.1 requires ^22.18.0. So we cannot install the latest LTS version because the Ghost installation will fail. Execute this command to install NodeJS.
$ curl -fsSL https://rpm.nodesource.com/setup_22.x | sudo -E bash Once completed, we can execute the command below to see the available versions to install.
$ sudo dnf list nodejs --showduplicatesWe will install version 22.18.0, so we need to run the command below:
$ sudo dnf install nodejs-22.18.0 -y --setopt=nodesource-nodejs.module_hotfixes=1NodeJS has been installed, and we can verify the installation by checking the node and npm versions.
$ node -v; npm -vYou will see an output like this:
v22.18.0
10.9.3
Step 4: Install and Configure Web Server
In this article, we will use Nginx or Apache as the web server. Let’s install it now. You can skip this Nginx installation and configuration step and go to the Apache installation if you want to use Apache.
$ sudo dnf install nginx -yThen, we need to create an nginx server block for our Ghost website.
$ sudo nano /etc/nginx/conf.d/ghost.confInsert the following into the file.
server {
    listen 80;
    server_name ghost.yourdomain.com;

    client_max_body_size 50m;

    location / {
        proxy_set_header X-Forwarded-For $proxy_add_x_forwarded_for;
        proxy_set_header X-Forwarded-Proto $scheme;
        proxy_set_header X-Real-IP $remote_addr;
        proxy_set_header Host $http_host;

        proxy_pass http://127.0.0.1:2368;
    }

    location ~ /.well-known {
        allow all;
    }
}
Make sure to replace ghost.yourdomain.com with your actual domain or subdomain name. Save and close the file. To apply the changes, we need to restart nginx.
$ sudo systemctl restart nginxIf you want to use Apache, do this:
$ sudo dnf install httpdOnce installed, we can create a new Apache virtual host for our Ghost website.
$ sudo nano /etc/httpd/conf.d/ghost.confInsert the following into the file:
<VirtualHost *:80>
    ServerName ghost.yourdomain.com
    ServerAlias ghost.yourdomain.com
    DocumentRoot /var/www/ghost.yourdomain.com/

    ErrorLog logs/ghost.yourdomain.com_error.log
    CustomLog logs/ghost.yourdomain.com_access.log combined

    <Directory /var/www/ghost.yourdomain.com/public_html>
        Require all granted
        AllowOverride All
    </Directory>

        ProxyPreserveHost On
        ProxyPass / http://127.0.0.1:2368/
        ProxyPassReverse / http://127.0.0.1:2368/
</VirtualHost>
Save the file, exit, then restart Apache.
$ sudo systemctl restart httpdStep 5. Install MariaDB Server and Create a Database
In this step, we will install MariaDB from the default AlmaLinux repository. To install the MariaDB server, execute the command below:
$ sudo dnf install mariadb-server -yTo ensure MariaDB starts automatically upon server reboot, run the command below.
$ sudo systemctl enable --now mariadbAt this point, we can proceed to create a new database and user for our Ghost website.
$ sudo mysql After logging in to the MariaDB/MySQL shell, we can run these.
MariaDB [(none)]> CREATE USER 'ghost'@'localhost' IDENTIFIED BY 'm0d1fyth15';
MariaDB [(none)]> CREATE DATABASE ghost;
MariaDB [(none)]> GRANT ALL PRIVILEGES ON ghost.* TO 'ghost'@'localhost';
MariaDB [(none)]> FLUSH PRIVILEGES;
MariaDB [(none)]> \q
Step 6. Install and Configure Ghost
The next step is to install and configure Ghost CMS. Let’s install Ghost-CLI. Ghost-CLI is a command-line tool that helps you install and configure Ghost quickly and easily. Run the following command in your terminal:
$ sudo npm install ghost-cli@latest -gThe Ghost CLI has been installed; we can now install Ghost.
$ mkdir /var/www/ghost.yourdomain.com/ && cd $_
$ ghost install
During the installation, you will be asked for the database details and the blog URL. You can leave the URL at http://localhost:2368 by pressing ENTER, then enter all required database information to proceed with the installation.
 Checking for latest Ghost version
✔ Checking system Node.js version - found v22.18.0
✔ Checking current folder permissions
✔ Checking memory availability
✔ Checking free space
✔ Checking pnpm installation - found corepack v0.33.0
✔ Setting up install directory
✔ Downloading and installing Ghost v6.52.1
✔ Finishing install process
✔ Enter your blog URL: http://localhost:2368
✔ Enter your MySQL hostname: 127.0.0.1
✔ Enter your MySQL username: ghost
✔ Enter your MySQL password:
✔ Enter your Ghost database name: ghost
✔ Configuring Ghost
✔ Setting up instance
+ sudo chown -R ghost:ghost /var/www/ghost.yourdomain.com/content
✔ Setting up "ghost" system user
ℹ Setting up "ghost" mysql user [skipped]
Your url contains a port. Skipping Nginx setup.
ℹ Setting up Nginx [skipped]
Nginx setup task was skipped, skipping SSL setup
ℹ Setting up SSL [skipped]
✔ Do you wish to set up Systemd? Yes
+ sudo mv /tmp/localhost/ghost_localhost.service /lib/systemd/system/ghost_localhost.service
+ sudo systemctl daemon-reload
✔ Setting up Systemd
+ sudo systemctl is-active ghost_localhost
✔ Do you want to start Ghost? Yes
+ sudo systemctl start ghost_localhost
+ sudo systemctl is-enabled ghost_localhost
+ sudo systemctl enable ghost_localhost --quiet
✔ Starting Ghost


Ghost uses direct mail by default. To set up an alternative email method read our docs at https://ghost.org/docs/config/#mail

------------------------------------------------------------------------------

Ghost was installed successfully! To complete setup of your publication, visit:

    http://localhost:2368/ghost/
That’s it! Ghost has been successfully installed. You can run this command now:
$ ghost config url http://ghost.yourdomain.com/Since you made changes to Ghost, you need to reload it:
$ ghost restartNow, you can go to the website backend at http://ghost.yourdomain.com/ghost/, and you will see this:
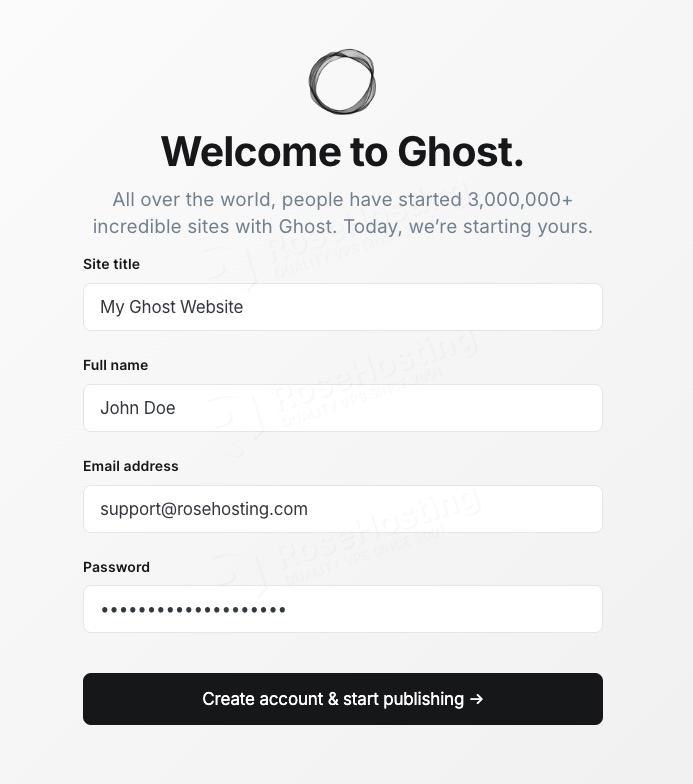
You can fill in all, then hit the ‘Create account & start publishing’ button
You will be brought to the dashboard and start working on it now.
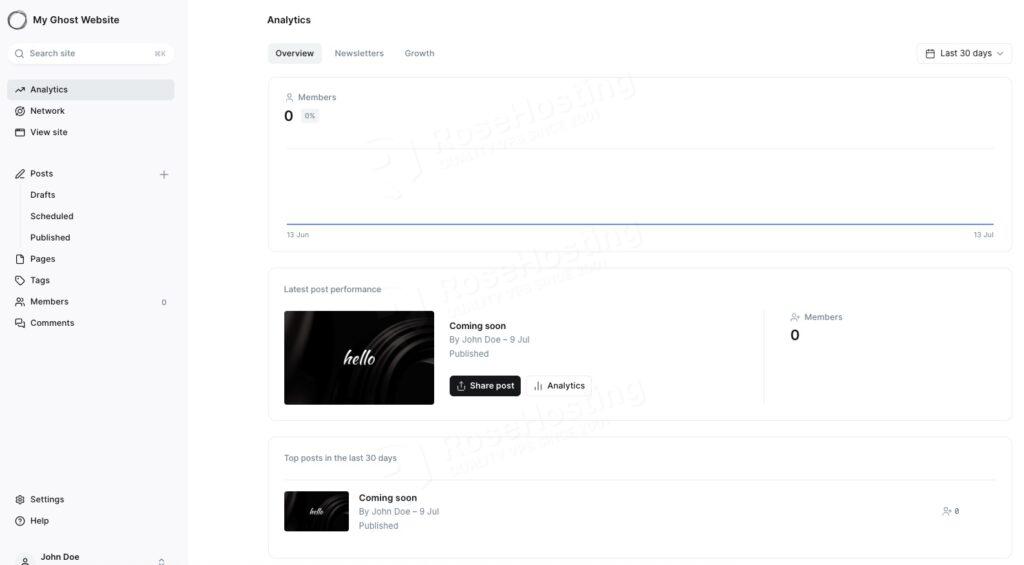
To see the frontend, you can go to http://ghost.yourdomain.com/

Of course, you don’t have to install Ghost CMS on AlmaLinux 10 yourself if you use one of our AlmaLinux VPS Hosting services; in which case you can simply ask our expert Linux admins to install Ghost CMS on AlmaLinux 10 for you. Our experienced administrators are available 24×7 and will address your request immediately. Managing Ghost CMS instances is not just about the installation; we can help you optimize your Ghost CMS server if you have an active service with us.
If you liked this post on how to install Ghost CMS on AlmaLinux 10, please share it with your friends or leave a comment below.