In this guide, we will show you how to install Magento 2.4 with LEMP stack on an Ubuntu 20.04 VPS.

Magento is one of the most popular open-source eCommerce platforms available, thanks to its customization and flexibility. It is created using the Zend Framework and uses MySQL as its database management system. Magento provides online merchants with a very flexible shopping cart and it comes with a rich set of features, making it an excellent choice for businesses looking to have an online stop set up without hassle.
Installing Magento 2.4 with a LEMP Stack on Ubuntu 20.04 should take less than 10 minutes to complete. Let’s get started with the tutorial.
Table of Contents
Prerequisites
- An Ubuntu 20.04 VPS with root access enabled, or a user with sudo privileges
- 4GB of RAM or higher
- Nginx
- MariaDB 10.4
- Elasticsearch 7.6.x because Magento 2.4 is tested with this version
- PHP 7.4 with bcmath, ctype, curl, dom, gd, hash, iconv, intl, libxml, mbstring, openssl, pdo_mysql, simplexml, soap, xsl and zip extensions enabled. Also, for performance reasons it is a good idea to install and enable the opcache extension.
- A valid domain name for accessing the Magento 2 website. Also, a valid SSL certificate is required for accessing the website using HTTPS.
If you don’t have a LEMP stack set up (Nginx, MariaDB, PHP), no problem – we’ll be covering how to install those in this tutorial as well.
Getting Started
First, we’re going to need to log into our server using SSH. You can do that by entering this command:
ssh root@IP_Address -p Port_number
Replace “root” with a user that has sudo privileges if necessary. Additionally, replace “IP_Address” and “Port_Number” with your server’s respective IP address and SSH port number.
Once you are logged in, you should update all of your Ubuntu OS packages to their latest available versions.
apt-get update
apt-get upgrade
Once all of the OS packages are up-to-date, restart your server if required to apply any new configuration changes.
Install LEMP and Elasticsearch
LEMP is an acronym that describes a Linux OS with Nginx, MySQL (or MariaDB), and PHP. It’s a general stack of applications and servers that can provide the foundation for many software packages. Let’s install LEMP on our Ubuntu 20.04 VPS.
Install Nginx
If there is an Apache web server installed on the server already, stop the Apache service and disable it from starting on server boot:
systemctl stop apache2
systemctl disable apache2
Install Nginx with the following command:
apt-get install nginx
That’s all we need to do with Nginx for now.
Install MySQL
Next, we will install the MySQL database server, which will be used for storing the data of our Magento website, such as the products, categories, customers, and orders.
For the purposes of this tutorial, we will install and use MariaDB. To install the MariaDB database server, enter the following commands:
apt-get install software-properties-common
We need to add a key in order to add our MariaDB repository.
apt-key adv --recv-keys --keyserver hkp://keyserver.ubuntu.com:80 0xF1656F24C74CD1D8
Now that we have the key, let’s install the repository:
add-apt-repository 'deb [arch=amd64,arm64,ppc64el] http://mirror.lstn.net/mariadb/repo/10.4/ubuntu bionic main'
Update your APT repositories so that the package lists get read.
apt update
Finally, we can install MariaDB.
apt install mariadb-server
Once MariaDB installed, enable the MariaDB service to start on server boot:
systemctl enable mariadb.service
Check the status of the MariaDB service:
systemctl status mariadb.service
It should be running. That’s all we need to do with MariaDB for now.
Install Elasticsearch
Switch to a directory where you can download a file temporarily.
cd /opt
Let’s download the Elasticsearch package file.
wget https://artifacts.elastic.co/downloads/elasticsearch/elasticsearch-7.6.1-amd64.deb
Install it by running this next command:
dpkg -i elasticsearch-7.6.1-amd64.deb
Start the Elasticsearch service:
systemctl start elasticsearch
Check the status:
systemctl status elasticsearch
Check the version and other information about Elasticsearch:
curl -XGET 'http://localhost:9200'
If it all looks normal up to this point, we can now install PHP.
Install PHP 7.4
Add the PPA for PHP 7.4:
add-apt-repository ppa:ondrej/php
Next, update the OS package list and install PHP 7.4 with the following command:
apt-get update
apt-get install php7.4
Install all of the required PHP extensions with the following command:
apt install php7.4-fpm php7.4-common php7.4-mysql php7.4-gmp php7.4-curl php7.4-intl php7.4-mbstring php7.4-xmlrpc php7.4-gd php7.4-xml php7.4-cli php7.4-zip php7.4-bcmath
Once the PHP extensions have been installed on the server, install a few other OS packages that are required for the Magento 2 installation:
apt-get install git curl software-properties-common
Next, open the main PHP configuration file /etc/php/7.4/fpm/php.ini:
nano /etc/php/7.4/fpm/php.ini
Change the following settings:
file_uploads = On
allow_url_fopen = On
short_open_tag = On
memory_limit = 256M
cgi.fix_pathinfo = 0
zlib.output_compression = On
upload_max_filesize = 128M
max_execution_time = 600
max_input_time = 900
date.timezone = America/Chicago
Save and close the PHP configuration file.
Create a Database for Magento 2
Secure your MariaDB installation by using the mysql_secure_installation script. This script will remove anonymous users, disallow root login remotely, and remove the test database.
mysql_secure_installation
We recommend that you answer all of the questions as shown below:
Enter current password for root (enter for none): Press [Enter] since no password is set by default
Set root password? [Y/n]: N (You can set a password if you like)
Remove anonymous users? [Y/n]: Y
Disallow root login remotely? [Y/n]: Y
Remove test database and access to it? [Y/n]: Y
Reload privilege tables now? [Y/n]: Y
Next, we will create our MySQL user and database for our Magento 2 website. Log in to your MySQL server with the following command and enter your MySQL root password when prompted:
mysql -u root -p
To create a new database for our Magento 2 instance, run the following commands:
mysql> set global log_bin_trust_function_creators=1;
mysql> CREATE USER 'magento'@'localhost' IDENTIFIED WITH mysql_native_password BY 'strongPassword';
mysql> create database magentodb;
mysql> GRANT ALL PRIVILEGES ON magentodb.* TO 'magento'@'localhost';
mysql> flush privileges;
mysql> quit
Make sure that you give your magento MariaDB user a real and strong password.
Install Magento 2
We can now proceed with the Magento 2 installation. At the time of writing this article, the latest stable version of Magento is version 2.4.
First, go to the GitHub repository and download the latest version of Magento with the following command:
mkdir -p /var/www/magento2/
cd /var/www/magento2/
git clone https://github.com/magento/magento2.git /var/www/magento2/
Next, we will need to install Composer to install all necessary Magento components. You can install Composer by just running the following command:
curl -sS https://getcomposer.org/installer | php -- --install-dir=/usr/bin --filename=composer
Run these next commands to configure composer.
cd /var/www/magento2
composer install
bin/magento setup:install --base-url=http://yourdomain.com/ --db-host=localhost --db-name=magentodb --db-user=magento --db-password=strongPassword --admin-firstname=FirstName --admin-lastname=LastName --admin-email=your@emailaddress.com --admin-user=magentoadmin --admin-password=strong-password --language=en_US --currency=USD --timezone=America/Chicago --use-rewrites=1
Do not forget to replace the domain name, database password, admin username, password and admin email address accordingly.
Once the installation is complete, you should receive the following output:
[Progress: 699 / 701]
Post installation file permissions check...
For security, remove write permissions from these directories: '/var/www/magento2/app/etc'
[Progress: 700 / 701]
Write installation date...
[Progress: 701 / 701]
[SUCCESS]: Magento installation complete.
[SUCCESS]: Magento Admin URI: /admin_1k4pc0
Nothing to import.
Remember the ‘Magento Admin URI’. You will need this info later as that’s the URL that you’ll be using to log in to the Magento back-end.
Change the ownership of the magento2 directory to www-data with the following command:
chown -R www-data:www-data /var/www/magento2/
Create an Nginx Configuration File
Create an Nginx configuration file with your text editor:
nano /etc/nginx/sites-available/magento2
Then add the following as the file’s content:
upstream fastcgi_backend {
server unix:/run/php/php7.4-fpm.sock;
}
server {
server_name yourdomain.com;
listen 80;
set $MAGE_ROOT /var/www/magento2;
set $MAGE_MODE developer; # or production
access_log /var/log/nginx/magento2-access.log;
error_log /var/log/nginx/magento2-error.log;
include /var/www/magento2/nginx.conf.sample;
}
Make sure that you set yourdomain.com to your registered domain name.
Remove the default Nginx configuration file, if is not being used:
rm -f /etc/nginx/sites-enabled/default
Enable the newly created Nginx configuration file, then test the Nginx configuration and make sure that there are no errors:
ln -s /etc/nginx/sites-available/magento2 /etc/nginx/sites-enabled/magento2
nginx -t
nginx: the configuration file /etc/nginx/nginx.conf syntax is ok
nginx: configuration file /etc/nginx/nginx.conf test is successful
That’s it! Your web server is now successfully configured.
Install an SSL Certificate
We’re going to install a free SSL certificate from Let’s Encrypt. Install the required packages by running this command:
apt-get install certbot python3-certbot-nginx
Then install a new SSL certificate for your domain name, making sure that yourdomain.com is set to your registered domain name:
certbot --nginx -dyourdomain.com-dwww.yourdomain.com
Please select ‘2’ and choose to redirect HTTP traffic to HTTPS:
- - - - - - - - - - - - - - - - - - - - - - - - - - - - - - - - - - - - - - - -
1: No redirect - Make no further changes to the webserver configuration.
2: Redirect - Make all requests redirect to secure HTTPS access. Choose this for
new sites, or if you're confident your site works on HTTPS. You can undo this
change by editing your web server's configuration.
- - - - - - - - - - - - - - - - - - - - - - - - - - - - - - - - - - - - - - - -
Select the appropriate number [1-2] then [enter] (press 'c' to cancel): 2
Use the following Magento 2 CLI commands to update the Magento base-url and the base-url-secure values:
cd /var/www/magento2/
php bin/magento setup:store-config:set --base-url="https://yourdomain.com/"
php bin/magento setup:store-config:set --base-url-secure="https://yourdomain.com/"
Edit the Nginx configuration file and enable HTTP/2:
nano /etc/nginx/sites-enabled/magento2
Replace:
listen 443 ssl;
With:
listen 443 ssl http2;
Restart the Nginx service for the changes to take effect:
systemctl restart cron.service
Install Cron Job
Magento requires a cron job configuration for many important system functions. Let’s create the following cron job:
crontab -u www-data -e
Add this to the file:
* * * * * /usr/bin/php /var/www/magento2/bin/magento cron:run | grep -v "Ran jobs by schedule" >> /var/www/magento2/var/log/magento.cron.log
Save and close the file.
Restart the cron service:
systemctl restart cron.service
That is everything! Magento 2 has been successfully installed on your server.

You can access the Magento front-end at http://yourdomain.com :
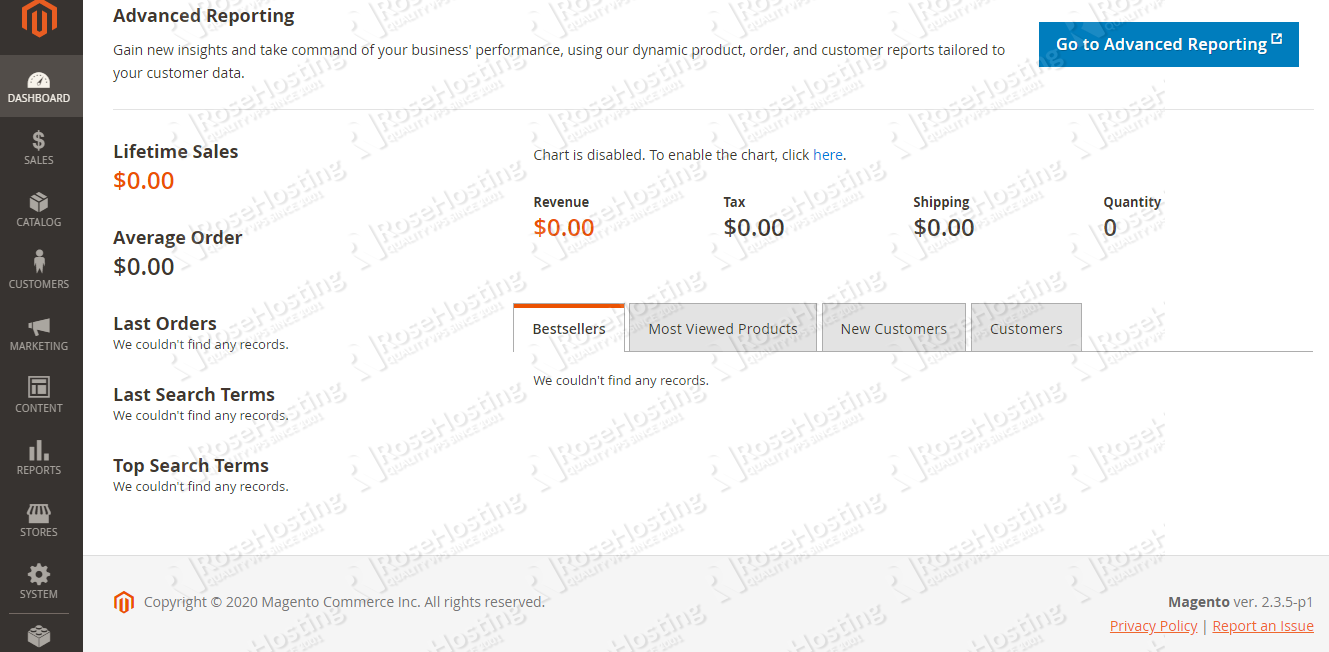
Log in to the Magento 2 back-end at http://, and configure Magento according to your needs. You can install extensions, add products, categories, and more.yourdomain.com/Magento Admin URI

It’s becoming more and more important to have online presence in today’s digital world. You don’t need to be an expert in Linux system administration when you use our Managed Magento hosting – we’ll set everything up for you and maintain it, all included with our VPS. We can even optimize your server as well as perform any requests that you might have. You’ll still have full control over your server, but you’ll never need to go through any hassle ever again.
We hope that this tutorial helped you install Magento 2 on your Ubuntu 20.04 VPS. If it did, please consider sharing this post on social media with our share shortcuts, or leave a comment below with any questions or suggestions that you might have. Thank you.
I get a blank page on setup
Magento 2.4, PHP 7.4 Nginx.
I have even tried changing permission to the unsafe 777 but nothing seems to work
Do not use 777 permissions on the website files. It is a huge security risk.
Magento files should be owned by the webserver user (e.g. www-data).
What OS do you have installed on your server?
Thanks! for your nice instruction. It is working for me :)
very nice post, i have istalled my Magento2 local in Vmware Ubuntu.
how configure host file to make my magento external?
example in my phisical machine windows
I get a blank page on setup
Magento 2.4, PHP 7.4 Nginx.
I have even tried changing permission to the unsafe 777 but nothing seems to work
I face same like blank page .
Ubunto Os
Revert the file/directory permissions. Do not use 777 permissions.
Did you run this command:
chown -R www-data:www-data /var/www/magento_install_dir/