If you have been looking for an open-source lightweight and web-based project management and issue tracking tools, then you found Redmine and now you want to host your own Redmine server on a CentOS 8 VPS? You’re in luck – this tutorial will cover everything you need to get a Redmine instance started on your CentOS 8 VPS as quickly as possible. From installing Ruby to setting up WEBrick, everything is covered.
![]() Redmine is an open-source web-based project management tool that can be self-hosted on a VPS. Written in Ruby, Redmine is made to be cross-platform and cross-database compatible. It enables teams to set up multiple projects, wikis, forums, and even time tracking systems. And as for visuals, it supports the Gantt chart and calendar system. Another great feature is its built-in third-party plugin support which makes it more robust and extendable, allowing Redmine to change its feature set to work best for your needs. Let’s get started with the installation.
Redmine is an open-source web-based project management tool that can be self-hosted on a VPS. Written in Ruby, Redmine is made to be cross-platform and cross-database compatible. It enables teams to set up multiple projects, wikis, forums, and even time tracking systems. And as for visuals, it supports the Gantt chart and calendar system. Another great feature is its built-in third-party plugin support which makes it more robust and extendable, allowing Redmine to change its feature set to work best for your needs. Let’s get started with the installation.
Some of the features that Redmine provides out-of-the-box:
- Role-based access control
- News, documents, and file management
- Feeds and Email notifications
- Custom Fields
- SCM Integration
- Multi-Language Support
- RestAPI available
We will be installing Ruby, installing and setting up a new database using MariaDB, and then finally install and use WEBrick as the web-server for our Redmine install.
Table of Contents
Check for OS and Package Updates
To start with our Redmine installation, log into your server via SSH using your preferred terminal environment:
ssh [username]@[server_ip_address] -p [port]
Modify the [username] variable with the username of a root-privileged user available on the server or the root user itself (recommended), replace [server_ip_address] variable with the public IP address of your server, and the port number which is usually 22.
After successfully logging in, we need to update OS and packages to their latest versions:
yum update
We also recommend installing development packages and dependencies to avoid any missing library issues during the installation. Also, to have additional software packages, we need to install EPEL or Extra Packages for Enterprise Linux and enable PowerTools.
yum group install "Development Tools"
yum install install epel-release
yum config-manager --enable epel
yum config-manager --set-enabled PowerTools
Creating Redmine User
We then need to create the user and group for our Redmine installation. This command assumes that the files will be located at /opt/redmine with user and group named redmine. Of course, you may change the location to the one you prefer.
useradd -m -U -r -d /opt/redmine redmine
Installing Ruby and Its Dependencies
Since Redmine is developed using the Ruby programming language, we will need to install the Ruby applications and its dependencies on our server. We can do this by simply using the following command:
yum install ruby ruby-devel rubygems zlib-devel curl-devel openssl-devel httpd-devel apr-devel apr-util-devel ImageMagick ImageMagick-devel
Once done, we can verify the Ruby version installed using the command:
ruby --version
The output should look like this:
ruby 2.5.5p157 (2019-03-15 revision 67260) [x86_64-linux]
Since Ruby has been set up, we can set up a database server now.
Installing and Setting up the Database
Redmine supports multiple databases like PostgreSQL and MySQL. In this tutorial, we will be using MariaDB. First, we need to install the MariaDB package:
yum install mariadb mariadb-server mariadb-devel
Once installed, we need to make sure that the service starts at boot and will start without issues:
systemctl enable mariadb
systemctl start mariadb
systemctl status mariadb
Once we verified that the MariaDB service is running without issues, we must apply the basic security measures. Activate the following command:
mysql_secure_installation
You will encounter a number of questions. The first question is about the MySQL root password. Just press Enter since we do not have a password set yet. After pressing Enter, it will ask if you want to set a root password. Type Y, then your desired password.
Do not forget to set a strong password. Generally, a password utilizing at least 12 characters including alphanumeric and grammatical symbols is sufficient. Never use passwords based upon dictionary words or significant dates.
For the rest of the questions, simply answer Y.
After securing our MySQL installation, we can now proceed to create our Redmine database. First, we need to login via MariaDB CLI:
mysql -u root -p
Once logged in, use the following syntax and feel free to modify the ones with the red font (especially the password field!):
CREATE DATABASE red_db;
CREATE USER 'red_user'@'localhost' IDENTIFIED BY '$tr0n6p@Ssw0rD';
GRANT ALL ON red_db.* TO 'red_user'@'localhost' IDENTIFIED BY '$tr0n6p@Ssw0rD';
FLUSH PRIVILEGES;
EXIT;
Installing and Setting up Redmine
Finally, after all of the required services and packages are installed and set up, we can now proceed with installing and setting up Redmine. As of writing, the latest stable released version is 4.1.1. To download, extract, and rename the Redmine release file, we need to log in as the Redmine user first, then follow the commands:
su - redmine
The download link has been already inserted in the command for you:
wget https://www.redmine.org/releases/redmine-4.1.1.tar.gz
tar -xvf redmine-4.1.1.tar.gz
mv redmine-4.1.1 redmine
After extracting the files, we then need to copy some sample files. Then we will add the database details at the database.yml file.
cp /opt/redmine/redmine/config/database.yml.example /opt/redmine/redmine/config/database.yml
cp /opt/redmine/redmine/config/configuration.yml.example /opt/redmine/redmine/config/configuration.yml
nano /opt/redmine/redmine/config/database.yml
In the production section, change the database values based on the values you used to create the MariaDB database earlier. Save then exit the text editor.
production:
  adapter: mysql2
  database: red_db
  host: localhost
  username: red_user
  password: "$tr0n6p@Ssw0rD"
  encoding: utf8mb4
Once done, we can now compile the Redmine installation.
cd ~
gem install bundler
bundle install --without development test postgresql sqlite --path vendor/bundle
Next is to generate keys and create the database schema:
bundle exec rake generate_secret_token
RAILS_ENV=production bundle exec rake db:migrate
Once the database schema has been migrated and set up, we can now create the default configuration data:
RAILS_ENV=production REDMINE_LANG=en bundle exec rake redmine:load_default_data
Testing Redmine Installation
Now that our setup is done, we can now start our Redmine installation using the recommended production HTTP web server WEBrick:
bundle exec rails server webrick -e production
or if you want the HTTP web server to run in the background:
bundle exec rails server webrick -de production
Once running, you can now check the Redmine login page using your browser by accessing http://[SERVER IP ADDRESS]:3000/login. You should see the same page:
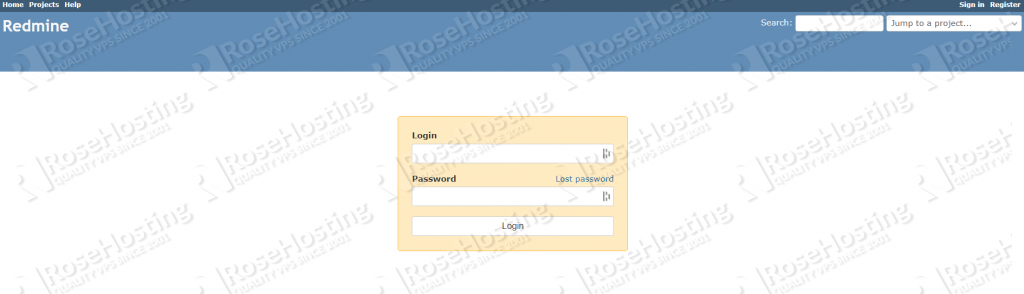
The default username and password is admin. After logging in, it will ask you to change the password.
That’s it – you now have Redmine installed and running on your CentOS 8 VPS. Do not forget to check the Redmine guide to have an idea of how to get started.
 Of course, you don’t have to Install Redmine on CentOS 8 if you have a CentOS 8 VPS or a Managed Redmine VPS with us. You can simply ask our support team to install Redmine on CentOS 8 for you. They are available 24/7 and will be able to help you with the installation.
PS. If you enjoyed reading this blog post on how to install Redmine on CentOS 8, feel free to share it on social networks using the shortcuts below, or simply leave a comment in the comments section. Thanks.