In this tutorial, we will show you how to install Magento 2 with Apache on a CentOS 8 VPS.
 Magento is a free, open-source and cloud-based e-commerce platform written in PHP. Magento offers a community and a commercial version of its platform – the community version is free and is designed primarily for individuals and/or small businesses. On the other hand, the enterprise version is mainly aimed at medium to large businesses and more of an enterprise environment.
Magento is very user-friendly and is fully customizable, allowing you to create and customize online stores in mere minutes. On top of the excellent customization, Magento offers powerful marketing, search engine optimization, and catalog-management tools. It allows you to run several stores at the same time and manage them using one panel. This is essentially the full package for e-commerce, providing everything you need to get started.
Let’s begin with the installation.
Table of Contents
Prerequisites
- A CentOS 8 VPS with root access enabled (our VPSes all have root access) or a user with sudo privileges.
- A valid domain name pointed with your server.
- Minimum 4GB of RAM and 2 CPU cores.
Getting Started
First, you will need to log in to your CentOS 8 VPS via SSH as the root user:
ssh root@IP_ADDRESS -p PORT_NUMBER
Make sure to replace “IP_ADDRESS” and “PORT_NUMBER” with your server’s IP (required) and Port number (if not the default).
Next, run the following commands to upgrade all installed packages on your VPS:
dnf update -y
By default, SELinux is enabled in CentOS 8 system. This can often cause conflicts and programs to stop working without any clear reason as to why, so it is recommended to disable SELinux on your system to ensure smooth functionality.
You can disable the SELinux by editing /etc/selinux/config file:
nano /etc/selinux/config
Find the following line:
SELINUX=enforcing
And, replace it with the following line:
SELINUX=permissive
Save and close the file. Then, restart your system to apply the changes.
Installing and Setting up Apache, MariaDB and PHP
In order for Magento to work, it requires a few prerequisite software packages. Apache provides the web server that serves the content, MariaDB is the database server that stores the data, and PHP is the programming language used to run the store.
First, install the Apache webserver and MariaDB with the following command:
dnf install httpd mariadb-server -y
The latest version of Magento is only compatible with PHP 7.1.3+ and 7.2.x. So you will need to install the supported PHP versions with required PHP extensions. By default, CentOS 8 ships with PHP version 7.2. This means that we won’t be needing a third-party repository in order to install PHP. Therefore, you can simply install the required PHP version with all dependencies using the following command:
dnf install php php-cli php-mysqlnd php-opcache php-xml php-gd php-soap php-pdo php-bcmath php-intl php-mbstring php-json php-iconv php-zip unzip git -y
Once all the packages are installed, edit the php.ini file and tweak some settings:
nano /etc/php.ini
Change the following values:
memory_limit = 1024M

upload_max_filesize = 256M

zlib.output_compression = on

max_execution_time = 18000

date.timezone = UTC
Save and close the file then start the Apache and MariaDB service and enable them to start at boot with the following command:
systemctl start httpd

systemctl start mariadb

systemctl enable httpd

systemctl enable mariadb
At this point, the LAMP server is installed on your server.
Create a Database for Magento
First, secure the MariaDB installation and set the MariaDB root password with the following command:
mysql_secure_installation
A set of prompts will appear – this is how we answered all the questions, as shown below:
Enter current password for root (enter for none):

Set root password? [Y/n] Y

New password:

Re-enter new password:

Remove anonymous users? [Y/n] Y

Disallow root login remotely? [Y/n] Y

Remove test database and access to it? [Y/n] Y

Reload privilege tables now? [Y/n] Y
Once the MariaDB is secured, log in to the MariaDB using the following command:
mysql -u root -p
Provide your MariaDB root password then create a database and user for Magento with the following command:
MariaDB [(none)]> CREATE DATABASE magento2;

MariaDB [(none)]> CREATE USER 'magento'@'localhost' IDENTIFIED BY 'password';
Make sure to REPLACE ‘password‘ with a SECURE password.
Next, grant all the privileges to the Magento database with the following command:
MariaDB [(none)]> GRANT ALL ON magento2.* TO 'magento'@'localhost' IDENTIFIED BY 'password' WITH GRANT OPTION;
Next, flush the privileges and exit from the MariaDB with the following command:
MariaDB [(none)]> FLUSH PRIVILEGES;

MariaDB [(none)]> EXIT;
Install Magento
Before starting, it is recommended to create a non-root system user for Magento instance.
You can create a user called magento and then add them to the Apache webserver group with the following command:
adduser magento

usermod -a -G apache magento
Next, you will also need to install Composer on your system. Composer allows you to install all of the required PHP libraries and dependencies for your Magento project through one simple package manager.
You can install Composer with the following command:
curl -sS https://getcomposer.org/installer | php

mv composer.phar /usr/local/bin/composer
Next, download the latest version of Magento from its official website.
Once the download is completed, unzip the downloaded file to the Apache web root directory with the following command. Note that the file name may be different for you, depending on the version that was downloaded:
unzip magento-ce-2.3.5-p1_sample_data-2020-04-24-10-19-21.zip -d /var/www/html/magento2
Next, change the directory to magento2 and install all required PHP dependencies with the following command:
cd /var/www/html/magento2

composer install
Next, set proper ownership and permissions to the magento directory with the following command:
chown -R magento:apache /var/www/html/magento2

chmod -R 775 /var/www/html/magento2
Configure Apache for Magento
Next, create an Apache virtual host configuration file for Magento with the following command:
nano /etc/httpd/conf.d/magento.conf
Add the following liens:
<VirtualHost *:80>

ServerAdmin admin@example.com

ServerName magento.example.com

DocumentRoot /var/www/html/magento2/

DirectoryIndex index.php

<Directory /var/www/html/magento2/>

Options Indexes FollowSymLinks MultiViews

AllowOverride All

Order allow,deny

allow from all

</Directory>

ErrorLog /var/log/httpd/magento_error.log

CustomLog /var/log/httpd/magento_access.log combined

</VirtualHost>
Save and close the file when you are finished. Then, restart the Apache service to implement the changes:
systemctl restart httpd
At this point, the Apache web server is configured to serve the Magento instance via HTTP.
Step 6 : Access Magento Web Interface
Now, open your web browser and type the URL http://magento.example.com. You will be redirected to the Magento welcome page:
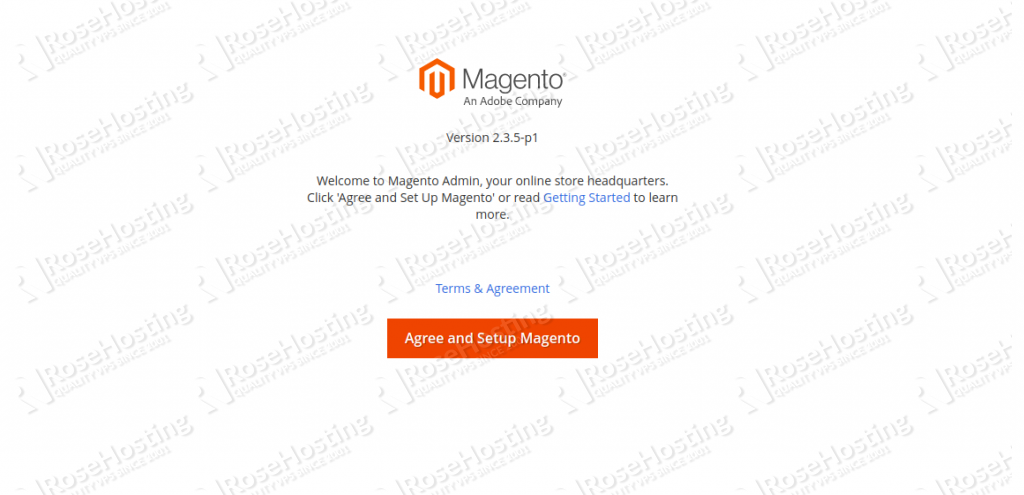 Click on the Agree and Setup Magento. You should see the readiness check page:
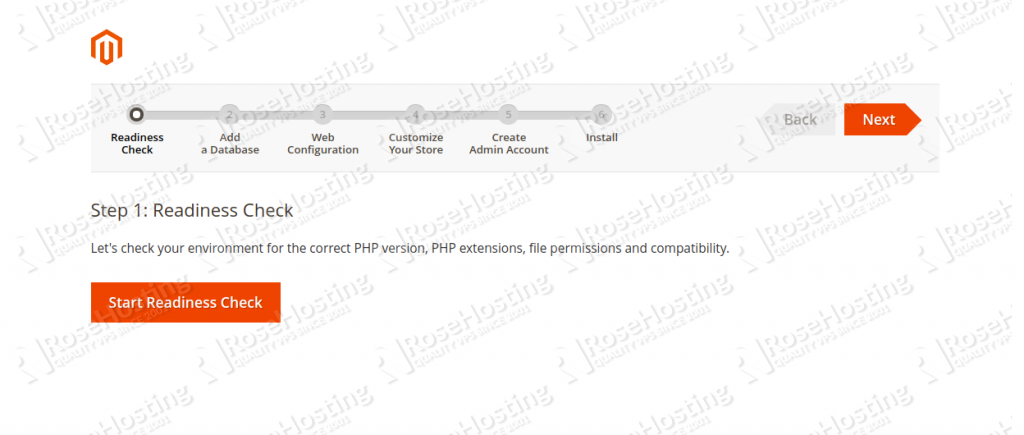
Click on the Start Readiness Check to check for the correct PHP version, PHP extensions and file permissions. Once the readiness check has been completed successfully, you should see the following page:
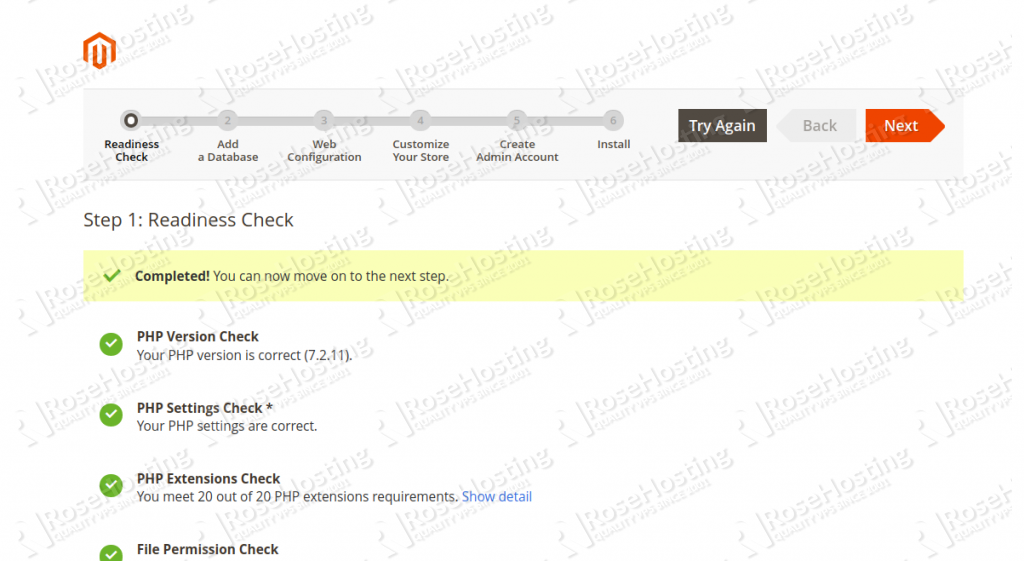
Click on the Next button. You should see the Database configuration page:
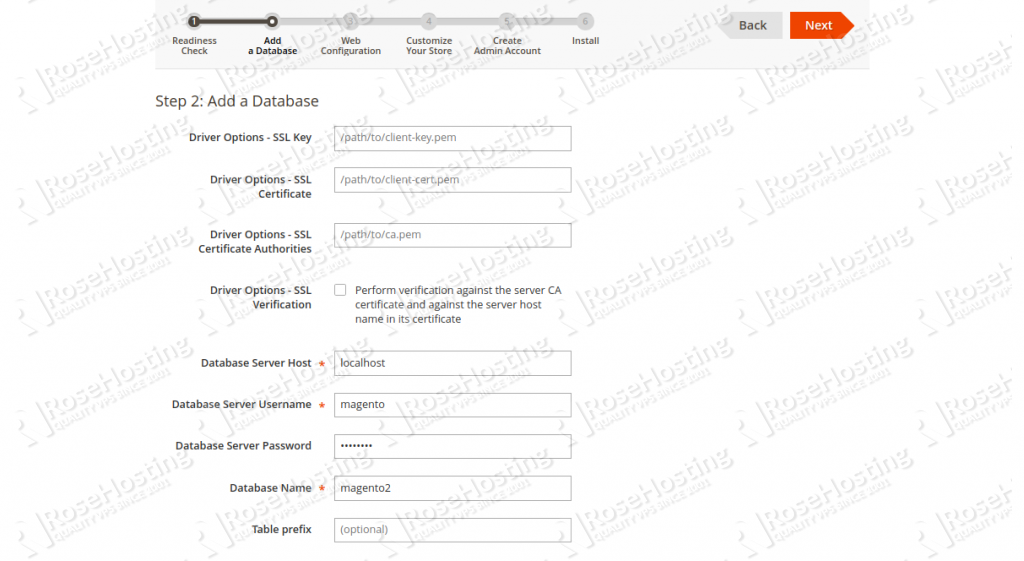
Provide your Magento database name, database user, password and click on the Next button. You should see the Magento web configuration page:

Provide your Magento store and admin address and click on the Next button. You should see the following page:
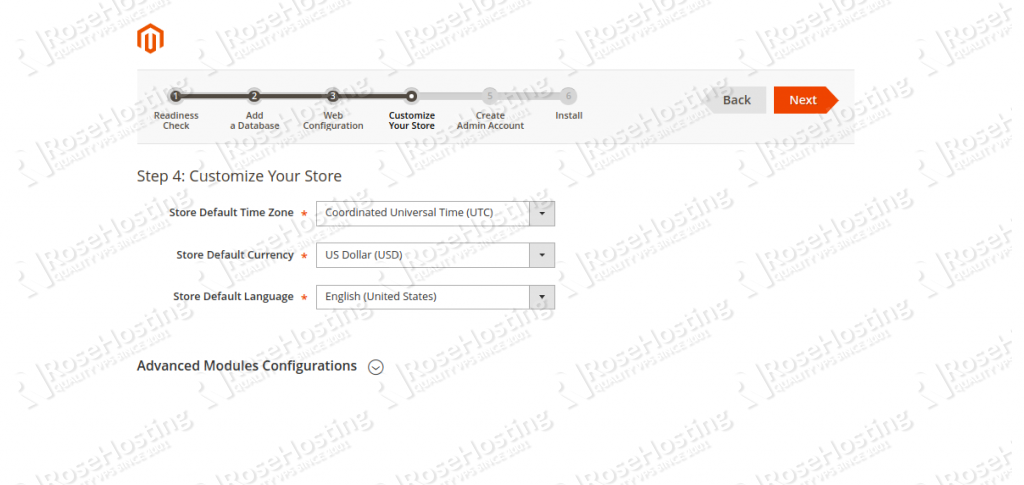
Set your default time zone, currency, language and click on the Next button. You should see the Magento admin account creation page:
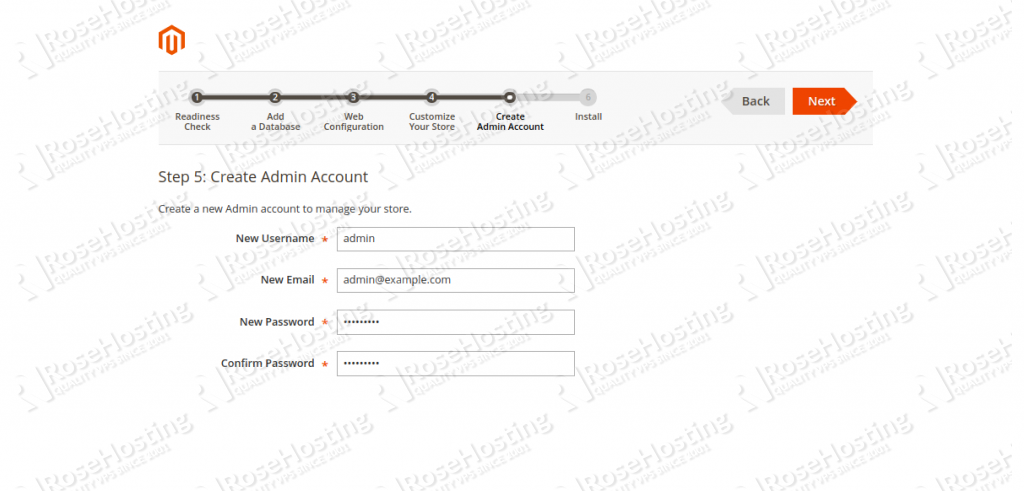
Provide your desired username, email, password and click on the Next button. You should see the following page:
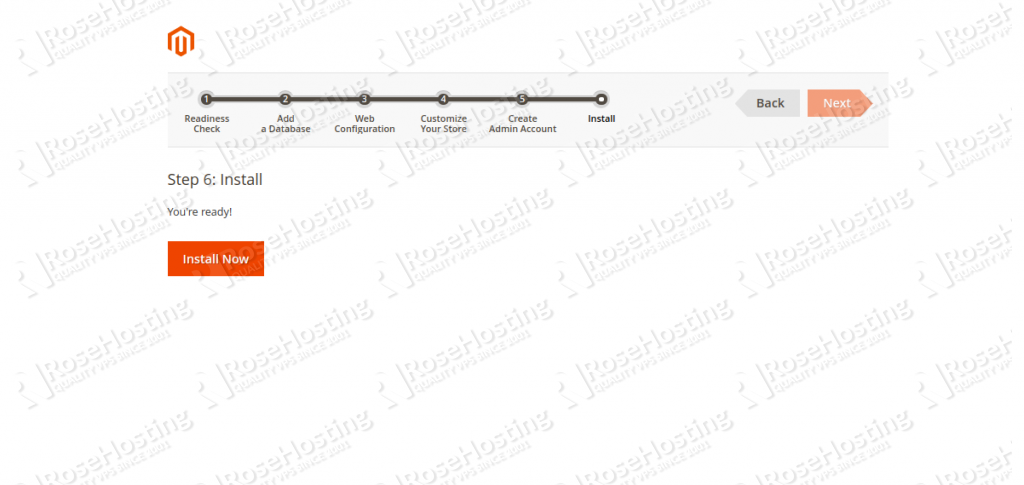
Click on the Install Now button to start the installation. Once the installation has been completed successfully, you will see a Success page listing all the details of your Magento installation.
IMPORTANT: Sometimes the installer page will stop showing new changes at around 91% even though the installation has completed. In this case, you can check the install log file at /var/www/html/magento2/var/log/install.log.
tail -f /var/www/html/magento2/var/log/install.log
You should see the following output:
[SUCCESS]: Magento installation complete.

[SUCCESS]: Magento Admin URI: /admin_1tez57
Now, open your web browser and type the URL http://magento.example.com/admin_1tez57. You should see the Magento store admin login on the following page:
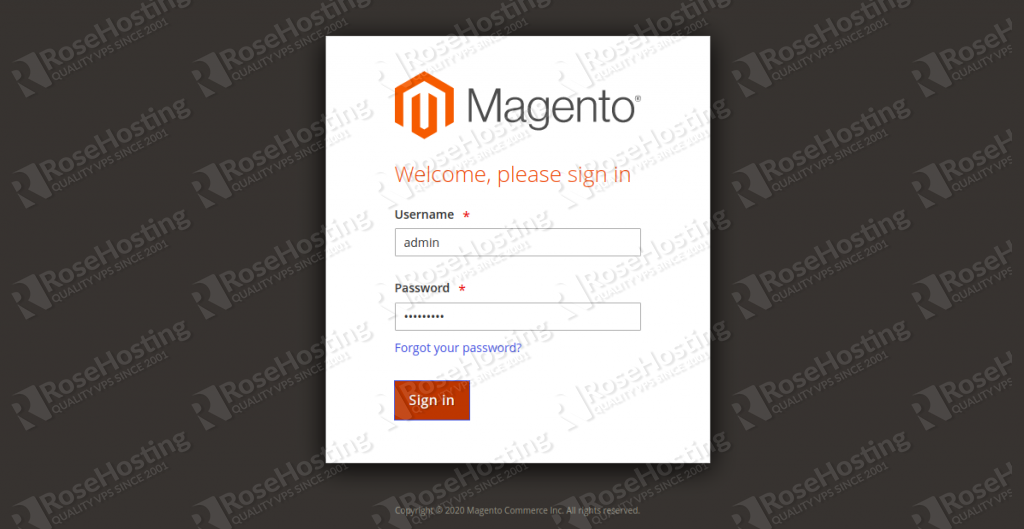
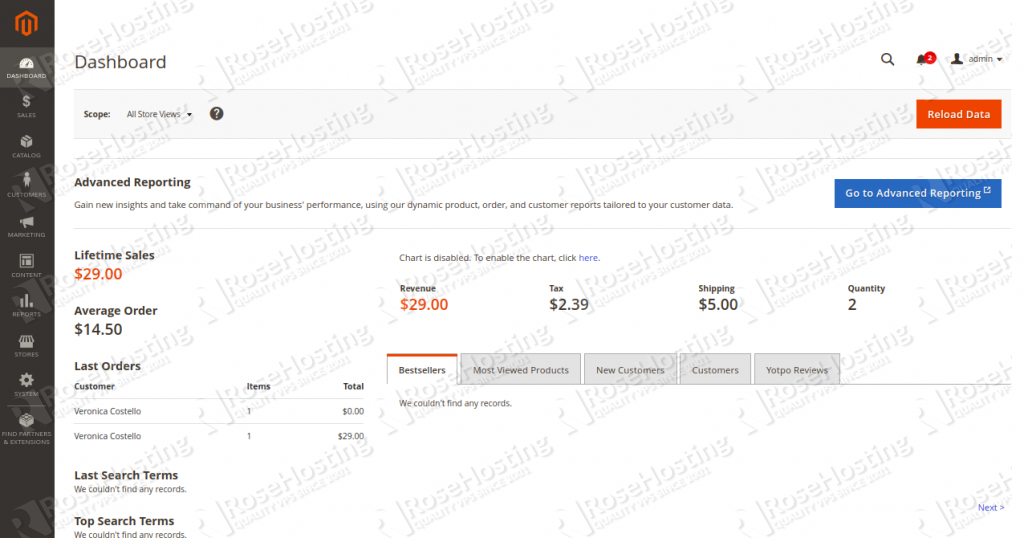
Provide your Magento admin username and password and click on the Sign In button. You should see the Magento 2 default dashboard in the following page:
You can also access your Magento store using the URL http://magento.example.com. You should see the following page:

Create the Magento Cron Job
You will also need to create a cron job to schedule tasks like re-indexing, notifications, sitemaps, emails and more. Magento provides a tool to create the correct cron entries to keep everything up-to-date.
Change the directory to the Magento’s root directory:
cd /var/www/html/magento2/
Next, create the Magento crontab by running the following command as magento user:
sudo -u magento ./bin/magento cron:install
You should see the following output:
Crontab has been generated and saved
Next, verify the installed cron jobs with the following command:
crontab -u magento -l
You should get the following output:
#~ MAGENTO START f73db5f5dcf223372d4c9fab56bef0c1730eece898fad5cbee0c313b46b0dd1f

* * * * * /usr/bin/php /var/www/html/magento2/bin/magento cron:run 2>&1 | grep -v "Ran jobs by schedule" >> /var/www/html/magento2/var/log/magento.cron.log

* * * * * /usr/bin/php /var/www/html/magento2/update/cron.php >> /var/www/html/magento2/var/log/update.cron.log

* * * * * /usr/bin/php /var/www/html/magento2/bin/magento setup:cron:run >> /var/www/html/magento2/var/log/setup.cron.log

#~ MAGENTO END f73db5f5dcf223372d4c9fab56bef0c1730eece898fad5cbee0c313b46b0dd1f
Congratulations! That’s all there is to it – you have successfully installed and configured Magento 2 with Apache on CentOS 8.
 Of course, you don’t have to do any of this if you use one of our Magento VPS Hosting services, in which case you can simply ask our expert Linux admins to set all of this up for you, quickly and easily. They are available 24×7 and will take care of your request immediately.
PS. If you liked this post, please share it with your friends on the social networks using the buttons below, or simply leave a comment down in the comments section. Thank you.
The latest version of Magento 2 does NOT have the web wizard. Do you offer a blog for Magento 2 installation on Centos 8 via CLI without a web wizard?
To install Magento 2 through the command line use the below command and make sure to change the variables needed for the installation:
bin/magento setup:install –admin-firstname=”Your Firstname” –admin-lastname=”Your Lastname” –admin-email=”user@example.com” –admin-user=”Magentouser” –admin-password=”password” –db-name=”magento” –db-host=”localhost” –db-user=”magento” –db-password=”password” –language=en_US –currency=USD –timezone=Europe/London –cleanup-database –base-url=http://”your_domain.com”