
In this blog post, we will show you how to install the Symfony PHP Framework on Ubuntu 26.04 OS. Symfony is a popular open-source PHP framework used to build dynamic websites and web applications. It is commonly used for creating business systems, e-commerce platforms, APIs, and content management systems. Symfony follows the Model-View-Controller (MVC) architecture, which helps developers organize code and makes applications easier to maintain. It includes many reusable components, built-in security features, flexible routing, and powerful development tools that speed up the coding process. The framework is known for its stability, scalability, and strong community support. Symfony also integrates well with databases and third-party services, making it a reliable choice for developing secure, high-performance, and modern web applications.
Installing Symfony on Ubuntu 26.04 is a straightforward and takes about 10 minutes. Let’s get started!
Table of Contents
Prerequisites
- A server running Ubuntu 26.04 or any Linux OS
- User privileges: root or non-root user with sudo privileges
- A valid domain name with a pointed A record to the server IP address
Step 1. Update the system
Before we start installing Symfony, we need to update the system packages to their latest available versions. To do that, execute the following commands:

apt update -y && apt upgrade -y
Step 2. Install Apache Web Server
Apache is required to host your Symfony application by configuring the domain (or virtual host), receiving HTTP requests, forwarding them to PHP, and returning the generated responses to users.
To install the Apache web server, execute the commands below:
apt install apache2 -y
Once the web server is installed, we need to start and enable the apache2 service:
systemctl start apache2 && systemctl enable apache2
To check the status of the service, execute the following command:
systemctl status apache2
If everything is OK, you should receive the following output:
● apache2.service - The Apache HTTP Server
     Loaded: loaded (/usr/lib/systemd/system/apache2.service; enabled; preset: enabled)
     Active: active (running) since Wed 2026-07-08 17:12:01 CDT; 2h 6min ago
 Invocation: 48f1f026ae764e43a1b6bdd872d68553
       Docs: https://httpd.apache.org/docs/2.4/
   Main PID: 11941 (apache2)
     Status: "Total requests: 16; Idle/Busy workers 100/0;Requests/sec: 0.00211; Bytes served/sec:   3 B/sec"
      Tasks: 7 (limit: 3770)
     Memory: 20.9M (peak: 21.2M)
        CPU: 1.040s
     CGroup: /system.slice/apache2.service
Step 3. Install PHP and extensions
Since Symfony is a PHP framework, we need to install PHP with its extensions. The default PHP version included in the official Ubuntu 26.04 LTS repositories is PHP 8.5. To install it, execute the following command:
apt install php php-cli php-fpm php-json php-common php-mysql php-zip php-gd php-mbstring php-xml php-curl php-intl git unzip curl -y


Once installed, verify the installation with the command below:

php -v
You should get the following output:
root@host:~# php -v
PHP 8.5.4 (cli) (built: May 25 2026 12:19:37) (NTS)
Copyright (c) The PHP Group
Built by Ubuntu
Zend Engine v4.5.4, Copyright (c) Zend Technologies
    with Zend OPcache v8.5.4, Copyright (c), by Zend Technologies
Step 4. Install Composer
Composer is required for Symfony because it installs and autoloads Symfony’s components and all project dependencies, making the framework and third-party libraries work together automatically.
To install Composer, execute the following command:
sudo curl -sS https://getcomposer.org/installer | sudo php -- --install-dir=/usr/local/bin --filename=composer
Once done, you should receive this:
root@host:~# sudo curl -sS https://getcomposer.org/installer | sudo php -- --install-dir=/usr/local/bin --filename=composer
All settings correct for using Composer
Downloading...

Composer (version 2.10.2) successfully installed to: /usr/local/bin/composer
Use it: php /usr/local/bin/composer
To check the Composer version, just type composer in your terminal and agree to continue as root/super user:
Continue as root/super user [yes]? yes
   ______
  / ____/___  ____ ___  ____  ____  ________  _____
 / /   / __ \/ __ `__ \/ __ \/ __ \/ ___/ _ \/ ___/
/ /___/ /_/ / / / / / / /_/ / /_/ (__  )  __/ /
\____/\____/_/ /_/ /_/ .___/\____/____/\___/_/
                    /_/
Composer version 2.10.2 2026-07-01 11:24:45
Step 5. Create Symfony Project
One way to create a Symfony project is with Composer.
To do that, execute the following command:
#Enter in the Apache document root

cd /var/www/html

#Create Symfony project

composer create-project symfony/skeleton project_name
Once done, set the correct permissions:
chown -R www-data:www-data /var/www/html/project_name

find . -type d -exec chmod 755 {} \;

find . -type f -exec chmod 644 {} \;
Now, let’s go to the last step, where we will configure our Symfony project to be accessible via a domain name.
Step 6. Create Apache Virtual Host File
To create an Apache configuration file, execute the following command:
touch /etc/apache2/sites-available/symfony.conf
Open the file and paste the following lines of code
<VirtualHost *:80>
ServerName yourdomain.com
DocumentRoot /var/www/html/project_name/public

<Directory /var/www/html/project_name>
AllowOverride All
</Directory>

ErrorLog ${APACHE_LOG_DIR}/error.log
CustomLog ${APACHE_LOG_DIR}/access.log combined

</VirtualHost>
Save the file and close it.
Enable the Apache configuration files for Symfony along with the rewrite module.
a2enmod rewrite

a2ensite symfony.conf
Check the Apache2 syntax:
apachectl -t
You should receive the following output:
root@host:/var/www/html/project_name# apachectl -t
Syntax OK
If the syntax is OK, restart the Apache service.
systemctl restart apache2
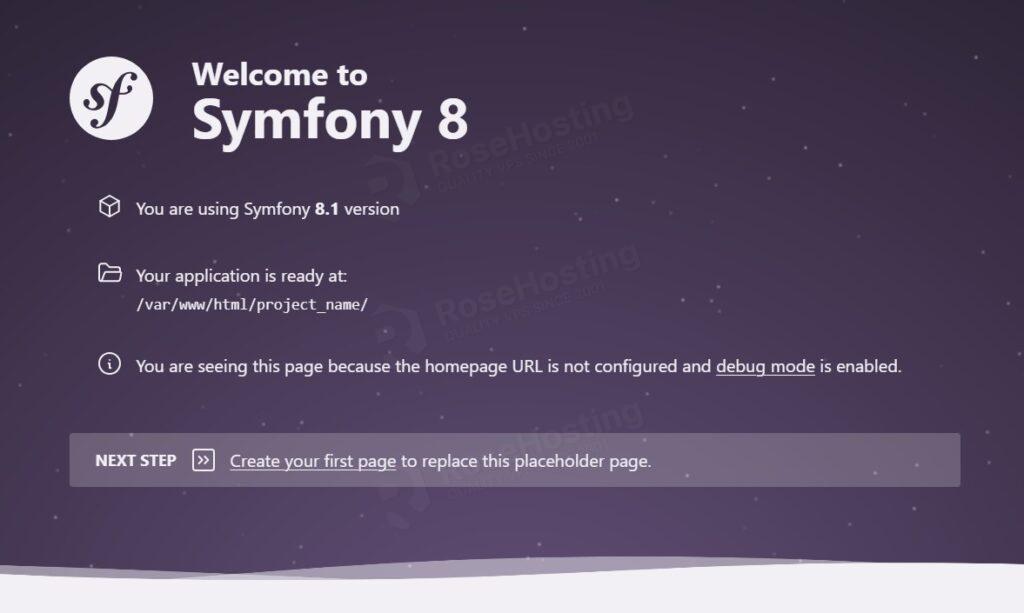
That’s it. Now you can access the Symfony project at http://yourdomain.com
In Conclusion
That’s it. You successfully installed the Symfony PHP Framework on Ubuntu 26.04.
Of course, you do not have to install it yourself if you have difficulty and are not familiar with Linux. All you have to do is sign up for one of our VPS hosting plans and submit a support ticket. Our admins are available 24/7 and will help you with any aspect of installing Symfony.
If you liked this post on how to install the Symfony PHP Framework on Ubuntu 26.04, please share it with your friends or leave a comment below.