Apache Tomcat (Or just Tomcat for short) is the most popular and widely-used Java application server. It is an open-source web server and servlet container developed by the Apache Software Foundation (ASF). In this tutorial, we will guide you through the steps of installing Tomcat 9 on an Ubuntu 20.04 VPS.

Tomcat is also an open-source software implementation of a subset of the Jakarta EE (formerly Java EE) technologies. Tomcat executes Java servlets and renders Web pages that include Java Server Page coding. By using Tomcat, you’re able to run your Java applications on a server that is designed to help you develop your Java applications faster and more efficiently. Let’s start installing Tomcat on our Ubuntu 20.04 VPS.
Table of Contents
Requirements
Make sure that your server meets the following minimum requirements:
- For the purposes of this tutorial, we will use a server running Ubuntu VPS 20.04 LTS.
- Full SSH root access, or a user with sudo privileges is also required.
- Java 8 or higher.
1. Getting Started
Log in to your Ubuntu 20.04 VPS using SSH:
ssh root@IP_Address -p Port_number
Make sure to replace “IP_Address” and “Port_number” with your server’s actual IP address and SSH port number.
Once logged in, you can check whether you have the proper Ubuntu version installed on your server with the following command:
# lsb_release -a
You should get this as your output:
Distributor ID: Ubuntu
Description: Ubuntu 20.04 LTS
Release: 20.04
Codename: focal
Then, run the following command to make sure that all installed packages on the server are updated to the latest available version.
# apt update && apt upgrade -y
2. Install Java
Tomcat 9 requires Java version 8 or higher.
We can check if Java is already installed using this command:
# which java
If there is no output, it means that Java is not installed on the server yet. We can install Oracle JDK or OpenJDK. We need to have Java version 8 or higher installed on your system to run Tomcat 9. We can install the default JDK, version 11, which is available on the built-in Ubuntu 20.04 repositories by using the following command:
# apt install default-jdk -y
Once installed, we can check the version using this command:
# java --version
root@ubuntu20:~# java --version
openjdk 11.0.7 2020-04-14
OpenJDK Runtime Environment (build 11.0.7+10-post-Ubuntu-3ubuntu1)
OpenJDK 64-Bit Server VM (build 11.0.7+10-post-Ubuntu-3ubuntu1, mixed mode, sharing)
3. Install Tomcat 9
When writing this tutorial, the latest stable Tomcat to download is version 9.0.35. You can navigate to https://tomcat.apache.org/download-90.cgi for more recent version, if any. To proceed with the installation, let’s download the binary distribution file first.
# wget https://downloads.apache.org/tomcat/tomcat-9/v9.0.35/bin/apache-tomcat-9.0.35.tar.gz -O tomcat.9.0.35.tar.gz
In this article, we will install Tomcat into the /opt/tomcat directory. Let’s create the directory and decompress the downloaded file there.
# mkdir /opt/tomcat
# tar xzvf tomcat.9.0.35.tar.gz -C /opt/tomcat --strip-components=1
4. Add a Tomcat user
It is not a good idea to run Tomcat as root, so for security reasons we will create a new system user:
# useradd -r tomcat -d /opt/tomcat --shell /bin/false
Once the Tomcat system user has been created, we need to update the ownership of the /opt/tomcat directory to tomcat user:
# chown tomcat: -R /opt/tomcat/
5. Create a Systemd Service File for Tomcat
Check the path of Tomcat’s home by running this command:
# update-java-alternatives -l
Output
root@ubuntu20:~# update-java-alternatives -l
java-1.11.0-openjdk-amd64 1111 /usr/lib/jvm/java-1.11.0-openjdk-amd64
We need the value of the third column for our Tomcat systemd file to set the JAVA_HOME environment variable.
# nano /etc/systemd/system/tomcat.service
Paste the following into the systemd service file, then save it.
[Unit]
Description=Apache Tomcat
After=network.target

[Service]
Type=forking

User=tomcat
Group=tomcat

Environment=JAVA_HOME=/usr/lib/jvm/java-11-openjdk-amd64
Environment=CATALINA_PID=/opt/tomcat/tomcat.pid
Environment=CATALINA_HOME=/opt/tomcat
Environment=CATALINA_BASE=/opt/tomcat
Environment="CATALINA_OPTS=-Xms512M -Xmx1024M -server -XX:+UseParallelGC"

ExecStart=/opt/tomcat/bin/startup.sh
ExecStop=/opt/tomcat/bin/shutdown.sh

ExecReload=/bin/kill $MAINPID
RemainAfterExit=yes

[Install]
WantedBy=multi-user.target
Save the changes, then start Tomcat.
# systemctl daemon-reload
# systemctl start tomcat
Tomcat should be started now, you can check it with this command:
root@ubuntu20:~# systemctl status tomcat
● tomcat.service - Apache Tomcat
Loaded: loaded (/etc/systemd/system/tomcat.service; disabled; vendor preset: enabled)
Active: active (running) since Mon 2020-06-01 03:43:31 CEST; 1h 14min ago
Process: 12975 ExecStart=/opt/tomcat/bin/startup.sh (code=exited, status=0/SUCCESS)
Main PID: 12997 (java)
Tasks: 30 (limit: 2286)
Memory: 253.4M
CGroup: /system.slice/tomcat.service
└─12997 /usr/lib/jvm/java-11-openjdk-amd64/bin/java -Djava.util.logging.config.file=/opt/tomcat/conf/logging.properties -Djava.util.logging.manager=org.ap>

Jun 01 03:43:31 ubuntu20 systemd[1]: Starting Apache Tomcat...
Jun 01 03:43:31 ubuntu20 startup.sh[12975]: Tomcat started.
Jun 01 03:43:31 ubuntu20 systemd[1]: Started Apache Tomcat.
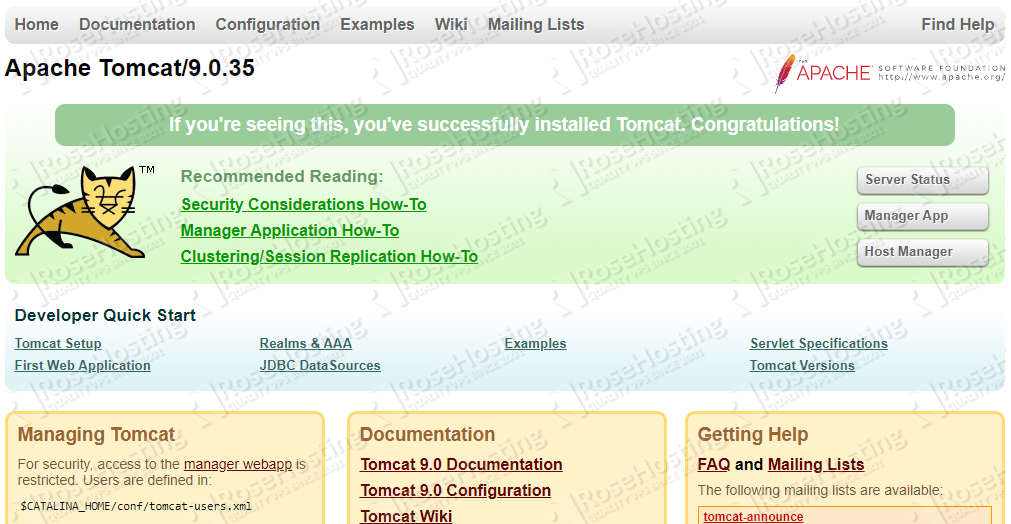
Now, you should be able to access Tomcat at http://your-server-IP:8080 .
In order to make Tomcat automatically run at boot, we need to enable the systemd service file. You can do so like this:
# systemctl enable tomcat
6. Configure Tomcat
In order to be able to access the Tomcat Manager, we need to create a user for Tomcat. Let proceed with editing the tomcat-users.xml file
# nano /opt/tomcat/conf/tomcat-users.xml
then add the following lines just before the closing line </tomcat-users>:
<role rolename="manager-gui" />
<role rolename="admin-gui" />changes
<user username="admin" password="M0d1fyth15" roles="manager-gui,admin-gui"/>
Don’t forget to replace M0d1fyth15 with an actual strong password.
We would need to make another configuration because by default Tomcat restricts access to the Manager and Host Manager, it only allows connection from the server IP address itself. To change the IP address restrictions on these, open the appropriate context.xml files.
To remove the restriction on the Manager App, we need to modify this /opt/tomcat/webapps/manager/META-INF/context.xml file. And, to remove the restriction on the Host Manager, we need to modify the /opt/tomcat/webapps/host-manager/META-INF/context.xml file.
Find these two lines in those files:
<Valve className="org.apache.catalina.valves.RemoteAddrValve"
         allow="127\.\d+\.\d+\.\d+|::1|0:0:0:0:0:0:0:1" />
Then comment them out. The lines should look like the following:
<!--
<Valve className="org.apache.catalina.valves.RemoteAddrValve"
         allow="127\.\d+\.\d+\.\d+|::1|0:0:0:0:0:0:0:1" />
-->
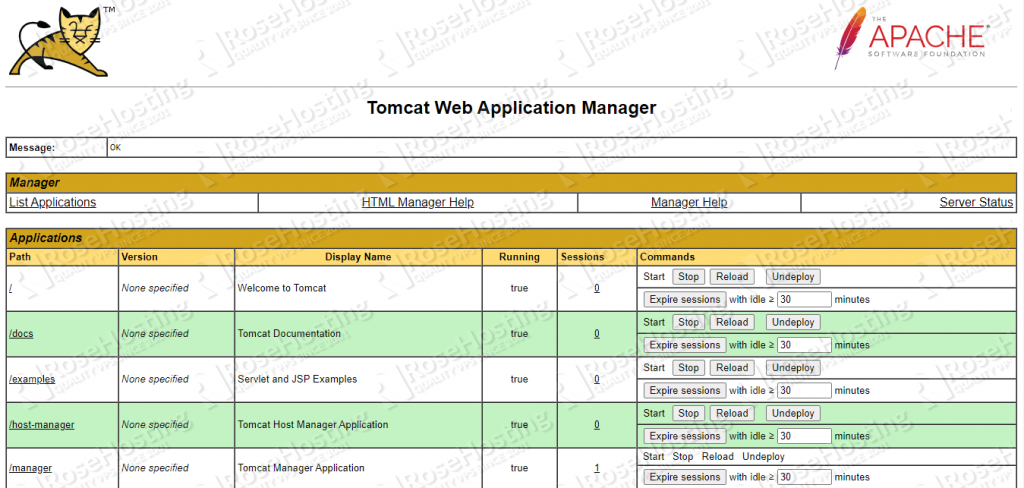
That’s it, you should be able to access Tomcat Manager and Host Manager using the user credentials that you created earlier.
That’s all you need to do – you now have a working install of Tomcat on your Ubuntu 20.04 VPS.

Developing applications that benefit from a server environment can be complex for developers that aren’t system administrators. That is where our Managed Tomcat hosting services come in. Our administrators can get you completely set up and running with your projects quickly and easily. They also maintain and keep everything running as it should, and if you have any requests, they can help you with that as well.
If this guide was useful to you and it helped you get Tomcat running on your system, please consider sharing this post on social networks with our share shortcuts, or let us know how your installation experience went by leaving a comment in our comment section. Thank you.