
Vaultwarden is a lightweight, fast, and cost-effective password management solution. Installing a password manager on AlmaLinux 10 is straightforward. As an unofficial rewrite of Bitwarden password manager, Vaultwarden allows you to manage passwords securely, share encrypted data, and control your data completely on a private server. With Vaultwarden, you get the convenience of Bitwarden without the additional costs. We can use Bitwarden clients to connect to our Vaultwarden server. We can also access it on multiple devices. In this article, we will show you how to install Vaultwarden as your password manager on AlmaLinux 10.
Table of Contents
Prerequisites
- A clean AlmaLinux 10 server
- SSH root access or a user with sudo privileges is required to set up the password manager on AlmaLinux 10.
Conventions
# – given commands should be executed with root privileges either directly as a root user or by use of sudo command
$ – given commands should be executed as a regular user
Step 1. Install Dependency
We need to install the dnf-plugins-core package, which provides the commands to manage your DNF repositories and set up the repository. Having these installed is important for setting up your password manager on AlmaLinux 10.
# dnf install dnf-plugins-core Step 2. Add Docker Repository
Docker is not available in the default AlmaLinux 10 repository. You’ll need to add the official Docker CE (Community Edition) repository to install it. In the previous step, we installed the dnf-plugins-core package, and now we should be able to execute the command below to add the Docker repository.
# dnf config-manager --add-repo https://download.docker.com/linux/centos/docker-ce.repoNow we can add the Docker repository. As you may realize, even though the URL says “CentOS,” it works perfectly for AlmaLinux because the two operating systems are binary compatible. This will help set up our password manager on AlmaLinux 10. We can proceed to the next step now.
Step 3: Install Docker Engine
In this step, we can install the Docker Engine and its related components by running this command:
# dnf install docker-ce docker-ce-cli containerd.io docker-buildx-plugin docker-compose-plugin -yDocker has been successfully installed, but it is not automatically running. As part of installing a password manager on AlmaLinux 10, we can run the command below to start it now and to enable it to automatically start every time we reboot our server.
# systemctl enable --now dockerStep 4. Add a System User
In this article, we will use a specific system user to run Docker. Let’s create a new user called ‘master’. This user will also be a member of Docker and the wheel/sudo group.
# useradd -G docker,wheel -s /bin/bash -m -d /opt/master masterNow, let’s give the user a password. Make sure to use a strong password when creating users for managing passwords on AlmaLinux 10.
# passwd masterWe will use this new user to execute the commands in the next steps, which is crucial when managing a password manager on AlmaLinux 10.
Step 5. Install Vaultwarden
In this step, let’s switch to the user ‘master’ we created earlier.
# su - masterThen, let’s create the directories we need.
$ mkdir ~/vaultwarden/{vw-data,caddy,caddy-config,caddy-data} -pNow, go to the vaultwarden directory, then create a docker-compose.yaml file.
$ cd ~/vaultwarden
$ nano docker-compose.yaml
Insert the following into the file:
services:
  vaultwarden:
    image: vaultwarden/server:latest
    container_name: vaultwarden
    restart: always
    environment:
      - WEBSOCKET_ENABLED=true
    volumes:
      - ./vw-data:/data

  caddy:
    image: caddy:2
    container_name: caddy
    restart: always
    ports:
      - "80:80"
      - "443:443"
    volumes:
      - ./caddy:/etc/caddy:ro
      - ./caddy-config:/config
      - ./caddy-data:/data
    environment:
      - DOMAIN=https://vaultwarden.yourdomain.com
      - EMAIL=you@yourdomain.com
      - LOG_FILE=/data/access.log
Save the file, then exit from the editor. We can now run the Docker Compose command in detached mode. Please note that the file above is a YAML file; you would need to pay attention to its indentation, or else you will have an issue when executing the Docker Compose command.
Now, installing Vaultwarden, a popular password manager on AlmaLinux 10, requires creating the Caddy configuration file.
$ nano ~/vaultwarden/caddy/CaddyfileInsert this content below into the file.
{$DOMAIN}:443 {
  log {
    level INFO
    output file {$LOG_FILE} {
      roll_size 10MB
      roll_keep 10
    }
  }

  # Get a cert by using the ACME HTTP-01 challenge.
  tls {$EMAIL}
  encode gzip

  # Headers to improve security.
  header {
  # Enable HSTS
  Strict-Transport-Security "max-age=31536000;"

  # Enable cross-site filter (XSS)
  X-XSS-Protection "1; mode=block"

  # Disallow the site to be rendered within a frame (clickjacking protection)
  X-Frame-Options "DENY"

  # Prevent search engines from indexing
  X-Robots-Tag "none"

  # Remove Caddy branding
  -Server
  }

  # Redirect notifications to the WebSocket.
  reverse_proxy /notifications/hub vaultwarden:3012
  reverse_proxy vaultwarden:80 {
       header_up X-Real-IP {remote_host}
  }
}
That’s it! We can now run the Docker Compose command in detached mode.
$ docker compose up -dThe command will show you an output like this:
[+] Running 12/12
 ✔ caddy Pulled                                                                                                                                                            7.6s
   ✔ 0368fd46e3c6 Pull complete                                                                                                                                                 2.2s
   ✔ 6e3cbe9aede8 Pull complete                                                                                                                                                 2.8s
   ✔ 50cbdd0ed56d Pull complete                                                                                                                                                 2.8s
   ✔ 9e3479dbb610 Pull complete                                                                                                                                                 3.6s
   ✔ 4f4fb700ef54 Pull complete                                                                                                                                                 3.8s
 ✔ vaultwarden Pulled                                                                                                                                                           7.3s
   ✔ 59e22667830b Pull complete                                                                                                                                                 2.2s
   ✔ cc18e03c8cd8 Pull complete                                                                                                                                                 2.9s
   ✔ f6e0865da50e Pull complete                                                                                                                                                 2.9s
   ✔ 6bec2bc6dc05 Pull complete                                                                                                                                                 3.3s
   ✔ aa7aba5b8287 Pull complete                                                                                                                                                 3.5s
[+] Running 3/3
 ✔ Network vaultwarden_default  Created                                                                                                                                         0.1s
 ✔ Container caddy              Started                                                                                                                                         0.3s
 ✔ Container vaultwarden        Started                                                                                                                                         0.3s
That’s it, Vaultwarden has been successfully installed, and you can access it at https://vaultwarden.yourdomain.com
Step 6. Configure Vaultwarden
Now, you can access Vaultwarden at https://vaultwarden.yourdomain.com, and you need to create an account before you can use it. Let’s open a web browser and create a new user now.
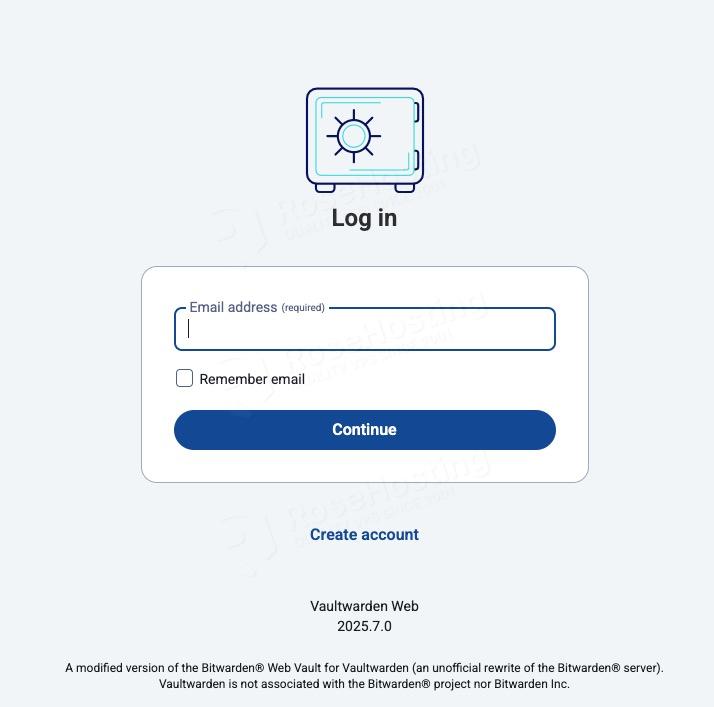
Click on the ‘Create Account’ link to create one.
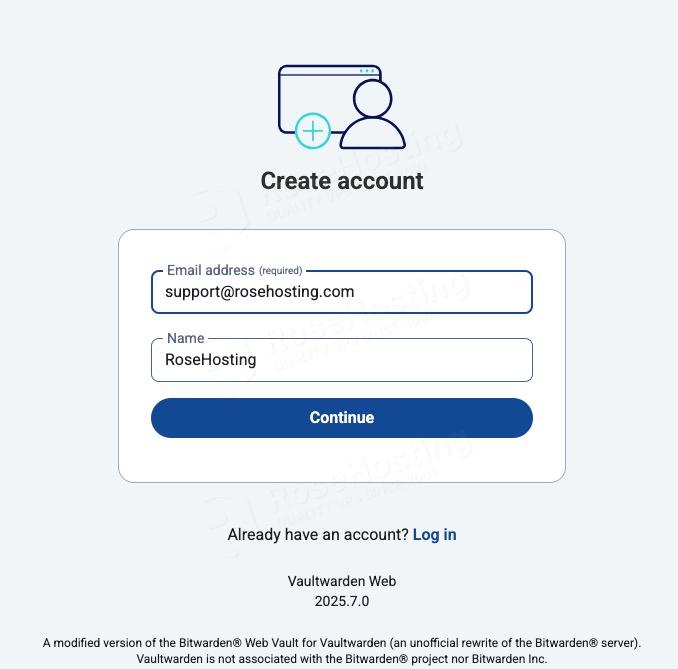
Type your name and email address, then click Continue to proceed.
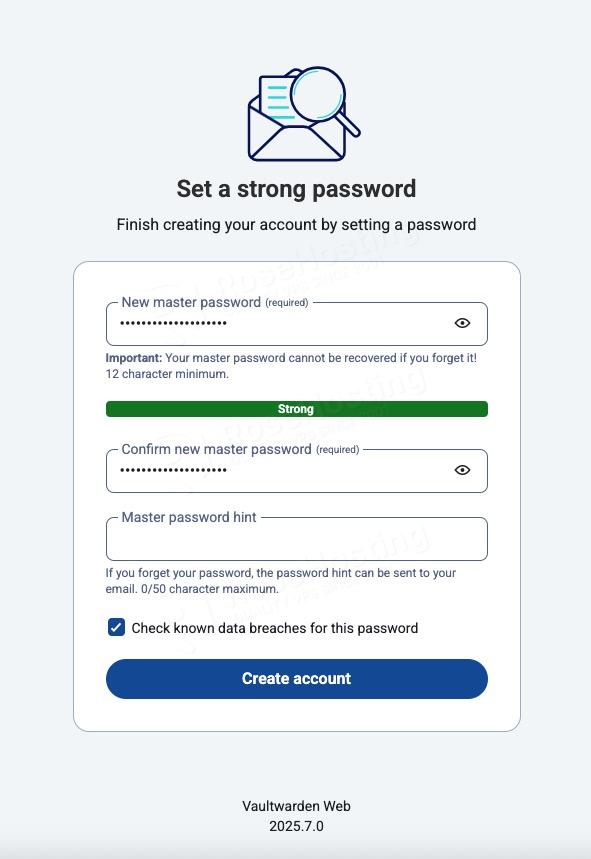
Create a strong password with a minimum of 12 characters for your account on this password manager installed on AlmaLinux 10, then click on the ‘Create Account’ button.
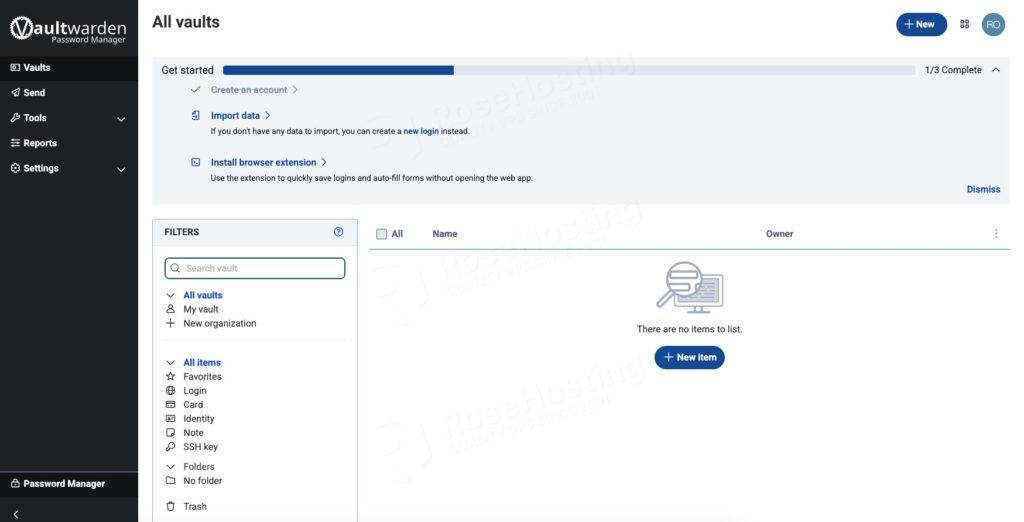
A new account has been created, and you should be in the Vaultwarden dashboard now. Here, you can start adding passwords to your vaults.
Step 7. Connect to Vaultwarden
At this point, you have a working Vaultwarden server, and you can use a Vaultwarden client like the Bitwarden extension for Chrome. You should be able to find the extension at https://chromewebstore.google.com/category/extensions
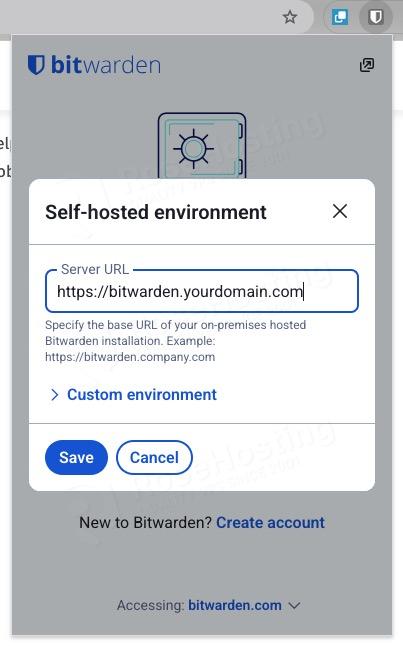
After the extension is installed, you can connect it to your Vaultwarden server.
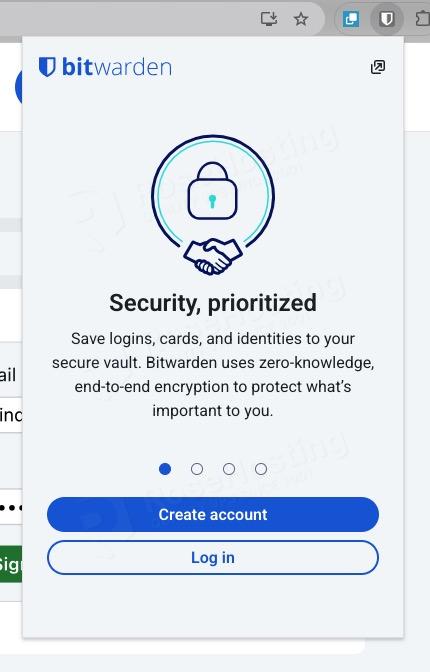
Since we are going to use our own Vaultwarden server, make sure to choose the ‘self-hosted’ server.
Once connected, you will notice that your vault is empty.
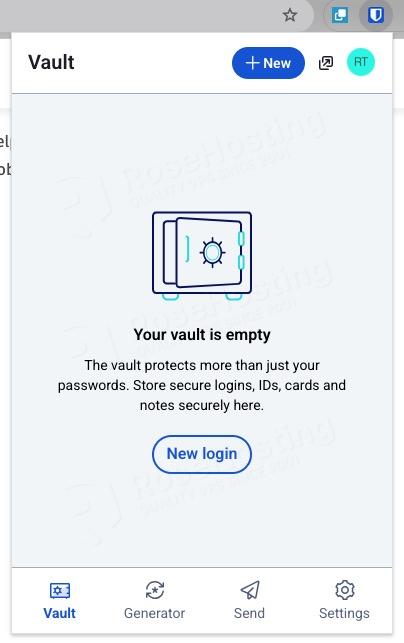
Your Vaultwarden vault is empty because you have not added any passwords yet. You can start adding them now to your password manager on AlmaLinux 10.
Conclusion
That’s it! You have successfully installed and configured Vaultwarden on your AlmaLinux 10 server.
If you are using our Vaultwarden hosting and want to use Vaultwarden as your password manager, you don’t need to follow this tutorial; simply submit a ticket, and one of our experienced administrators will help you install Vaultwarden on AlmaLinux 10. And if you liked this post about how to install and configure Vaultwarden on AlmaLinux 10, please share it with your friends on the social networks using the share buttons below, or simply leave a comment in the comments section. Thanks.