WordPress is a free, open-source, and one of the best content management systems around the world. It is based on PHP and uses MySQL/MariaDB as a database backend. It provides a simple and easier way to create a simple to advanced blog or website. It provides a web-based frontend to create and manage a website.
OpenLiteSpeed is a high-performance, lightweight, open-source HTTP server edition of LiteSpeed Web Server Enterprise.
In this guide, we will show you how to install WordPress multisite with OpenLiteSpeed on Ubuntu 20.04 server. A multisite network is a group of sites sharing the same WordPress installation and could also have the same plugins and themes.
Table of Contents
Prerequisites
- For the purposes of this tutorial, we will be using an Ubuntu 20.04 VPS.
- root SSH access or a regular user with sudo privileges
Step 1: Connect to Your Server
Log in to your Ubuntu 20.04 VPS with SSH as a root user or as a regular user with sudo privileges:
ssh root@IP_Address -p Port_Number
Of course, you will need to replace IP_Address and Port_Number with your actual server IP address and SSH port number.
Then, run the following command to make sure that all installed packages on the server are updated to the latest available version:
apt update && sudo apt upgrade
Step 2: Download and Install OpenLiteSpeed
The following command will add the necessary repository to your server for the OpenLiteSpeed server installation.
wget -O - http://rpms.litespeedtech.com/debian/enable_lst_debain_repo.sh | bash
Run the following command to install the latest version of the OpenLiteSpeed server.
apt install openlitespeed
Once the installation is complete, you can start the OpenLiteSpeed service with the following command:
systemctl start lshttpd
To verify if the OpenLiteSpeed service is up and running, run the following command:
systemctl status lshttpd
Output:
● lshttpd.service - OpenLiteSpeed HTTP Server
Loaded: loaded (/etc/systemd/system/lshttpd.service; enabled; vendor preset: enabled)
Active: active (running)
Process: 4124 ExecStart=/usr/local/lsws/bin/lswsctrl start (code=exited, status=0/SUCCESS)
Main PID: 4157 (litespeed)
CGroup: /system.slice/lshttpd.service
├─4157 openlitespeed (lshttpd - main)
├─4166 openlitespeed (lscgid)
├─4195 openlitespeed (lshttpd - #01)
└─4196 lsphp
We also recommend enabling OpenLiteSpeed to start on server boot:
systemctl enable lshttpd
By default, OpenLiteSpeed listens on port 8088. It is recommended that you change the default port to 80. To do so, edit the OpenLiteSpeed default configuration file:
nano /usr/local/lsws/conf/httpd_config.conf
Find the following lines:
listener Default{
address *:8088
secure 0
map Example *
}
And, replace the port 8088 to 80:
listener Default{
address *:80
secure 0
map Example *
}
Save and close the file, then restart the OpenLiteSpeed service to apply the changes:
systemctl restart lshttpd
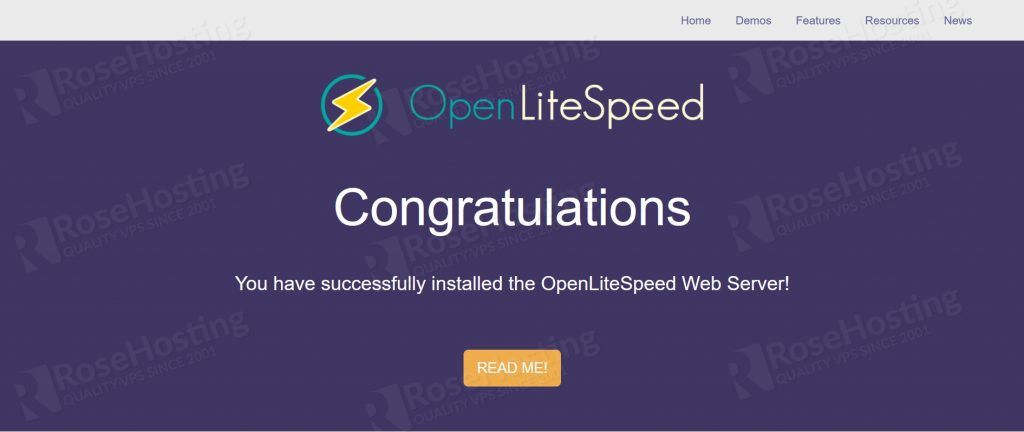
Open your browser and type the server IP address http://your-ip-address You should see the OpenLiteSpeed default page:
Step 3: Create OpenLiteSpeed Admin User
The OpenLiteSpeed server has an admin dashboard. To access it securely, you need to create an admin account and set a password:
/usr/local/lsws/admin/misc/admpass.sh
Set your admin username and password as shown below:
Please specify the user name of administrator.
This is the user name required to login the administration Web interface.

User name [admin]: admin

Please specify the administrator's password.
This is the password required to login the administration Web interface.

Password:
Retype password:
Administrator's username/password is updated successfully!
Step 4: Install and Configure MariaDB Server
Run the following command to install the latest MariaDB server from the official Ubuntu repositories:
apt install mariadb-server
Once it is installed, start the MariaDB service and enable it to automatically start up after the server boots up:
systemctl start mariadb
systemctl enable mariadb
After the installation is completed, you can improve the security of your MySQL server, by running the mysql_secure_installation script:
mysql_secure_installation
To start the process, the command will ask you to enter the current MySQL root password. Just press the [Enter] key once, as there is no default password for MySQL.
Step 5: Create MariaDB Database and User
Next, we need to create a database and user for the WordPress installation.
First, log in to MariaDB with the following command:
mysql -u root -p
Once login, create a database and user with the following command:
MariaDB [(none)]> CREATE DATABASE wpdb;
MariaDB [(none)]> CREATE USER 'wpuser'@'localhost' IDENTIFIED BY 'PASSWORD';
Note: Don’t forget to replace ‘PASSWORD‘ with an actual, strong password.
Grant all the privileges to the WordPress database:
MariaDB [(none)]> GRANT ALL ON wpdb.* TO 'wpuser'@'localhost' WITH GRANT OPTION;
Flush the privileges and exit from the MariaDB with the following command:
MariaDB [(none)]> FLUSH PRIVILEGES;
MariaDB [(none)]> EXIT;
Step 6: Install PHP and Modules
By default, OpenLiteSpeed is configured to use PHP 7.3. To install a newer PHP version along with all the necessary modules for WordPress, run the following command:
apt install lsphp80 lsphp80-mysql lsphp80-common lsphp80-curl lsphp80-imagick
Next, you will need to configure OpenLiteSpeed to use PHP version 8.0 instead of 7.3. You can do it by editing the httpd_config.conf file:
nano /usr/local/lsws/conf/httpd_config.conf
Find the following path lsphp73/bin/lsphp and replace it with the following path lsphp80/bin/lsphp
Save and close the file, then restart the LiteSpeed service to apply the changes:
systemctl restart lshttpd
Step 7: Install WordPress
Let’s download the latest WordPress version from the official WordPress site:
wget -c http://wordpress.org/latest.tar.gz
After downloading WordPress, extract it in the /usr/local/lsws/Example/html/ directory with the following command:
tar xvzf latest.tar.gz -C /usr/local/lsws/Example/html/
The WordPress files will be now placed in the wordpress directory at /usr/local/lsws/Example/html/wordpress
We also need to set the correct permissions of this directory so our OpenLiteSpeed server can access the files in it:
chown -R nobody:nogroup /usr/local/lsws/Example/html/wordpress
Next, run the following command to create a WordPress configuration file wp-config.php .
cd /usr/local/lsws/Example/html/wordpress
mv wp-config-sample.php wp-config.php
Now open the wp-config.php file:
nano wp-config.php
Then update the database settings, replacing database_name_here, username_here and password_here with your own details:
/** The name of the database for WordPress */
define('DB_NAME', 'database_name_here');

/** MySQL database username */
define('DB_USER', 'username_here');

/** MySQL database password */
define('DB_PASSWORD', 'password_here');

/** MySQL hostname */
define('DB_HOST', 'localhost');
Go to the bottom section and you’ll see /* That's all, stop editing! Happy blogging. */. Add the following line below that line.
define('WP_ALLOW_MULTISITE', true);
Save and exit the file.
Step 8: Configure OpenLiteSpeed
First, open your favorite browser and browse to OpenLiteSpeed admin panel at: https://your-ip-address:7080
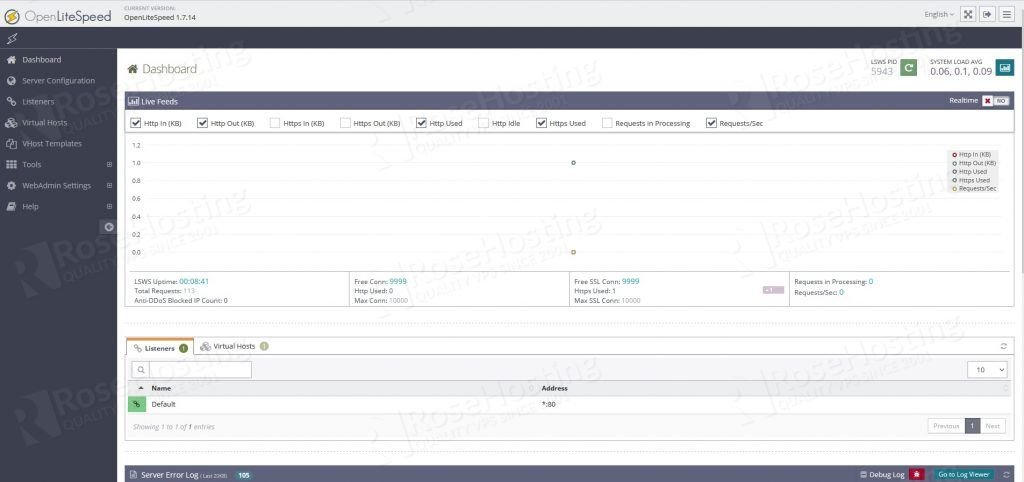
Enter your admin username and password and click on the Login button. You should see the OpenLiteSpeed dashboard on the following page:
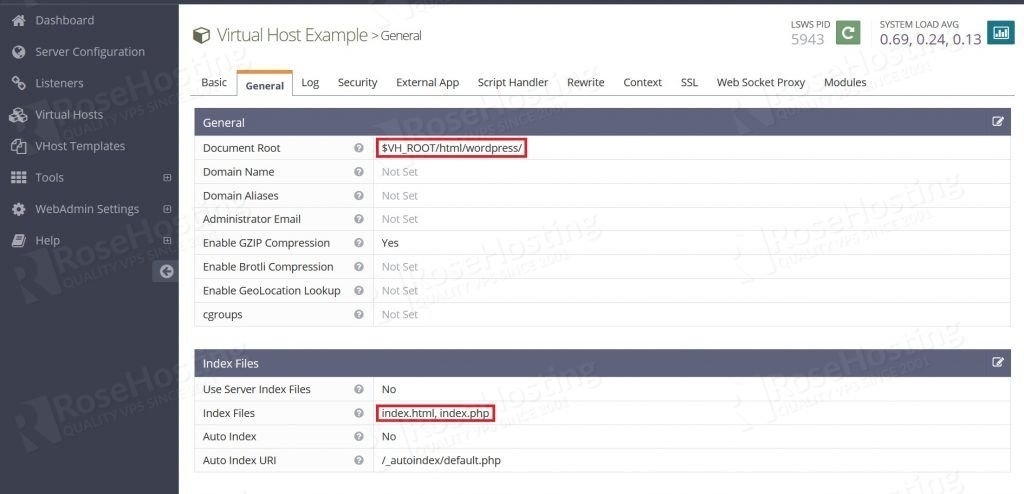
Navigate to Virtual Hosts > Example > General and modify:
Document Root:$VH_ROOT/html/wordpress/
Index Files: index.html, index.php
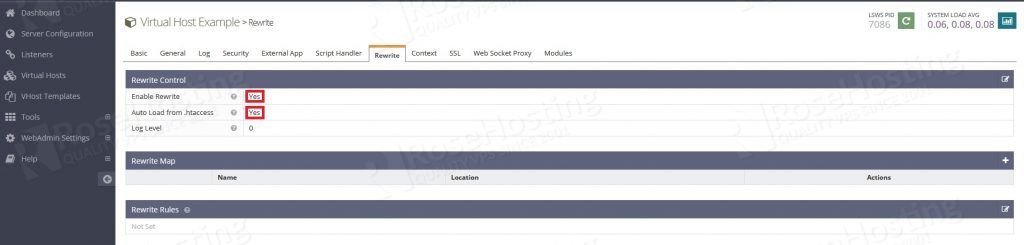
Navigate to Virtual Hosts > Example > Rewrite and modify:
Enable Rewrite:Yes
Auto Load from .htaccess: Yes
Step 9: Enable WordPress Multisite
To finish the WordPress installation, open your browser, navigate to: https://your-ip-address :
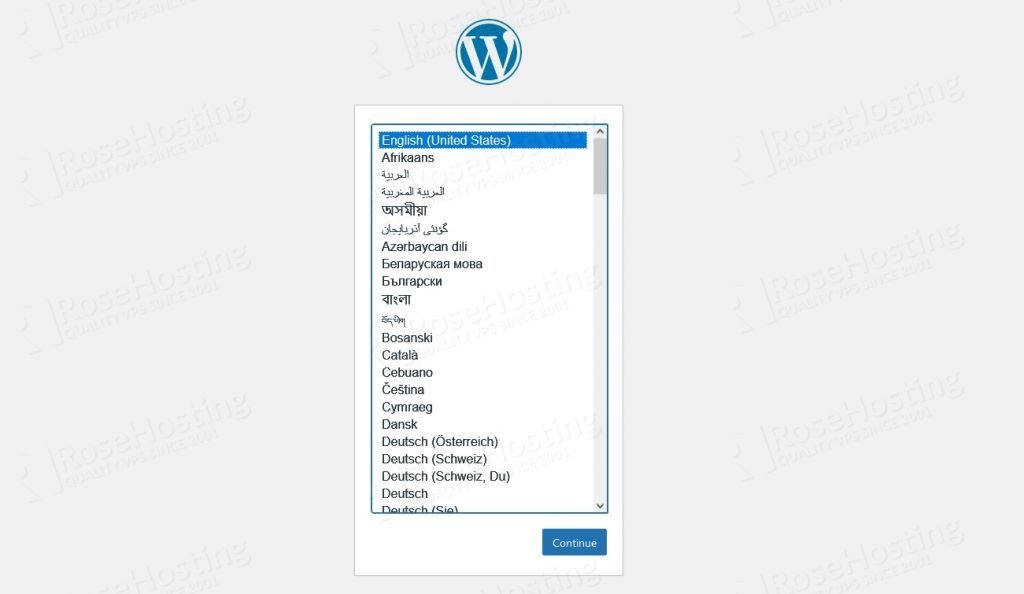
Select your Language and click on the Continue button. You should see the following page:
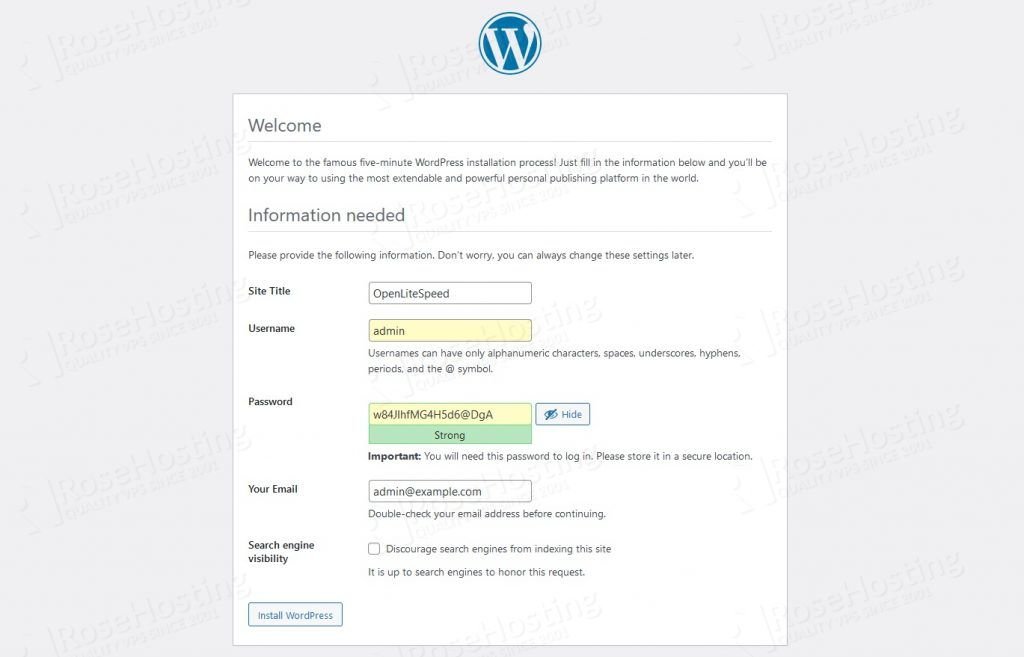
Provide your Site name, admin username, password, and click on the Install WordPress button. You should see the following page:
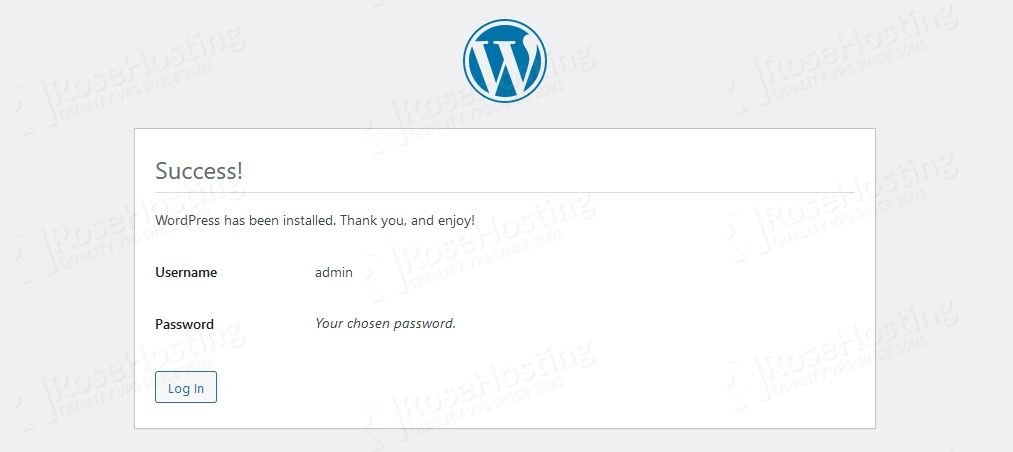
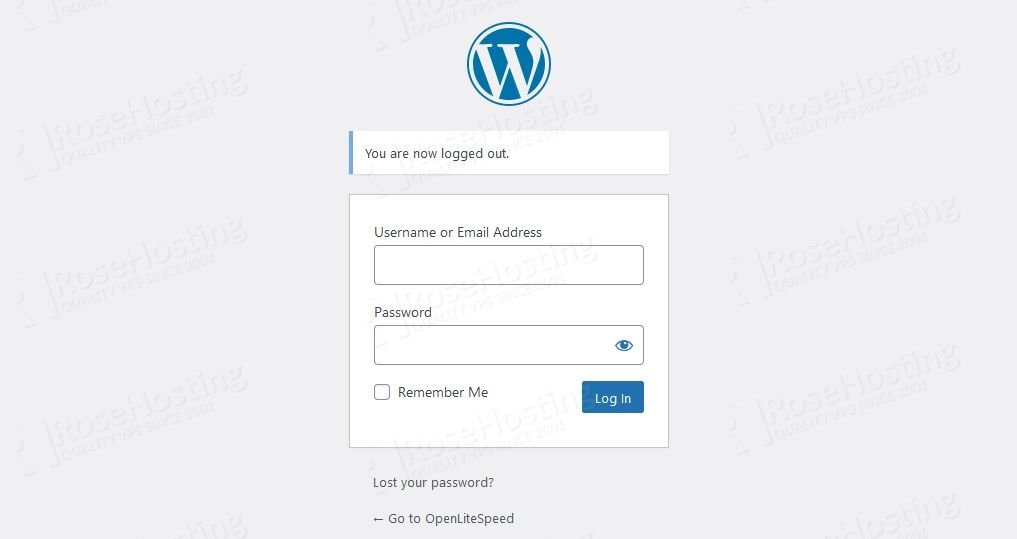
Click on the Login button. You will be redirected to the WordPress admin login page:
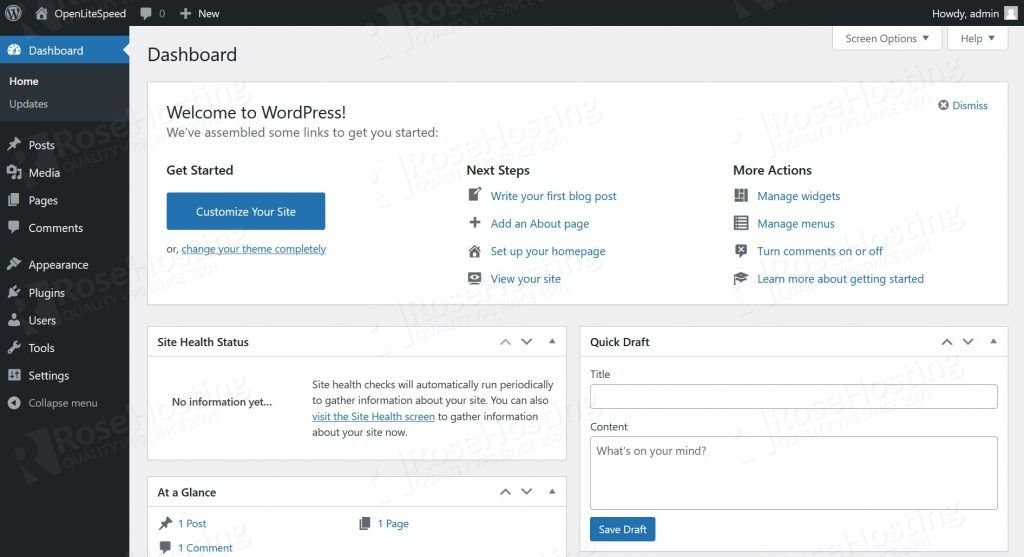
Once you log in, you will be taken to the WordPress administration dashboard:
So you can enable WordPress multisite feature you should see an item, labeled Network Setup, under the Tools menu. Enter the required details, then Click Install.

The next page appears as shown below:
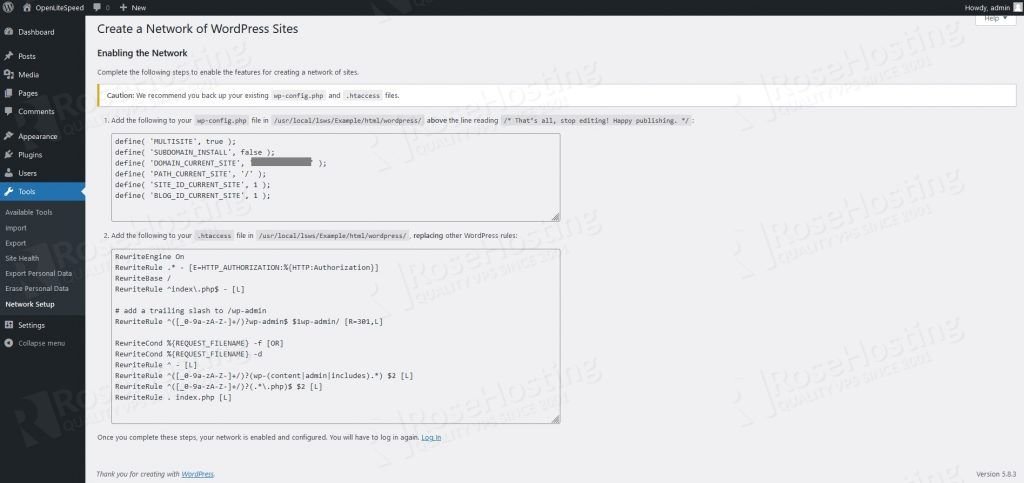
Add the following to your wp-config.php file in /usr/local/lsws/Example/html/wordpress/ above the line reading /* That’s all, stop editing! Happy publishing. */:
define( 'MULTISITE', true );
define( 'SUBDOMAIN_INSTALL', false );
define( 'DOMAIN_CURRENT_SITE', '192.168.2.131' );
define( 'PATH_CURRENT_SITE', '/' );
define( 'SITE_ID_CURRENT_SITE', 1 );
define( 'BLOG_ID_CURRENT_SITE', 1 );
Replace all the lines to your .htaccess file in the /usr/local/lsws/Example/html/wordpress/ directory:
RewriteEngine On
RewriteRule .* - [E=HTTP_AUTHORIZATION:%{HTTP:Authorization}]
RewriteBase /
RewriteRule ^index\.php$ - [L]

# add a trailing slash to /wp-admin
RewriteRule ^([_0-9a-zA-Z-]+/)?wp-admin$ $1wp-admin/ [R=301,L]

RewriteCond %{REQUEST_FILENAME} -f [OR]
RewriteCond %{REQUEST_FILENAME} -d
RewriteRule ^ - [L]
RewriteRule ^([_0-9a-zA-Z-]+/)?(wp-(content|admin|includes).*) $2 [L]
RewriteRule ^([_0-9a-zA-Z-]+/)?(.*\.php)$ $2 [L]
RewriteRule . index.php [L]
Log into your WordPress Admin Dashboard once again.
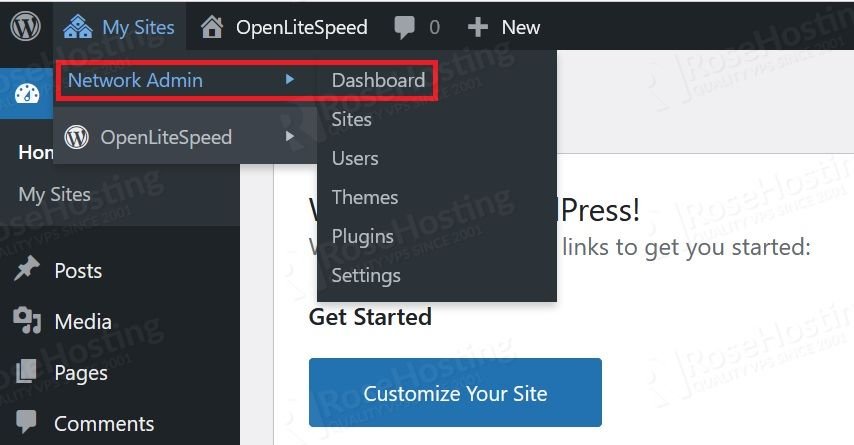
Go to My Sites > Network Admin > Click Dashboard as shown below:
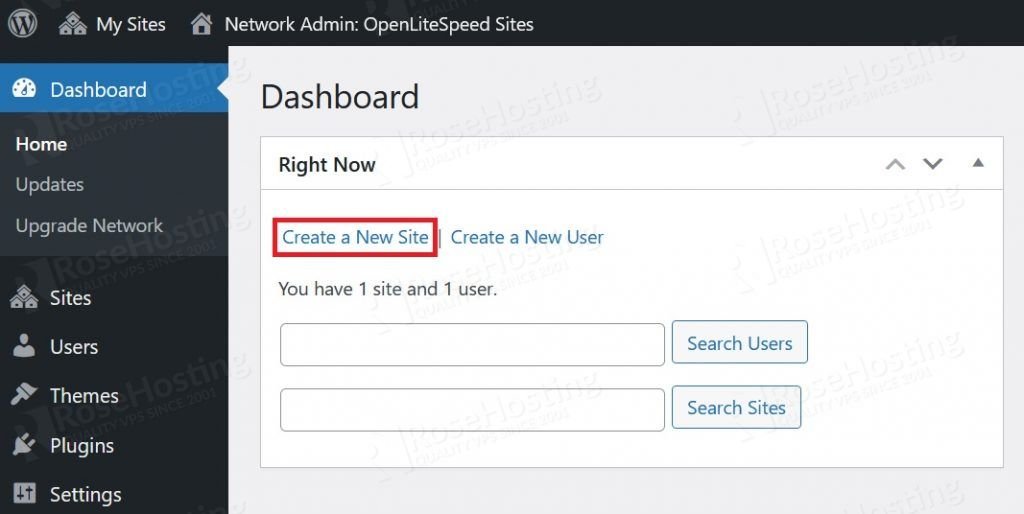
At the network multisite dashboard, Click Create New Site to start creating your new site:
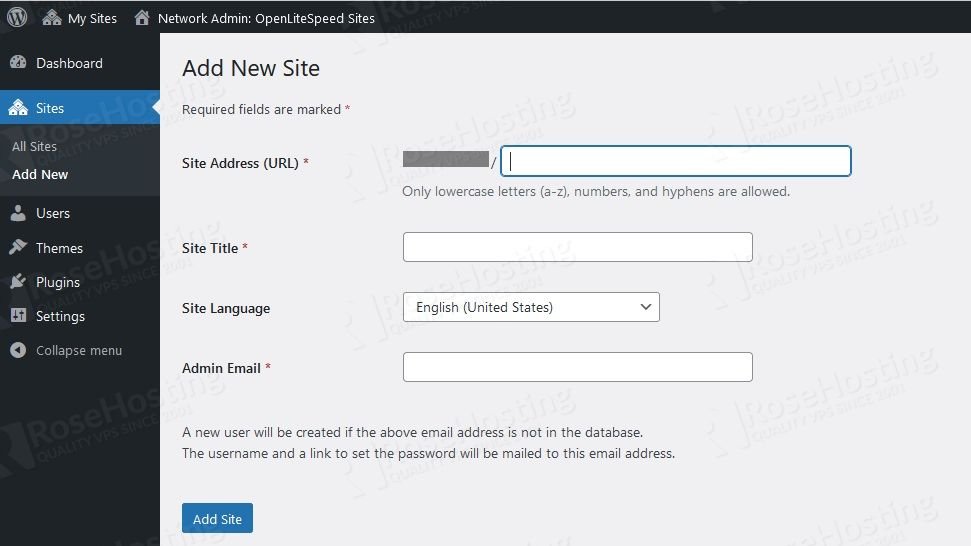
Then enter details of your new site:
Congratulations! WordPress multisite has been successfully installed on your server. Now, you can create as many sites as you want.
Of course, you don’t have to install WordPress multisite with OpenLiteSpeed server on Ubuntu 20.04, if you use one of our Optimized WordPress Hosting services, in which case you can simply ask our expert system administrators to install WordPress multisite with OpenLiteSpeed server on Ubuntu 20.04 for you. They are available 24×7 and will take care of your request immediately.
PS. If you liked this post on how to install WordPress multisite with OpenLiteSpeed server on Ubuntu 20.04, please share it with your friends on the social networks using the share shortcuts below, or simply leave a comment in the comments section. Thanks.
You to update this article.
Most VPS now have UFW installed. So before access port 7080, you would need to allow it first using the command:
ufw allow 7080
Ideally, you can also make sure that ports 80, 443 are also allowed.
Hope you Update it and make it available with a YouTube link.