
Nextcloud is an open-source, flexible, and self-hosted cloud storage service. It provides an alternative solution for online offices through its integration with Collabora. Collabora Online is a powerful online office based on LibreOffice software. It is a great open-source solution for enterprises that are looking for a robust office suite in the cloud.
With Nextcloud installed on your own server, you will know where your data is stored, who accesses it, and when it was last updated. In this tutorial, we will show you how to integrate Collabora Online with Nextcloud on Ubuntu 20.04.
Table of Contents
Prerequisites
Ubuntu 20.04 VPS
Nextcloud
SSH access with root privileges or a regular system user with sudo privileges
Log in to the server
First, log in to your Ubuntu 20.04 server through SSH as the root user or any other user with sudo privileges:
ssh root@IP_Address -p Port_number
You will need to replace ‘IP_Address‘ and ‘Port_number‘ with your server’s respective IP address and SSH port number. Additionally, replace ‘root’ with the username of the system user with sudo privileges.
You can check whether you have the proper Debian version installed on your server with the following command:
$ lsb_release -a
You should get this output:
No LSB modules are available.
Distributor ID: Ubuntu
Description: Ubuntu 20.04.3 LTS
Release: 20.04
Codename: focal
Before starting, you have to make sure that all Ubuntu OS packages installed on the server are up to date. You can do this by running the following commands:
$ sudo apt update -y
$ sudo apt upgrade -y
Step 1. Install Collabora
In this article, we will show you how to install Collabora from the Ubuntu repository. This article assumes that you already have a working Nextcloud instance. If you do not have it, you can follow our tutorial on how to install Nextcloud on Ubuntu 20.04 here.
First, let’s install dependencies.
$ sudo apt install apt-transport-https ca-certificates
Next, we will add the Collabora Online official repository, let’s start this by importing the signing key.
$ cd /usr/share/keyrings
$ sudo wget https://collaboraoffice.com/downloads/gpg/collaboraonline-release-keyring.gpg
Then, let’s create a package source file /etc/apt/sources.list.d/collaboraonline.sources
$ sudo nano /etc/apt/sources.list.d/collaboraonline.sources
Add the following contents to the file
Types: deb
URIs: https://www.collaboraoffice.com/repos/CollaboraOnline/CODE-ubuntu2004
Suites: ./
Signed-By: /usr/share/keyrings/collaboraonline-release-keyring.gpg
Save the file then exit.
Now, we need to download the package information from the newly added source above.
$ sudo apt update
Finally, we can install Collabora Online Development Edition by running the command below.
$ sudo apt install coolwsd code-brand
That’s it. Collabora Online Development Edition has been successfully installed on your Ubuntu 20.04 server.
Step 2. Configure Collabora
By default, the Collabora Online Socket Daemon enables a TLS connection. So, upon installation, when checking the daemon status, it will return an error or it fails to start because the service is unable to locate the certificate file.
$ sudo systemctl status coolwsd

To get this fixed, we can disable TLS in coolwsd and enable the TLS termination at the reverse proxy.
$ sudo coolconfig set ssl.enable false
$ sudo coolconfig set ssl.termination true
Now, to allow connection from your Nextcloud service, we need to run this command.
$ sudo coolconfig set storage.wopi.host nextcloud.yourdomain.com
Please make sure you replace nextcloud.yourdomain.com with your actual domain/subdomain that hosts your Nextcloud.
The changes made by running the commands above will be written to /etc/coolwsd/coolwsd.xml.
To create an administrator user and its password, you can run this command
$ sudo coolconfig set-admin-password
The output will be like this:
Enter admin username [admin]:
Enter admin password:
Confirm admin password:
Saving configuration to : /etc/coolwsd/coolwsd.xml …
Saved
Every time you make changes to the /etc/coolwsd/coolwsd.xml file, you need to restart the Collabora daemon.
$ sudo systemctl restart coolwsd
$ sudo systemctl status coolwsd

As seen in the picture, the Collabora daemon is now running.
Step 3. Configure Reverse Proxy
In this article, we will use Apache as the reverse proxy to Collabora. The connection between Nexcloud and Collabora should be established through a TLS enabled connection. To achieve this we will create an Apache virtual host and install an SSL certificate for it.
$ sudo nano /etc/apache2/sites-available/collabora.yourdomain.com.conf
Then, insert the following into the file.
<VirtualHost *:80>
 ServerName collabora.yourdomain.com
 AllowEncodedSlashes NoDecode
 ProxyPreserveHost On


 # static html, js, images, etc. served from coolwsd
 # browser is the client part of Collabora Online
 ProxyPass           /browser http://127.0.0.1:9980/browser retry=0
 ProxyPassReverse    /browser http://127.0.0.1:9980/browser


 # WOPI discovery URL
 ProxyPass           /hosting/discovery http://127.0.0.1:9980/hosting/discovery retry=0
 ProxyPassReverse    /hosting/discovery http://127.0.0.1:9980/hosting/discovery


 # Capabilities
 ProxyPass           /hosting/capabilities http://127.0.0.1:9980/hosting/capabilities retry=0
 ProxyPassReverse    /hosting/capabilities http://127.0.0.1:9980/hosting/capabilities


 # Main websocket
 ProxyPassMatch      "/cool/(.*)/ws$"      ws://127.0.0.1:9980/cool/$1/ws nocanon


 # Admin Console websocket
 ProxyPass           /cool/adminws ws://127.0.0.1:9980/cool/adminws


 # Download as, Fullscreen presentation and Image upload operations
 ProxyPass           /cool http://127.0.0.1:9980/cool
 ProxyPassReverse    /cool http://127.0.0.1:9980/cool
 # Compatibility with integrations that use the /lool/convert-to endpoint
 ProxyPass           /lool http://127.0.0.1:9980/cool
 ProxyPassReverse    /lool http://127.0.0.1:9980/cool
</VirtualHost>
Replace collabora.yourdomain.com with your own domain or subdomain. Save the file and exit, then enable the virtual host.
$ sudo a2ensite collabora.yourdomain.com
Before running the command, make sure you replace collabora.yourdomain.com with the actual domain/subdomain you use to host Collabora.
Next, let’s enable some Apache modules to be able to proxy the traffic using Apache.
$ sudo a2enmod proxy proxy_http proxy_wstunnel
After making the changes above, we need to restart Apache
$ sudo systemctl restart apache2
Step 4. Install SSL Certificate
We are going to install an SSL certificate for Collabora using the free SSL certificate from Lets Encrypt.
$ sudo apt install python3-certbot-apache
Once installed, you can run the command and follow the instruction to install an SSL certificate.
$ sudo certbot
Step 5. Integrate Collabora
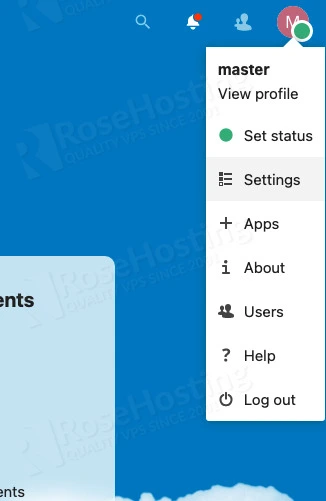
In your Nextcloud dashboard, click on your username on the top right, then click Settings
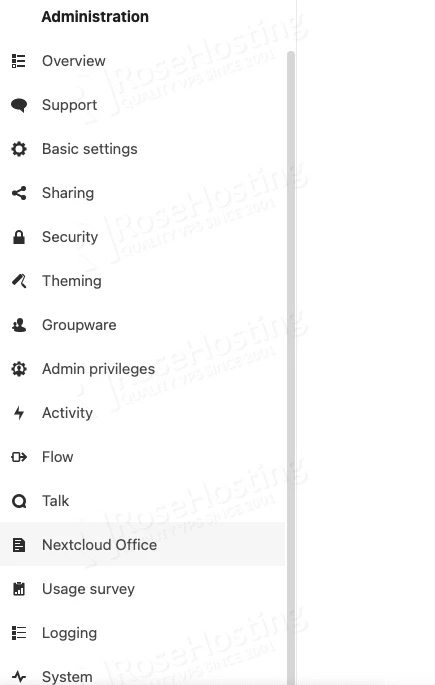
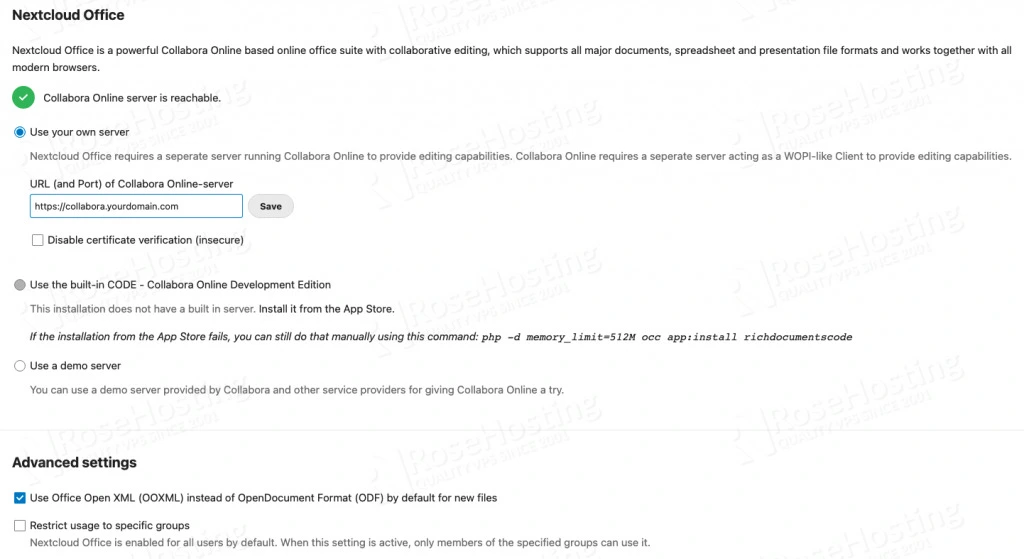
Under Administration on the left menu, click Nextcloud Office then tick ‘Use your own server’. In the blank field, type your Collabora Online URL then click the SAVE button.
In the advanced settings part, you can also use Office Open XML as the default format, this will make the files created in your Nextcloud compatible with Microsoft Office software.
That’s it. You can test the integration by creating a new file, for example, we can create a spreadsheet.
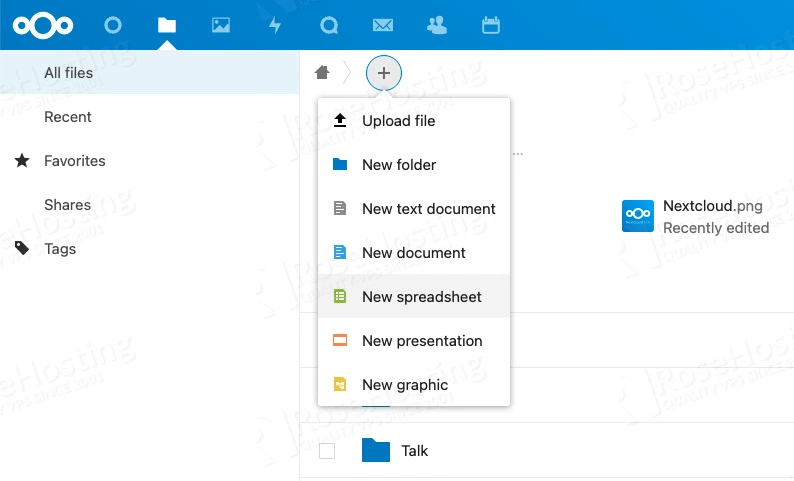
The new spreadsheet file will be opened, and we can start working on it.

Congratulations! You have successfully integrated Collabora Online with Nextcloud on Ubuntu 20.04.
Of course, if you are one of our Ubuntu Hosting customers, you don’t have to integrate Collabora Online with Nextcloud on Ubuntu 20.04. on your own – simply ask our admins, sit back, and relax. Our admins will integrate Collabora Online with Nextcloud on Ubuntu 20.04 for you immediately, along with many useful optimizations that we can do for you. Integrating Collabora Online with Nextcloud is not just about the work, we can also help you with optimizing your Nextcloud instance if you have a managed VPS with us.
If you liked this post about how to integrate Collabora Online with Nextcloud on Ubuntu 20.04, please share it with your friends on social networks, or simply leave a comment in the comments section. Thanks.
THANK YOU, work for me! from INDONESIA.