Django is an open-source web framework written in Python. It is a popular all-in-one web framework and one of the top choices for many developers. Django offers many advantages, such as MVT (Model View Template) architecture, automatic admin panel, and powerful ORM (Object Relational Mapping) database support. It also offers awesome debugging tools for developers. In this tutorial, we will show you how to install Django with PostgreSQL as the database storage instead of the default SQLite, Nginx as the reverse proxy, and Gunicorn as the application server on Ubuntu 20.04.
Table of Contents
Prerequisites
- An Ubuntu 20.04 VPS
- SSH access with root privileges
Step 1. Log in to the server
First, log in to your Ubuntu 20.04 server through SSH as the root user:
ssh root@IP_Address -p Port_number
You will need to replace ‘IP_Address‘ and ‘Port_number‘ with your server’s respective IP address and SSH port number. Additionally, replace ‘root’ with the username of the admin account if necessary.
Before starting, you have to make sure that all Ubuntu OS packages installed on the server are up to date. You can do this by running the following commands:
# apt update -y
# apt upgrade -y
Step 2. Create a system user
Once logged in to Ubuntu 20.04 as root, we will create a new system user and grant it with sudo privileges. We will also use this user to complete this installation. In this tutorial, we will create a new system user called ‘master’, you can choose any username you like.
# adduser master
Once created, let’s run this command to add the new user to sudo group. In Ubuntu, users who are members of sudo group are allowed to run sudo commands.
# usermod -aG sudo master
We will also add user master to our www-data group
# usermod -aG www-data master
Now, we can log in as the new user ‘master’
# su - master
Step 3. Install Packages
To start this, we will install every required package from the repository. To install Nginx, PostgreSQL, Python from the repository, we can run this command:
$ sudo apt install postgresql postgresql-contrib python3-pip python3-dev libpq-dev nginx -y
Step 4. Add Database and Database User
During the PostgreSQL installation, a system user named postgres was created as the default administrative user. We need to use this user to log in to the PostgreSQL shell and perform administrative tasks.
$ sudo -u postgres psql
You will be asked for your ‘master’ password and the shell would be like this:
postgres=#
While in the postgreSQL shell, run the following commands:
postgres=# CREATE USER djangouser WITH PASSWORD 'm0d1fyth15';
postgres=# CREATE DATABASE djangodb;
Next, we also need to change the encoding to UTF-8, the timezone and default_transaction_isolation database scheme.
postgres=# ALTER ROLE djangouser SET client_encoding TO 'utf8';
postgres=# ALTER ROLE djangouser SET default_transaction_isolation TO 'read committed';
postgres=# ALTER ROLE djangouser SET timezone TO 'UTC';
The last part, we grant the privileges to the new database then exit PostgreSQL shell.
postgres=# GRANT ALL PRIVILEGES ON DATABASE djangodb TO djangouser;
postgres=# \q
Step 5. Create Python Virtual Environment
Django can be installed in several ways, in this article we will show you how to install it in a python virtual environment.
$ sudo -H pip3 install --upgrade pip
$ sudo -H pip3 install virtualenv
Once completed, let’s create a new directory for django installation then enter to the new directory
$ mkdir django && cd $_
After entering the ‘django’ directory, we can run this command to create a new virtual environment.
$ virtualenv djangoenv

As seen in the picture, the new virtual environment is created in directory ‘djangoenv’. To install Django, Gunicorn and Psycopg2 in the virtual environment, we have to activate it first.
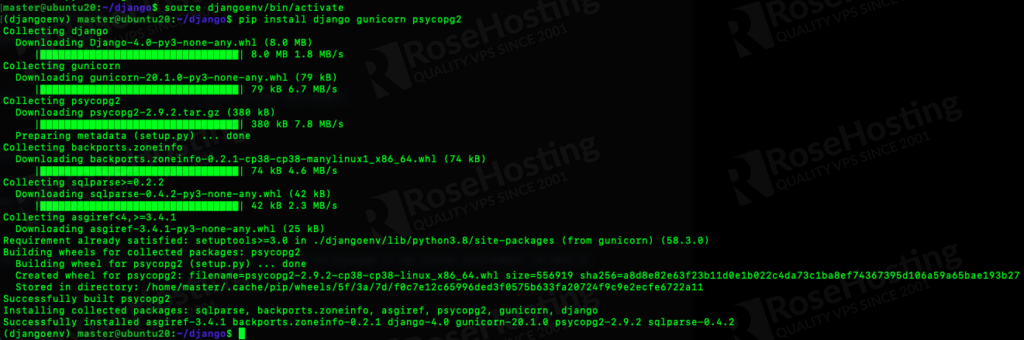
$ source djangoenv/bin/activate
By running the command above, your shell will look like this:
(djangoenv) master@ubuntu20:~/django$
While in the shell, run this command to install django.
(djangoenv) master@ubuntu20:~/django$ pip install django gunicorn psycopg2
Once completed, you should see an output like this:
Installing collected packages: sqlparse, backports.zoneinfo, asgiref, psycopg2, gunicorn, django
Successfully installed asgiref-3.4.1 backports.zoneinfo-0.2.1 django-4.0 gunicorn-20.1.0 psycopg2-2.9.2 sqlparse-0.4.2
All required components to start a django project should be installed in the virtual environment.
Step 6. Create Django Project
In the previous step, we created a directory ~/django or in this case /home/master/django. We will create a django project in this directory, we can run this command to install django project in ~/django. The command should be ran while we are in the virtual environment.
(djangoenv) master@ubuntu20:~/django$ django-admin startproject djangoproject ~/django
The command above will install django project in to ~/django/djangoproject. If you list the directory, you will see manage.py, djangoenv, and djangoproject in your ~/django.
Now, since we want to use PostgreSQL as the database storage, we need to modify the configuration.
$ nano ~/django/djangoproject/settings.py
Add this line at the top of your settings.py
import os
And replace the existing database information with the following.
DATABASES = {
    'default': {
        'ENGINE': 'django.db.backends.postgresql_psycopg2',
        'NAME': 'djangodb',
        'USER': 'djangouser',
        'PASSWORD': 'm0d1fyth15',
        'HOST': 'localhost',
        'PORT': '',
    }
}
Make sure the database username and password match with the one we created in the previous step. Still in the same settings.py file, find ALLOWED_HOSTS then you can add your server IP adress, domain names, sub domain names. The entries should be seperated by a comma and listed in quotations.
ALLOWED_HOSTS = ['123.123.123.123', 'domain.com', 'sub.domain.com']
Next, find the Django’s static files configuration. The changes is required to make your Django static files accessible through nginx, and to prevent nginx from returning error 404 messages. Add this line after STATIC_URL = ‘/static/’
STATIC_ROOT = os.path.join(BASE_DIR, 'static/')
Do not forget to save the changes then exit.
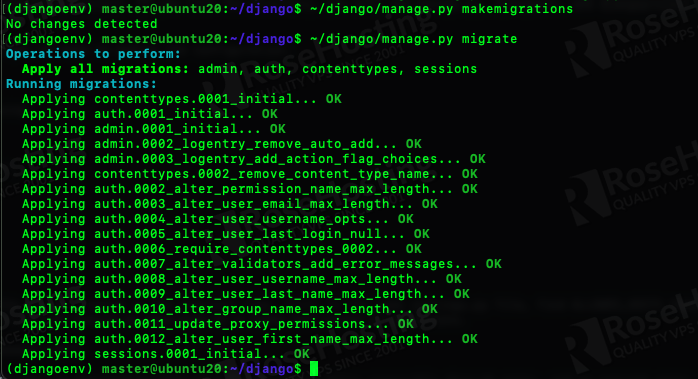
Next, it is time to migrate the initial database schema to our PostgreSQL database, let’s run these commands.
(djangoenv) master@ubuntu20:~/django$ ~/django/manage.py makemigrations
(djangoenv) master@ubuntu20:~/django$ ~/django/manage.py migrate
Then, create a superuser.
(djangoenv) master@ubuntu20:~/django$ ~/django/manage.py createsuperuser
You will be asked to create a username, provide an email address and the username’s password. You would want to save the information about this administrative user and password because you will use them to log in to Django backend.
For the last one, run the command below to collect static files.
(djangoenv) master@ubuntu20:~/django$ ~/django/manage.py collectstatic
You will need to confirm the action by answering it with yes then you will see this output after confirming:
128 static files copied to '/home/master/django/static'
Deactivate the virtual environment to exit.
(djangoenv) master@ubuntu20:~/django$ deactivate
Step 7. Create Gunicorn Systemd File
To manage Gunicorn service, we will create a systemd unit file at /etc/systemd/system/gunicorn.service.
$ sudo nano /etc/systemd/system/gunicorn.service
Paste these lines
[Unit]
Description=gunicorn daemon
After=network.target

[Service]
User=master
Group=www-data
WorkingDirectory=/home/master/django
ExecStart=/home/master/django/djangoenv/bin/gunicorn --access-logfile - --workers 3 --bind unix:/home/master/django/djangoproject.sock djangoproject.wsgi:application

[Install]
WantedBy=multi-user.target
Save the file then exit. Then reload systemd and start gunicorn.
$ sudo systemctl daemon-reload
$ sudo systemctl start gunicorn
To check whether gunicorn is running or not, run this command:
$ sudo systemctl status gunicorn

Step 8. Configure Nginx
Gunicorn is running and we are now ready to configure nginx to act as a reverse proxy to our Django project. Let’s create an nginx server block for Django and delete the nginx default server block.
$ sudo rm /etc/nginx/sites-enabled/default
$ sudo nano /etc/nginx/conf.d/django.conf
Paste these lines in /etc/nginx/conf.d/django.conf
server {
    listen 80;
    server_name 123.123.123.123;

    location = /favicon.ico { access_log off; log_not_found off; }
    location /static/ {
        alias /home/master/django/static/;
        }
    location /.well-known {
    	alias /home/master/django/;
		}


    location / {
        include proxy_params;
        proxy_pass http://unix:/home/master/django/djangoproject.sock;
    }
}
Before saving the files, make sure you replace 123.123.123.123 with your server’s actual IP address and the socket path is correct. Then, check for any error and restart nginx to reload the new configuration.
$ sudo nginx -t
$ sudo systemctl restart nginx
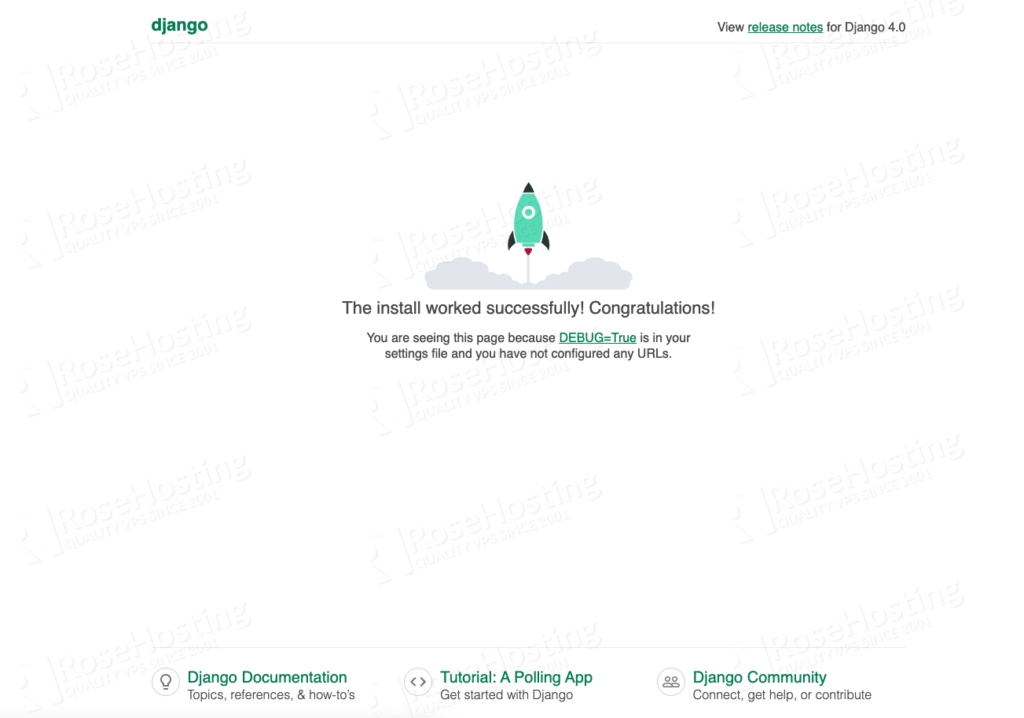
At this point, you should be able to access your Django project at http://YOUR_SERVER_IP_ADDRESS and the administrative URL at http://YOUR_SERVER_IP_ADDRESS/admin using your favorite web browser.
Step 9. Install SSL Certificate
This step is optional but highly recommended to complete. In the modern era, websites should run in HTTPS instead of HTTP. This step will walk you through SSL installation from Let’s Encrypt.
$ sudo apt install certbot python3-certbot-nginx -y
Once installed, edit your Django website server block and replace the server_name with your actual domain or subdomain pointed to your server IP address. Make sure the domain or subdomain DNS record is already pointed to your server prior to issuing the SSL certificate.
Open /etc/nginx/conf.d/django.conf and edit this part
server {
    listen 80;
    server_name 123.123.123.123;
to
server {
    listen 80;
    server_name yourdomain.com;
Make sure to replace yourdomain.com with your actual domain name. Save the file then exit and reload Nginx.
$ sudo systemctl reload nginx
Now, we are ready to install the SSL certificate, run this command:
$ sudo certbot
You would need to provide your email address, accept the Let’s Encrypt TOS, and whether you want to share your email address with the Electronic Frontier Foundation or not. Then, you need to choose which names would you like to activate HTTPS for. Choose your Django website by typing the number and hitting ENTER. Let’s encrypt will install the certificate and it will ask you whether to configure HTTP to HTTPS redirect or not, you can choose redirect then certbot will create the redirection and reload Nginx if everything is okay.
Now, you should be able to access your Django website in HTTPS mode at https://yourdomain.com.
That’s it, you have learned how to set up Django with PostgreSQL, Nginx, and Gunicorn.
Of course, you don’t have to set up Django with PostgreSQL, Nginx, and Gunicorn on Ubuntu 20.04 if you use one of our Django VPS Hosting services, in which case you can simply ask our expert Linux admins to set up Django with PostgreSQL, Nginx, and Gunicorn on Ubuntu 20.04 VPS for you. They are available 24×7 and will take care of your request immediately.
PS. If you liked this post on how to set up Django with PostgreSQL, Nginx, and Gunicorn on Ubuntu 20.04, please share it with your friends on the social networks using the buttons below or simply leave a reply in the comments sections. Thanks.