
Jitsi Meet is an open-source video-conferencing application for web and mobile. It is simple, easy to use, secure, and works on Linux, Windows, and Mac OS. It is very similar to other video-conferencing applications and collaboration software including, Zoom, Skype, and Google Meet, and supports all common browsers and also mobile devices. With Jisti Meet, you can stream your desktop, video chat with the entire team, and allow other users to meet using a custom URL. This tutorial will show you how to install Jitsi Meet on Centos 8.
Table of Contents
Prerequisites
- A Jitsi Hosting VPS.
- Access to the root user account (or access to an admin account with root privileges)
Step 1: Log in to the Server & Update the Server OS Packages
First, log in to your CentOS 8 server via SSH as the root user:
ssh root@IP_Address -p Port_number
You will need to replace ‘IP_Address‘ and ‘Port_number‘ with your server’s respective IP address and SSH port number. Additionally, replace ‘root’ with the username of the admin account if necessary.
Before starting, you have to make sure that all CentOS packages installed on the server are up to date. You can do this by running the following commands:
dnf update -y
Step 2: Add Docker Repository
By default, the latest version of Docker is not available in the CentOS 8 default repo. So you will need to add the Docker repo to your system.
First, install the required packages with the following command:
dnf install yum-utils curl git -y
Next, add the Docker repo with the following command:
yum-config-manager --add-repo https://download.docker.com/linux/centos/docker-ce.repo
Next, update the package cache with the following command:
dnf makecache
Next, install the Docker CE with the following command:
dnf install docker-ce --nobest
Once the Docker is installed, start the Docker service and enable it to start at system reboot with the following command:
systemctl start docker
systemctl enable docker
Step 3: Install Docker Compose
Next, you will also need to install Docker compose in your system.
You can download the latest version of Docker compose binary package to the /usr/loca/bin directory with the following command:
curl -L https://github.com/docker/compose/releases/download/1.25.4/docker-compose-`uname -s`-`uname -m` -o /usr/local/bin/docker-compose
Next, change the permission of the downloaded binary with the following command:
chmod +x /usr/local/bin/docker-compose
Next, verify the installed version of Docker compose with the following command:
docker-compose --version
You should get the following output:
docker-compose version 1.25.4, build 8d51620a
Step 4: Install Jitsi Meet
Jitsi meet package is not available for CentOS operating system. So we will install Jitsi meet using Docker.
First, download the Jitsi meet for Docker with the following command:
git clone https://github.com/jitsi/docker-jitsi-meet
Next, change the directory to the downloaded directory and copy the sample environment file:
cd docker-jitsi-meet
cp env.example .env
Next, create required directories for Jitsi meed with the following command:
mkdir -p ~/.jitsi-meet-cfg/{web/letsencrypt,transcripts,prosody,jicofo,jvb}
Next, build the Jitsi meet Docker image with the following command:
docker-compose up -d
This will download the Jitsi image from the Docker hub and start the containers. You can check all the running containers with the following command:
docker ps
You should get the following output:
CONTAINER ID        IMAGE                  COMMAND             CREATED             STATUS                  PORTS                                              NAMES
129f1e2c6c9f        jitsi/jicofo:latest    "/init"             7 seconds ago       Up 1 second                                                                docker-jitsi-meet_jicofo_1
2b06a36e4814        jitsi/jvb:latest       "/init"             7 seconds ago       Up Less than a second   0.0.0.0:4443->4443/tcp, 0.0.0.0:10000->10000/udp   docker-jitsi-meet_jvb_1
53183d823f82        jitsi/prosody:latest   "/init"             9 seconds ago       Up 1 second             5222/tcp, 5280/tcp, 5347/tcp                       docker-jitsi-meet_prosody_1
0378862d1706        jitsi/web:latest       "/init"             9 seconds ago       Up 7 seconds            0.0.0.0:8000->80/tcp, 0.0.0.0:8443->443/tcp        docker-jitsi-meet_web_1
At this point, Jitsi meet container is started and running on port 8443.
Step 5: Configure Firewall
Next, you will need to configure a firewall to allow ports 80, 443, 4443, 8443, and 10000. You can allow them with the following commands:
firewall-cmd --zone=public --add-port=80/tcp --permanent
firewall-cmd --zone=public --add-port=443/tcp --permanent
firewall-cmd --zone=public --add-port=8443/tcp --permanent
firewall-cmd --zone=public --add-port=4443/tcp --permanent
firewall-cmd --zone=public --add-port=10000/udp --permanent
Next, reload the firewall to apply the changes:
firewall-cmd --reload
Step 6: Access Jitsi Meet
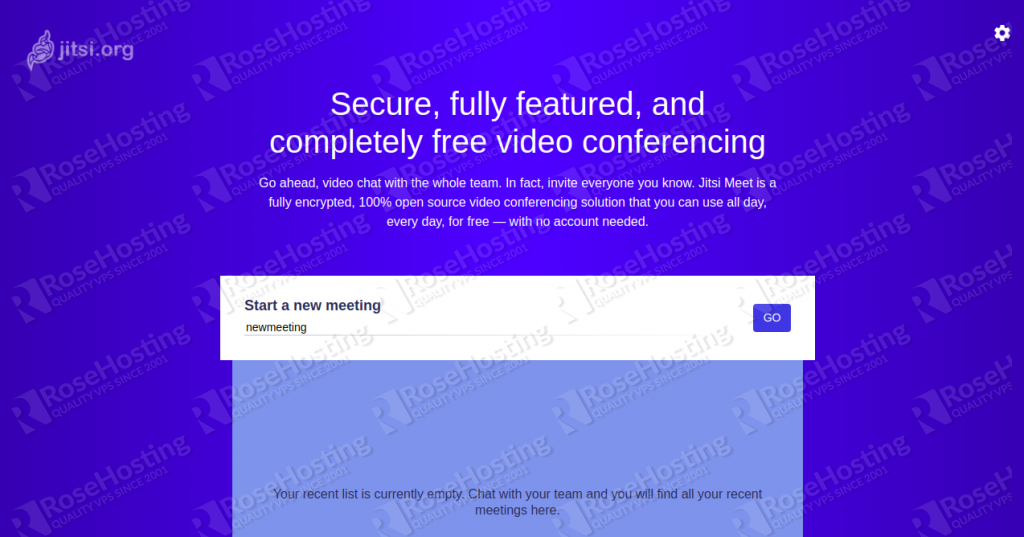
Now, open your web browser and access the Jitsi Meet using the URL https://your-server-ip:8443/. You should see the following screen:

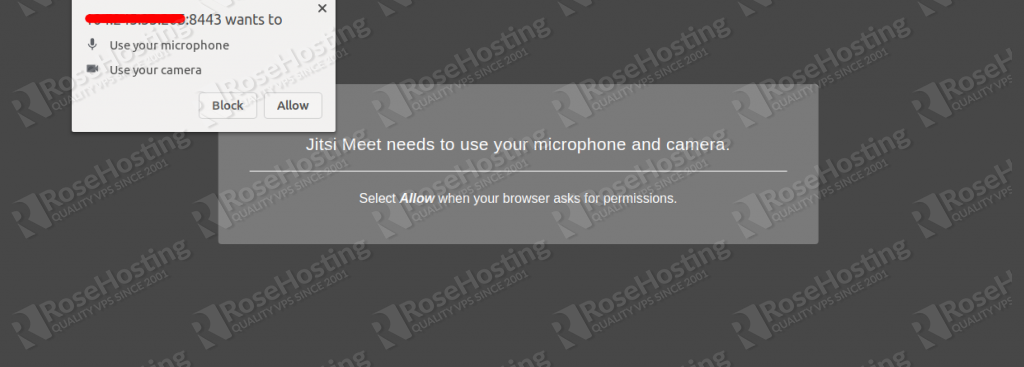
Provide your meeting name and click on the GO button. You will be redirected to the following screen:

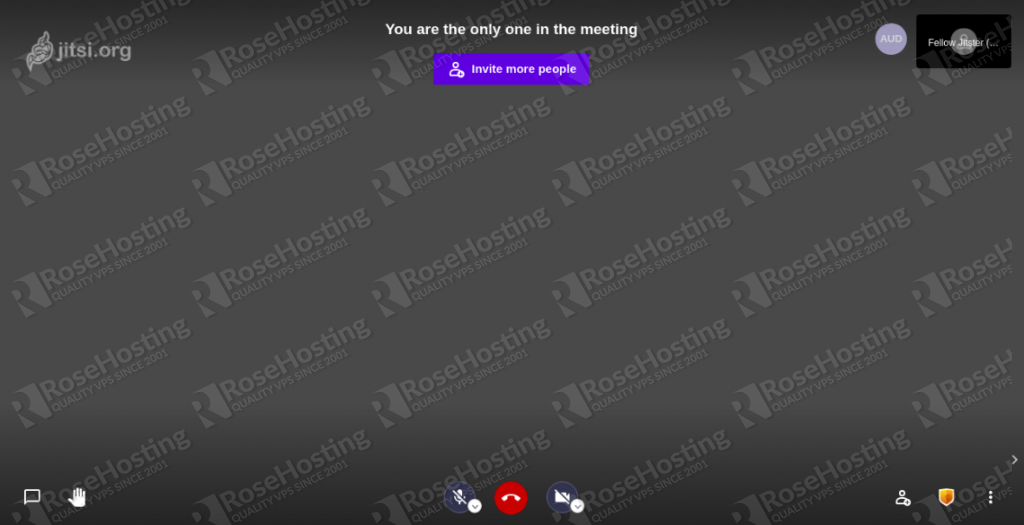
Click on the Allow button to use your Microphone and Camera. You should see the Jitsi Meet dashboard in the following screen:


Of course, you don’t have to install Jitsi Meet on CentOS 8, if you use one of our Managed CentOS Hosting plans, in which case you can simply ask our expert Linux admins to install Jitsi Meet on CentOS 8 for you. They are available 24×7 and will take care of your request immediately.
PS. If you liked this post on how to install Jitsi Meet on CentOS 8, please share it with your friends on the social networks using the buttons on the left or simply leave a reply below. Thanks.
Thanks!
The default port for Webmin is 10000, so nano env.example
and change it to, for example, 10100. See line #243
Please make sure to allow the changed port in the Firewall.
Just tried it, and all the time there is information “you have been disconnected”. Already tried many other things. I believe current version may be broken, because i used to get it work some time ago on C7 box.
Try to check the logs on your server for more information.
ERROR: for docker-jitsi-meet_web_1 Cannot start service web: driver failed programming external connectivity on endpoint docker-jitsi-meet_web_1 (e0f41cbf243cfd2eCreating docker-jitsi-meet_prosody_1 … done
Creating docker-jitsi-meet_jicofo_1 … done
Creating docker-jitsi-meet_jvb_1 … done
ERROR: for web Cannot start service web: driver failed programming external connectivity on endpoint docker-jitsi-meet_web_1 (e0f41cbf243cfd2ed474d26c92c98e61aa1031109621782b4b12750e8843be09): Error starting userland proxy: listen tcp4 0.0.0.0:8443: bind: address already in use
ERROR: Encountered errors while bringing up the project.
Already 8443 port. Becase my server outport port is 8443. How I changed jiitsi port?
You will need to change the configuration in several config files before running docker-compose up or you can make port 8443 available for this application.