LiteSpeed is a free, open-source, small, lightweight, and is Apache alternative web server that conserves resources without sacrificing performance, security, or convenience. It streamlined event-driven architecture and capable of handling thousands of concurrent connections with minimum memory and CPU. It is compatible with Apache’s mod_security, .htaccess and mod_rewrite features and built-in DDoS protection such as bandwidth and connection throttling.
RoseHosting cloud provides LiteSpeed solution out-of-box that helps you to host secure, efficient, and scalable servers in the cloud environment. Compared to Apache and NGINX web servers, LiteSpeed’s performance is ten times higher.
In this tutorial, we will show you how to set up LiteSpeed Web Server for Highly-Loaded PHP Applications on the RoseHosting Cloud Platform.
Table of Contents
Install LiteSpeed Web Server
You can follow the below steps to install the LiteSpeed webserver on RoseHosting Cloud platform:
Step 1: Login to RoseHosting Cloud platform. You should see the following screen:
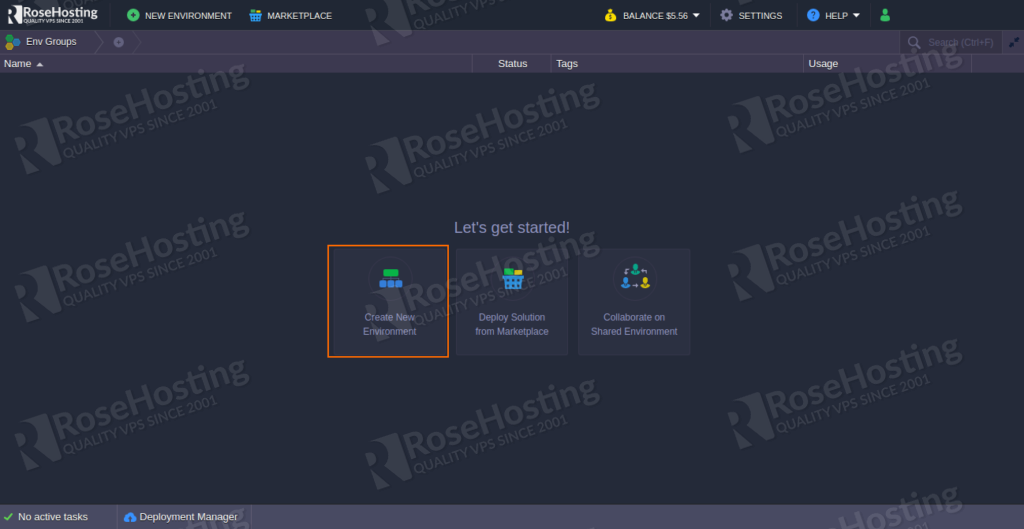
Step 2: Click on the Create New Environment button. This will open the topology wizard as shown below:
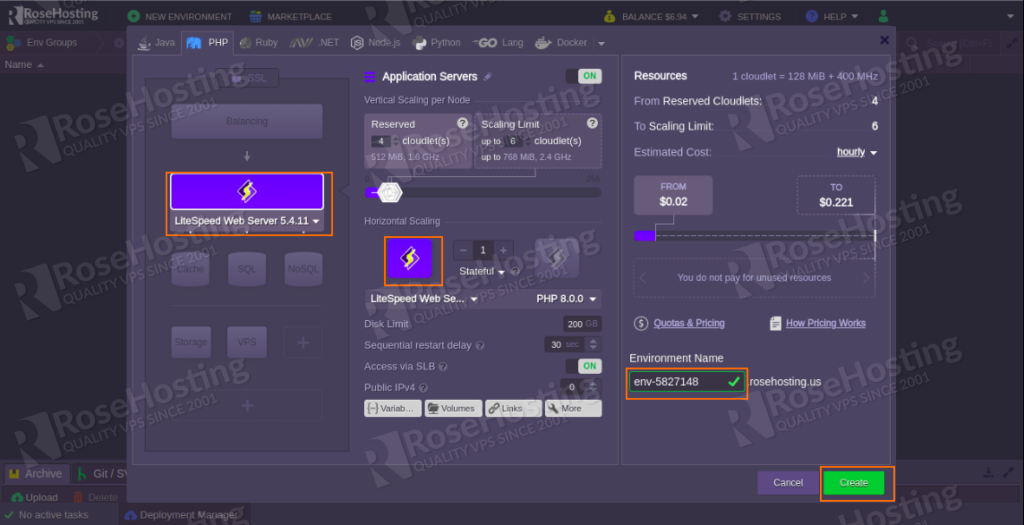
Step 3: Click on the PHP tab, select LiteSpeed web server and set other configurations like, cloudlets limit, Public IPs, region, etc as per your need. Then click on the Create button. Once the environment has been created. You should see the following screen:
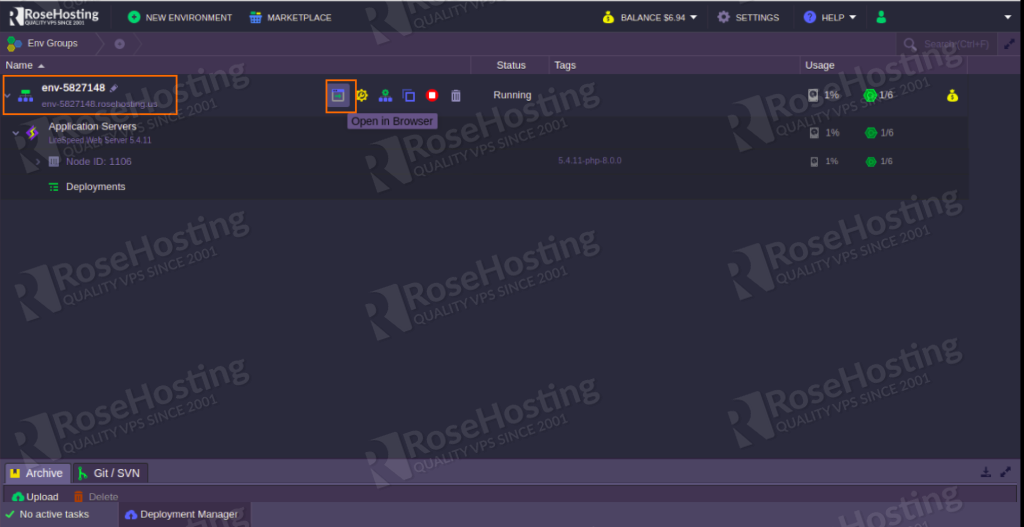
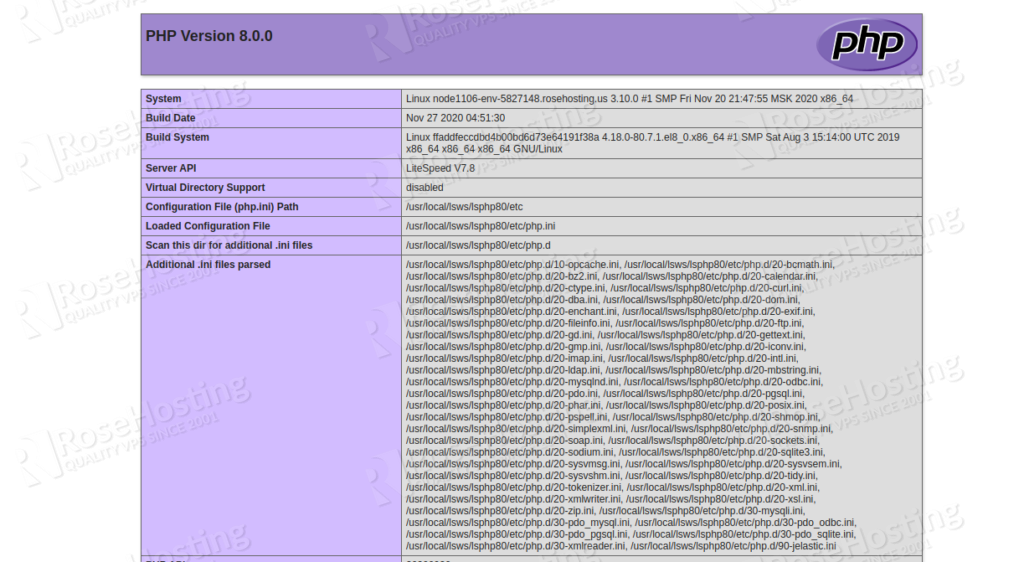
Step 4: On the LiteSpeed container, click on the Open in Browser button. This will open the PHP info page as shown below:
Access LiteSpeed Admin Console
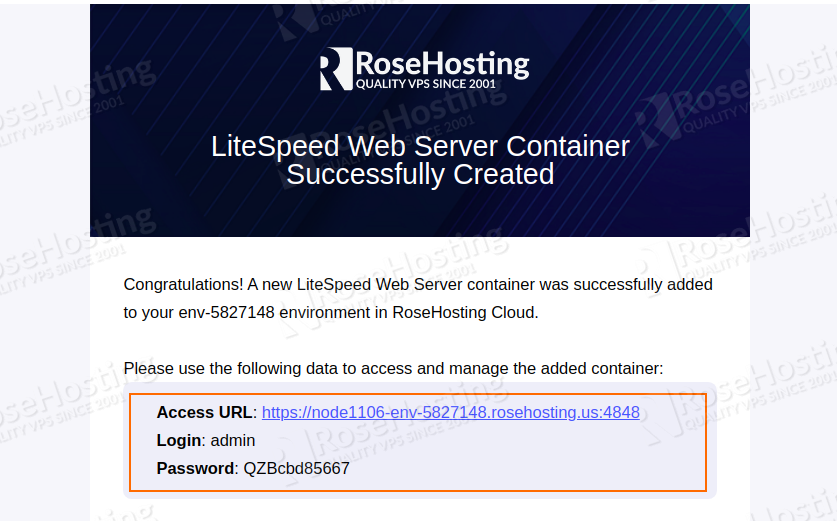
Once your LiteSpeed environment is created. You should receive an email with LiteSpeed admin URL and login credentials as shown below:
Now, open the given URL in your web browser. You should see the following screen:
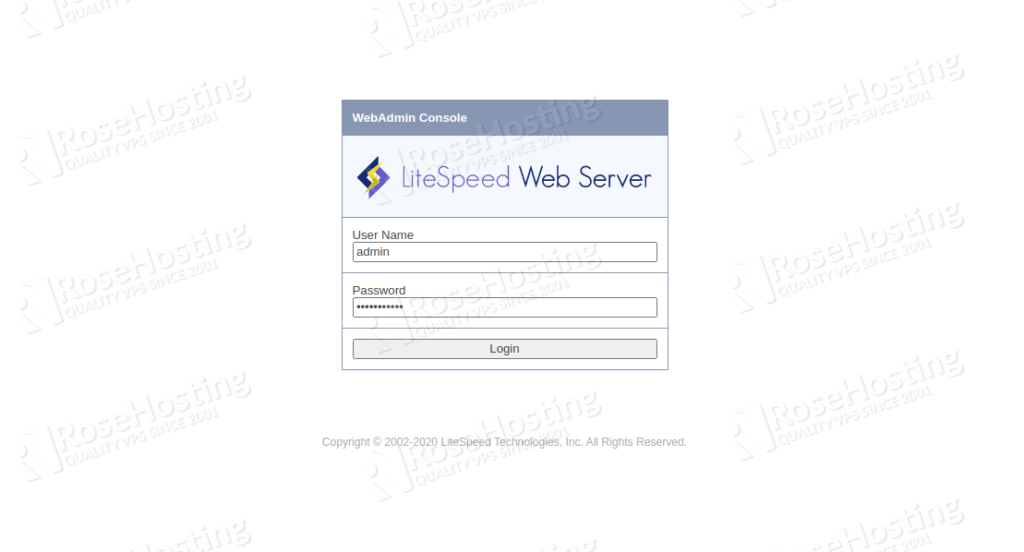
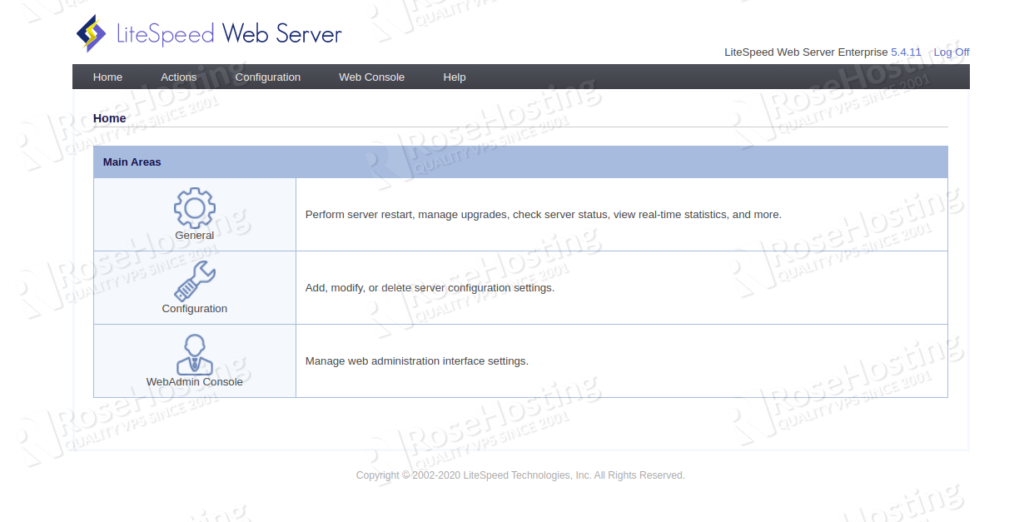
Provide your admin username, password and click on the Login button. You should see the LiteSpeed dashboard in the following screen:
Manage LiteSpeed Web Server
With LiteSpeed admin console, you can perform many operations through a web browser. Some of them are listed below:
Restart: You can restart the web server, detached PHP processes and virtual hosts using this option.
Toggle Debug Logging: You can enabled and disabled detailed logging with this option. Logging will help you to troubleshoot any issues.
Server Log Viewer: This option will help you to view a server log using a user-friendly dashboard.
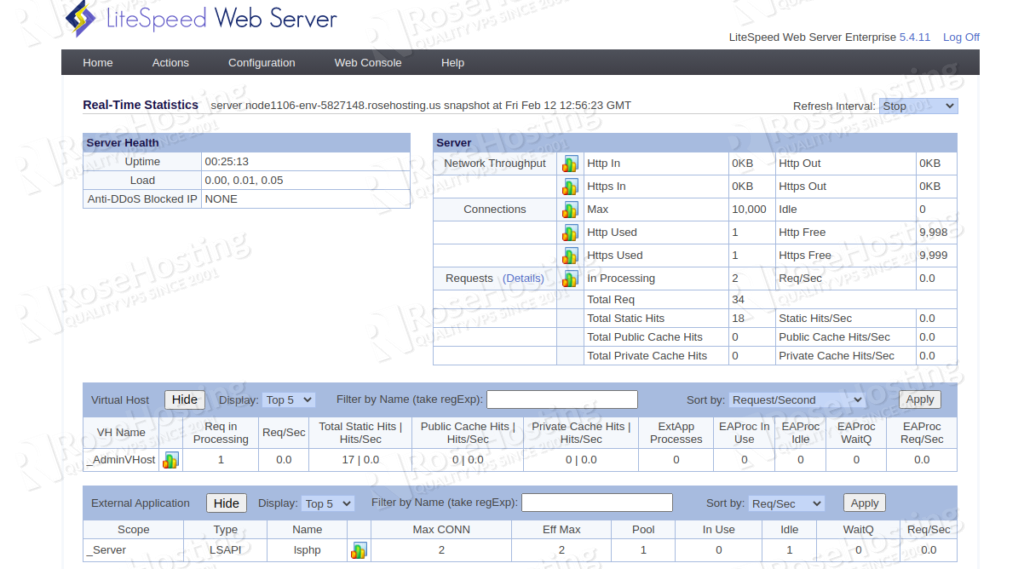
Real-Time Stats: You can monitor server status and workload using this module.
Version Manager: This option allows you to update your server to the latest version.
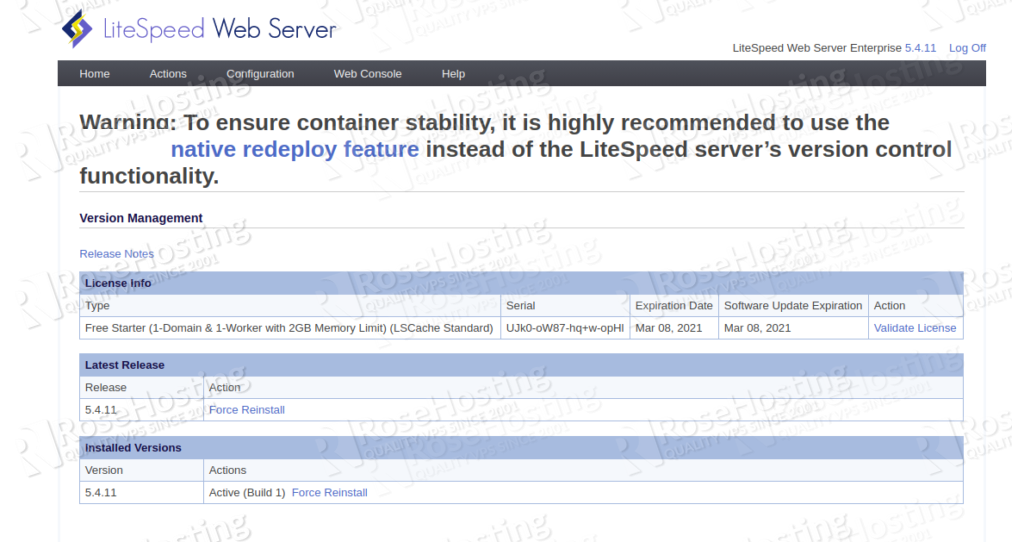
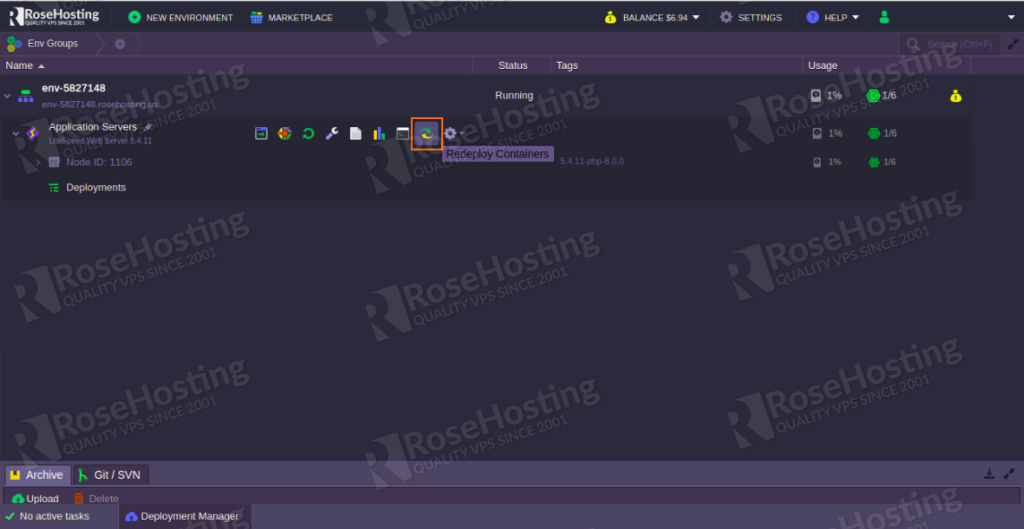
Keep in mind that after performing the update. You will need to Redeploy Containers via the dashboard as shown below.
Configure LiteSpeed Web Server
LiteSpeed admin console provides many options to configure your web server that suitable for your needs. Some of them are listed below:
Multiple Server parameters
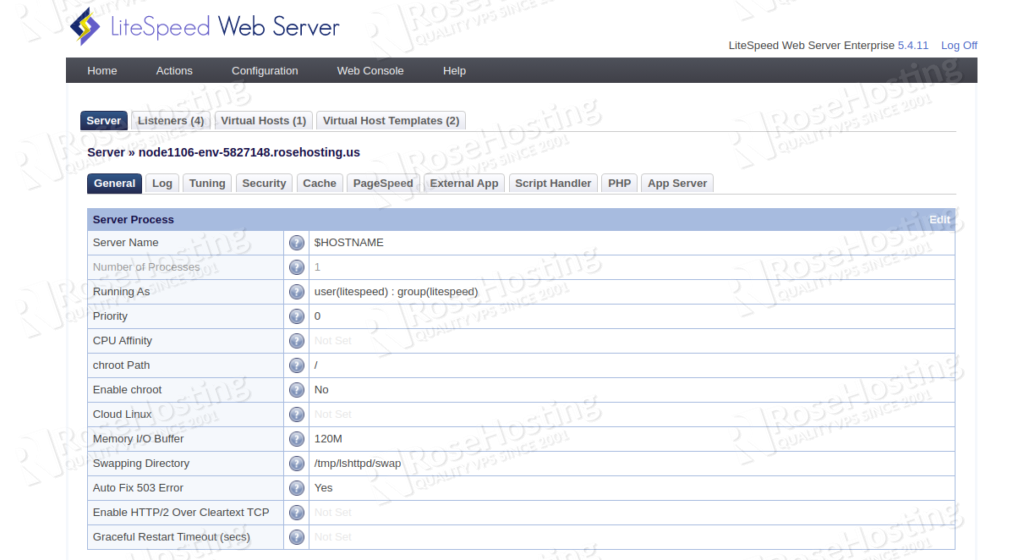
Listeners: This will allow you to change the listening port
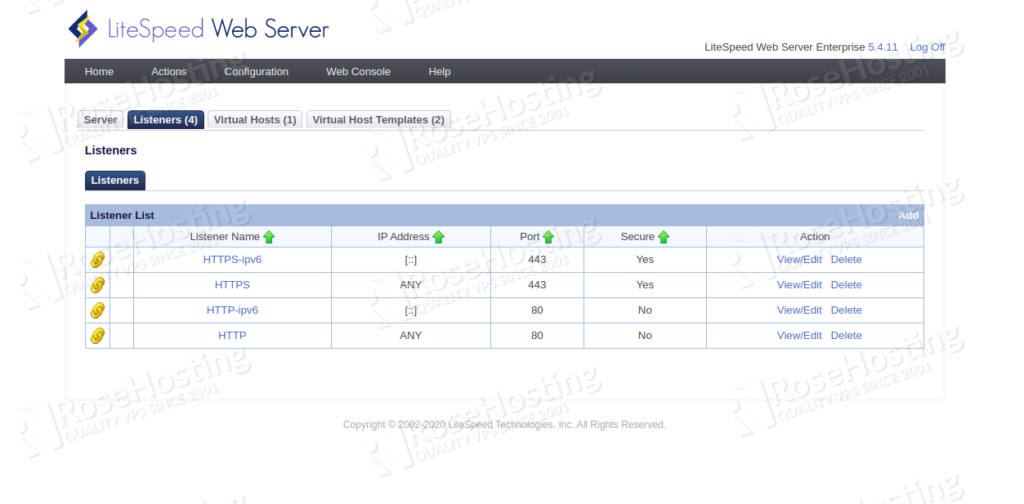
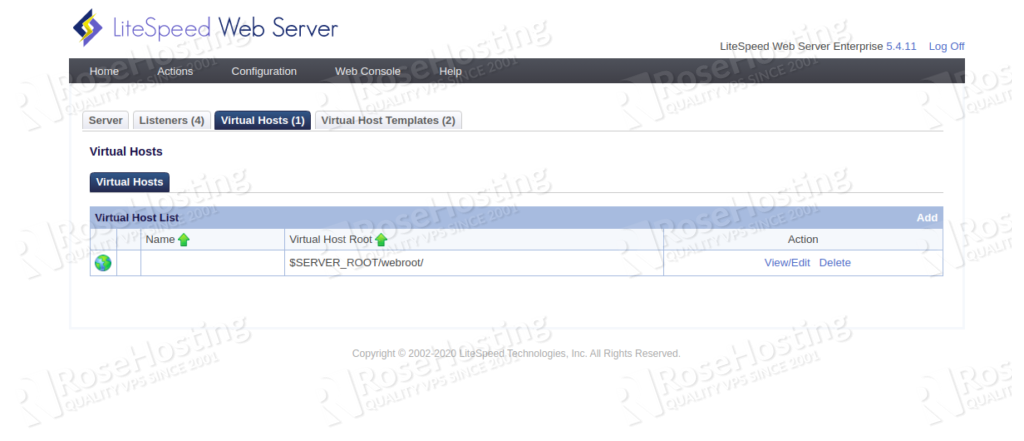
Virtual Hosts: This will allow you to create, change and delete virtual host configuration for your website.
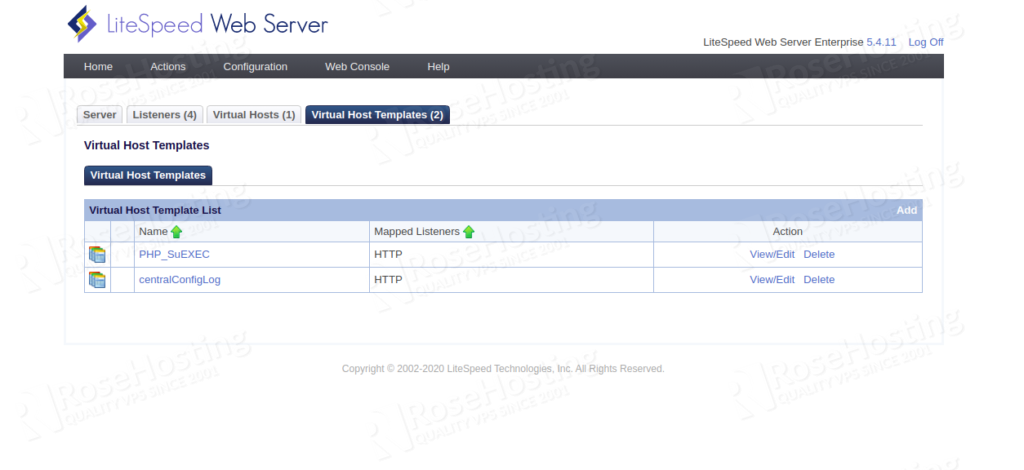
Virtual Host Templates: This will provide built-in virtual host templates.
Configure LiteSpeed Cache
LiteSpeed provides a built-in high-performance dynamic content acceleration feature in the webserver. By default, it is free and provides legacy 8-CPU license. It is very similar to mod_cache in Apache and is used to accelerate the dynamic content. It also handles static assets and you don’t need an extra reverse-proxy layer required by Varnish.
You can enable the LiteSpeed cache globally or for a specified virtual host. In this section, we will show you how to enable the LiteSpeed cache for dynamic content.
You can follow the below steps to enable the LiteSpeed cache on the LiteSpeed webserver.
Step 1: On the LiteSpeed container, click on the Open in Browser button. This will open the PHP info page in the Google Chrome web browser as shown below:

Step 2: Now press F12 or Ctrl+Shift+i to turn on the Developer tools. You should see the Response Headers section for your website on the following screen:
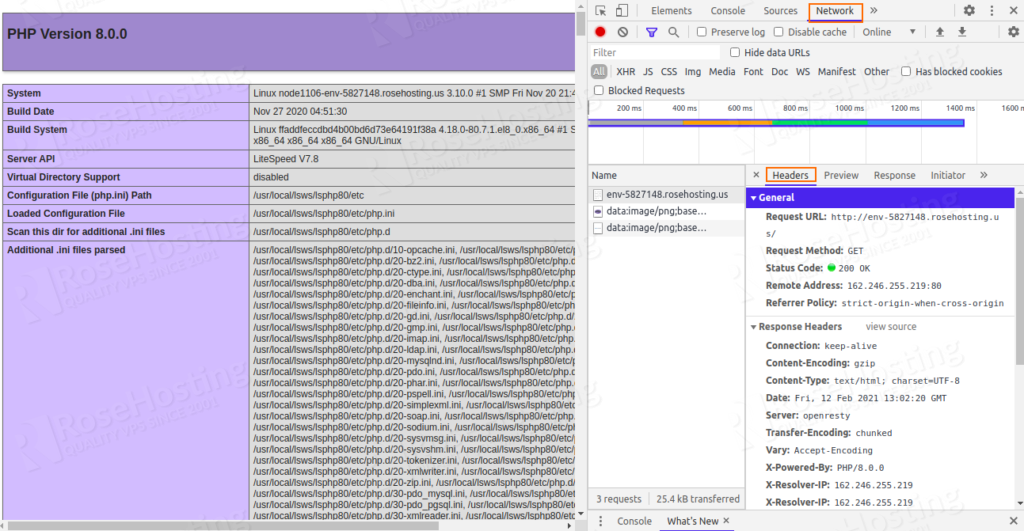
As you can see there is not any caching configured in your server.
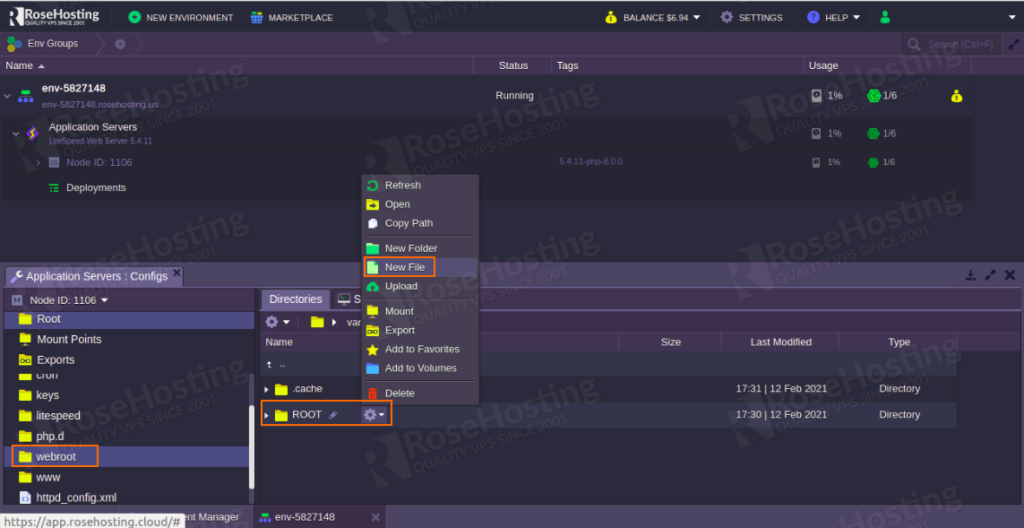
Step 3: Now, open the Application Servers config => go to the root directory and create a new .htaccess file as shown below:
Add the following contents:
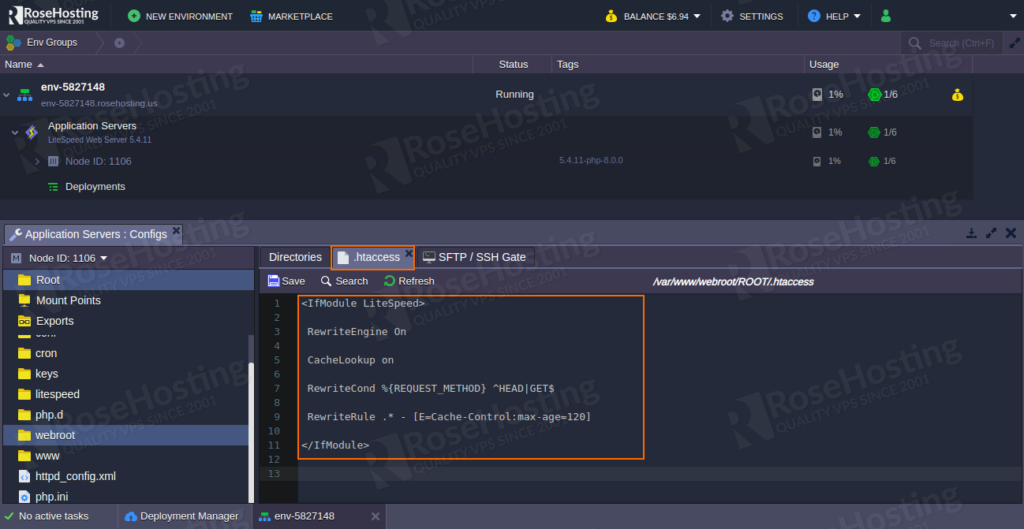
Add the following lines:
<IfModule LiteSpeed>
 RewriteEngine On
 CacheLookup on
 RewriteCond %{REQUEST_METHOD} ^HEAD|GET$
 RewriteRule .* - [E=Cache-Control:max-age=120]
</IfModule>
Click on the Save button to save the changes.
Step 4: Now, refresh the webpage and check the Response Headers section. You should see “X-Litespeed-Cache: miss” on the following screen:

That means, LiteSpeed cache is enabled for your website but not cache yet.
Step 5: Now, refresh the webpage again and check the X-Litespeed-Cache header. You should see that the cache status has been changed to “X-Litespeed-Cache: hit“

That means, your website dynamic content was loaded from the cache.
Congratulations! you have successfully deployed LiteSpeed Web Server for Highly-Loaded PHP Applications on RoseHosting Cloud Platform. You can now explore the benefits of RoseHosting cloud and this setup for heavily loaded PHP-based websites. Of course, you don’t have to install all of this, just simply ask our systems administrators and they will do this for you, free of charge.