
Laravel is an open-source PHP web framework that can be used to develop web applications easier and faster through built-in features.
It is based on the Symfony framework and follows the model–view–controller architectural pattern.
Some of the features of Laravel are a modular packaging system with a dedicated dependency manager, different ways for accessing relational databases, utilities that aid in application deployment and maintenance, etc.
In this post, we will explain to you the step-by-step process of setting up Laravel on the RoseHosting Cloud Platform. We will use the Laravel framework from the RoseHosting Cloud Marketplace.
Table of Contents
Step 1: Install Laravel Framework
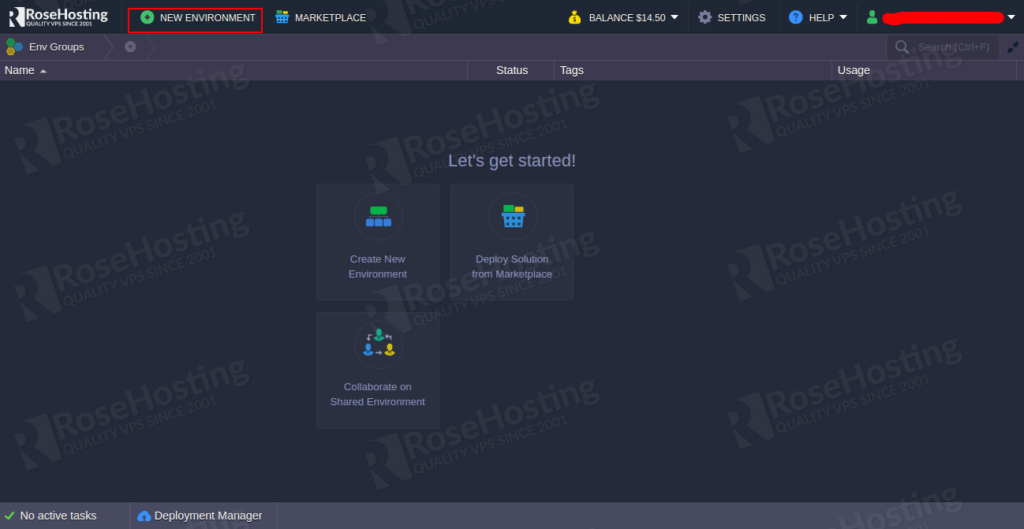
First, log in to the RoseHosting Cloud Platform using the URL https://app.rosehosting.cloud.
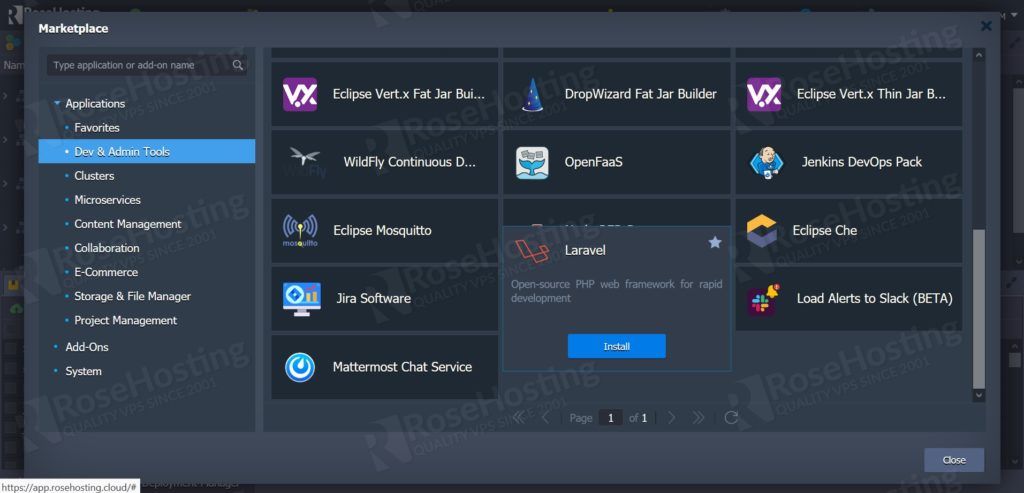
Now, click on the MARKETPLACE => Applications => Dev & Admin Tools then find Laravel as shown below:
Now, click on the Install button. You should see the following page:
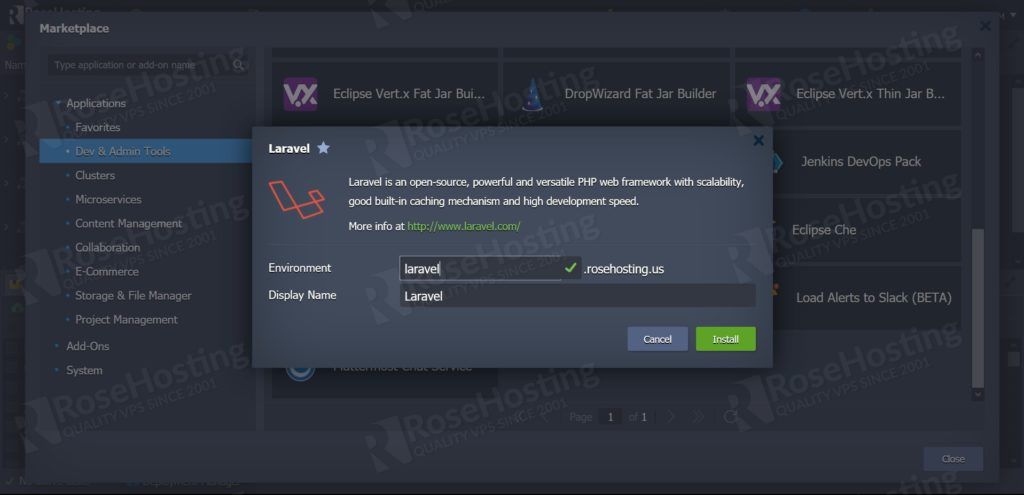
In the opened dialog, specify the Environment name, and click on the Install button. Once the installation has been completed, you should see the following page:
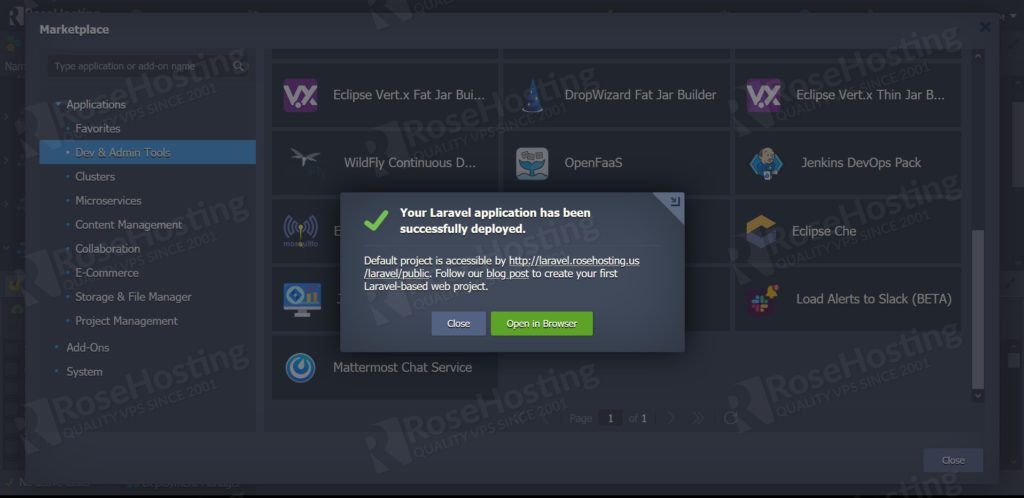
Click on the Open in Browser button. The welcome page contains the first essential links for getting started with the framework.

Step 2: Add a MySQL database node to the environment
RoseHosting cloud provides MySQL for the database backend and stores all website contents. It is pre-configured with all necessary parameters for the highest possible performance.
First, we need to add a database node to the environment.
To do this you need to press Change Environment Topology and add a database node.

From the above dashboard, you can set up the resource provisioning for this solution using the vertical scaling as shown below:
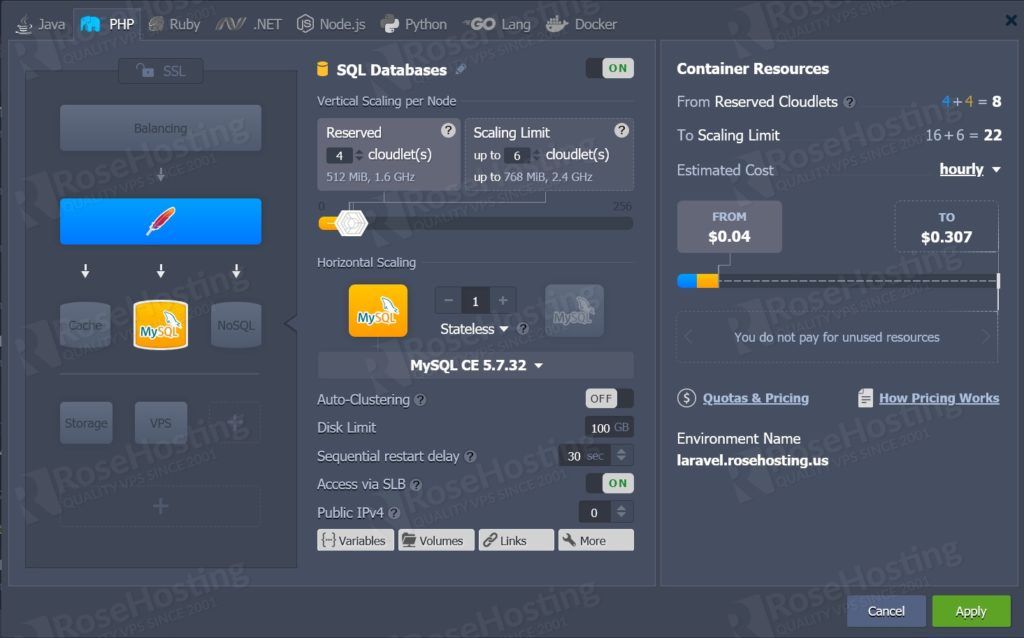
Add you are necessary resources in Vertical Scaling per Node section and press Apply.
As you can see, the default container capacity is 512MB RAM, 1.6 GHz CPU, and 6 cloudlets. You can also set the default limit as per your need using the topology wizard.
Once the database node is added to the environment, the topology is changed.

The database access credentials you can find in the respective email.
Step 3: Connect your Laravel application to the MySQL database
You can create a new database via PHPMyAdmin. Browse to your phpMyAdmin URL (e.g. node1776-laravel.rosehosting.us) using your Internet Web Browser, and log in using your root user login credentials provided to your email.
Click on the Databases tab and create a new database with your wanted name.
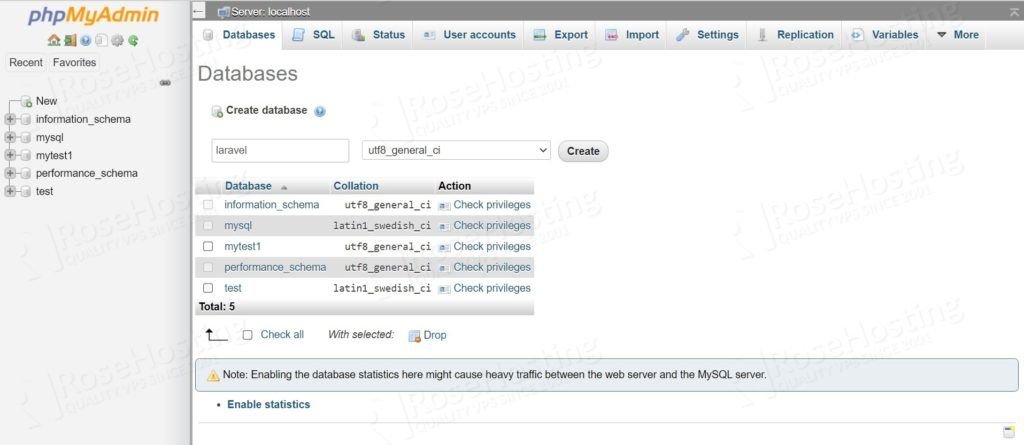
Clicking on create will create a new database.
Step 4: Update .env configurations
Once the database has been created, you need to connect the Laravel application to the database.
To do this you need to open the Web SSH client and change the directory to the laravel application :
cd webroot/ROOT/laravel
edit the .env file and define your database settings:
~ /webroot/ROOT/laravel $ nano .env
Update the .env with the database name you want to connect to, as well as the other environment variables if they differ from the default.
DB_CONNECTION=mysql
DB_HOST=node1776-laravel.rosehosting.us
DB_PORT=3306
DB_DATABASE=laravel
DB_USERNAME=root
DB_PASSWORD=ZRVbyn61255
Step 5: Migrations (optional)
Laravel migrations simply allow you to easily perform certain actions to the database without going to the database manager (eg. phpMyAdmin). They can also serve as version control for your database. They create tables, and columns as well as modify them, etc.
It can be executed to the database with the following command:
php artisan migrate
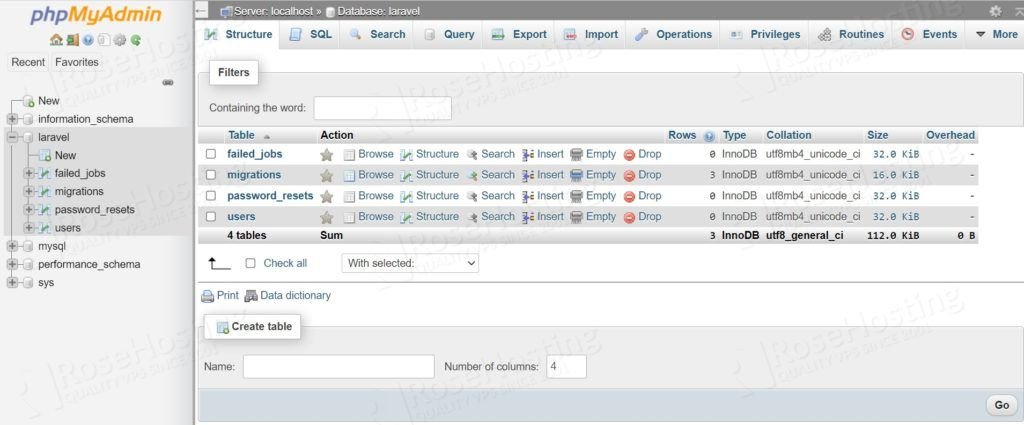
Note: Migrations are found in database/migrations directory.
Refresh your database, it has been updated with the users’ table and its properties.
Congratulations! You have successfully created a Laravel project and connect it to your MYSQL database on our RH Cloud Platform.
You don’t have to configure Laravel yourself if you use one of our Managed Cloud Paas Hosting, in which case you can ask one of our expert system admins to install and configure it for you. They are available 24/7, 365 days a year, ready to assist with any configuration.
If you liked this post, don’t forget to show us support by sharing it with your friends on social media. Thanks!