
In this tutorial, we are going to show you how to install XWiki on your Ubuntu 20.04 server. We will explain what XWiki stands for and the steps about its installation, configuration and other additional required software.

XWiki is an open-source and free wiki platform written in Java, which allows you to customize your wiki with a very simple and user-friendly web interface. It runs on Tomcat, Jetty, or JBoss servlet containers and uses MySQL/MariaDB or PostgreSQL as a database to store the information.
In this post, we will use Tomcat as a servlet container and MariaDB as a database. Installing XWiki on Ubuntu 20.04 should take no more than 15 minutes. Let’s get started with the installation!
Table of Contents
Prerequisites
- Fresh install of Ubuntu 20.04
- User privileges: root or non-root user with sudo privileges
Step 1. Update the System
We need to update the system to its latest version and be sure the software is up to date since we assume that you have a fresh installation of Ubuntu 20.04
Execute the following one-line command and wait some time for the system to get the latest software updates
sudo apt update -y && sudo apt upgrade -y
Step 2. Install Java
We need Java to be installed on our system because XWiki is written in it. Java can be installed with the following command:
apt-get install default-jdk gnupg2 -y
Once, Java is installed you can check the version with the following command:
java --version
The following output should be returned.
root@vps:~# java --version
openjdk 11.0.11 2021-04-20
OpenJDK Runtime Environment (build 11.0.11+9-Ubuntu-0ubuntu2.20.04)
OpenJDK 64-Bit Server VM (build 11.0.11+9-Ubuntu-0ubuntu2.20.04, mixed mode, sharing)
Step 3. XWiki GPG public key and repository
The signing GPG key can be added with the following command:
wget https://maven.xwiki.org/xwiki-keyring.gpg -P /usr/share/keyrings/
Ubuntu 20.04 does not contain the XWiki repo and that is why this step is important for adding it.
wget "https://maven.xwiki.org/stable/xwiki-stable.list" -P /etc/apt/sources.list.d/
Update the repository with the following command:
sudo apt update -y
Step 4. Install the XWiki along with Tomcat and MySQL
Before installing XWiki there is an option to list the available XWiki packets:
apt-cache search xwiki
In this tutorial we need to install the xwiki-tomcat9-common and xwiki-tomcat9-mariadb with the following command:
sudo apt install xwiki-tomcat9-common xwiki-tomcat9-mariadb -y
While installing the required packets, the prompt will ask you to enter the MySQL root password for your XWiki installation.
Hit Yes, on the first window.

Enter the MySQL root password and hit Yes.

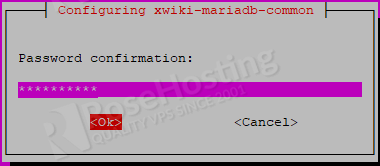
Confirm the MySQL root password and hit Yes.
While the installation is in progress it is a good practice to save the MySQL root password in your notes for later configuration.
Now, when the packets are installed we can verify if the tomcat and MariaDB services are up and running.
Execute the following command to see if the tomcat service is running properly:
systemctl status tomcat9
You should see the following output:
root@vps:/# systemctl status tomcat9
● tomcat9.service - Apache Tomcat 9 Web Application Server
     Loaded: loaded (/lib/systemd/system/tomcat9.service; enabled; vendor preset: enabled)
    Drop-In: /etc/systemd/system/tomcat9.service.d
             └─xwiki-tomcat9-systemd.conf
     Active: active (running) since Mon 2021-10-11 23:32:55 UTC; 7min ago
       Docs: https://tomcat.apache.org/tomcat-9.0-doc/index.html
   Main PID: 91633 (java)
      Tasks: 67 (limit: 4617)
     Memory: 690.8M
     CGroup: /system.slice/tomcat9.servic
To check if the MariaDB service is up and running, execute the following command:
sudo systemctl status mariadb
You should see the following output:
root@vps:/# sudo systemctl status mariadb
● mariadb.service - MariaDB 10.3.31 database server
     Loaded: loaded (/lib/systemd/system/mariadb.service; enabled; vendor preset: enabled)
     Active: active (running) since Mon 2021-10-11 23:30:46 UTC; 10min ago
       Docs: man:mysqld(8)
             https://mariadb.com/kb/en/library/systemd/
   Main PID: 90670 (mysqld)
     Status: "Taking your SQL requests now..."
      Tasks: 30 (limit: 4617)
     Memory: 69.9M
     CGroup: /system.slice/mariadb.service
             └─90670 /usr/sbin/mysqld
Step 5. Install Nginx as a web server
We need a web server so we can set up the reverse proxy for accessing the XWiki installation.
Execute the following command to install the Nginx webserver:
sudo apt install nginx -y
Once, Nginx is installed, start it with the following command:
sudo systemctl start nginx
Check the service if is up and running:
sudo systemctl status nginx
You should see the following output:
root@vps:/# sudo systemctl status nginx
● nginx.service - A high performance web server and a reverse proxy server
     Loaded: loaded (/lib/systemd/system/nginx.service; enabled; vendor preset: enabled)
     Active: active (running) since Mon 2021-10-11 23:44:40 UTC; 5s ago
       Docs: man:nginx(8)
    Process: 93791 ExecStartPre=/usr/sbin/nginx -t -q -g daemon on; master_process on; (code=exited, status=0/SUCCESS)
    Process: 93798 ExecStart=/usr/sbin/nginx -g daemon on; master_process on; (code=exited, status=0/SUCCESS)
   Main PID: 93799 (nginx)
      Tasks: 5 (limit: 4617)
     Memory: 5.0M
     CGroup: /system.slice/nginx.service
Step 6. Create a new Nginx virtual host file
Once, the Nginx web server is installed create the virtual host file with the following command:
sudo nano /etc/nginx/conf.d/xwiki.conf
Paste the following lines:
server {
 listen 80;

 server_name xwiki.example.com;

 access_log /var/log/nginx/xwiki-access.log;
 error_log /var/log/nginx/xwiki-error.log;

 location / {
 proxy_set_header   X-Real-IP $remote_addr;
 proxy_set_header   Host      $host;
 proxy_http_version 1.1;
 proxy_set_header   Upgrade $http_upgrade;
 proxy_set_header   Connection 'upgrade';
 proxy_cache_bypass $http_upgrade;
 proxy_pass         http://127.0.0.1:8080;
 }
 }
Save and close the configuration file.
The next step is to increase the hash_bucket size value in the nginx.conf file:
sudo nano /etc/nginx/nginx.conf
Add or uncomment the following line below the HTTP section as shown:
server_names_hash_bucket_size 64;
Save the configuration file and restart the Nginx service.
sudo systemctl restart nginx
Step 7. Access the XWiki Web interface
Open, your browser and access the XWiki interface using the URL in the reverse proxy xwiki.example.com/xwiki
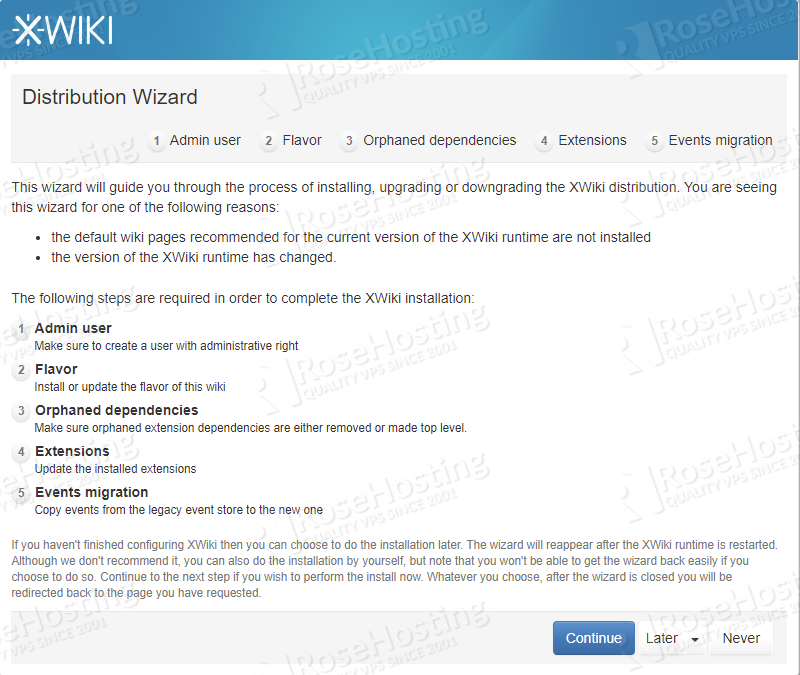
Click on the “Continue” button where another window will be displayed to input the first and last name, username, password, and email address.
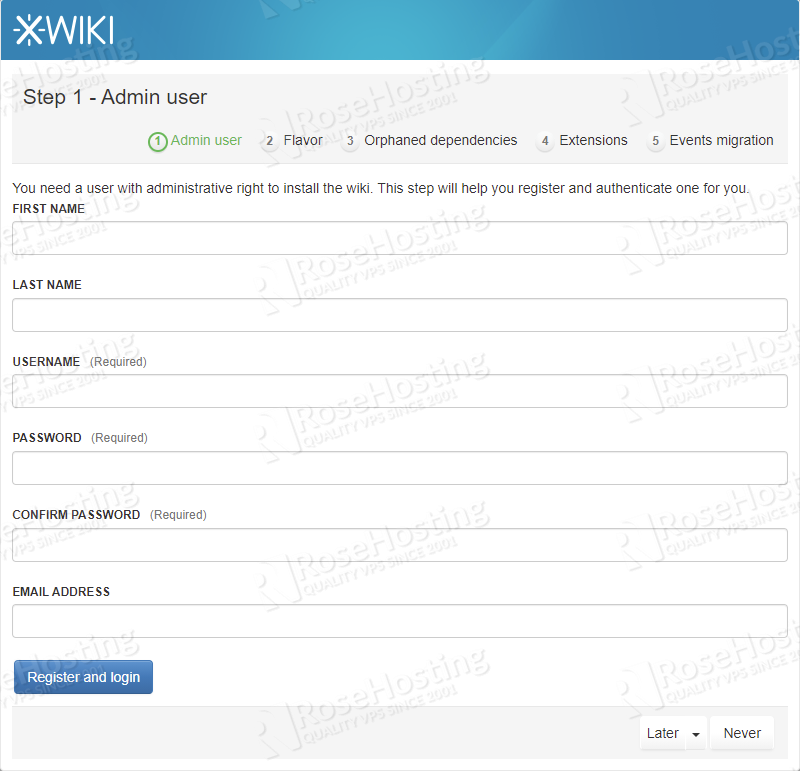
Once, everything is filled click on the “Register and Login” button
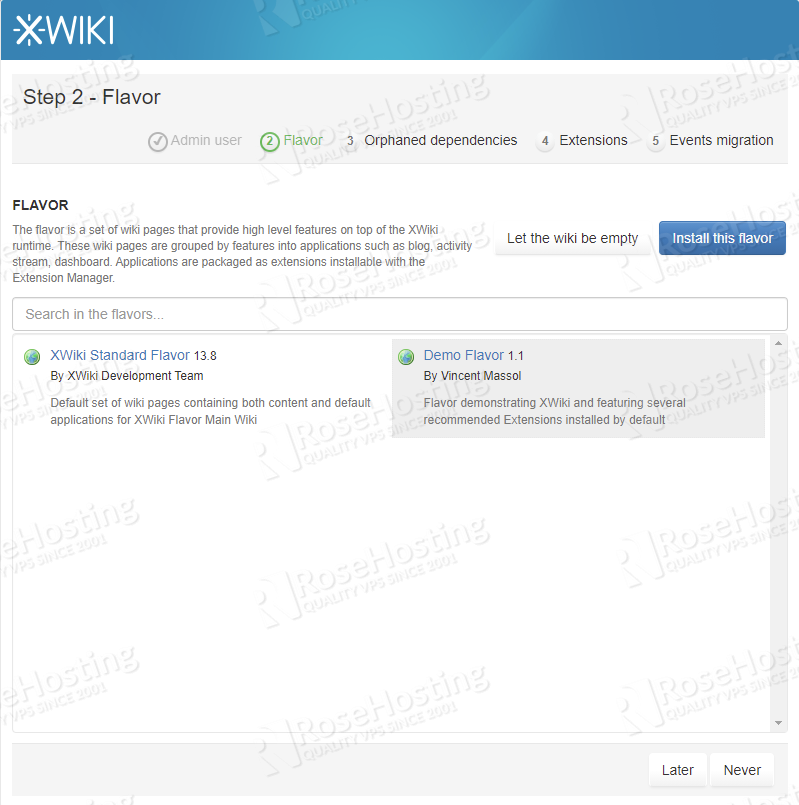
In the Next window choose one Flavor by your choice and install it by clicking on the “Install this flavor” button.
In the next steps, leave everything as is and just click on the “Continue” button till the installation completes.
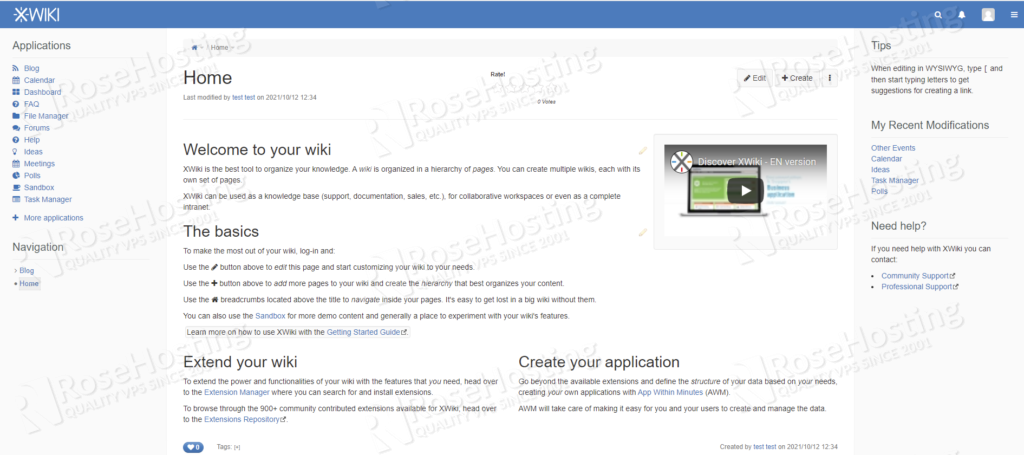
After the last step, you will see the XWiki welcome dashboard.
That’s it! You successfully installed the XWiki platform on Ubuntu 20.04. Of course, you don’t have to install it if you find it difficult. You can simply ask our expert Linux VPS hosting admins to install XWiki on Ubuntu 20.04 for you. They are available 24/7 and will take care of your request immediately.
If you liked this post on how to install XWiki on Ubuntu 20.04, please share it with your friends on the social networks using the buttons on the left or simply leave a reply below. Thanks.
Yeah this doesn’t work. All you get is the default Tomcat page.
Please make sure, to complete all steps, especially pay attention to the reverse proxy Nginx configuration.
add /xwiki
Did you forget this part: Save and close the file then activate the Nginx virtual host with the following command:
ln -s /etc/nginx/sites-available/xwiki.conf /etc/nginx/sites-enabled/
The configuration file was created inside the conf.d directory so there is no need to do a symbolic link to the sites-enabled directory.