A replica set is a group of MongoDB database nodes used for defining database clusters with master-slave replication and automated failover. A replica set contains a single primary node, multiple secondary nodes, and an arbiter node. The primary node receives all write operations while other nodes apply operations from the primary so that all nodes have the same data set.
If your primary node breaks due to hardware failure or system-related issues, the replica set members autonomously select a new primary node, and your application functioning without manual intervention.
In this post, we will explain how to set up a MongoDB replica set with three nodes. We will also show you how to create an environment, configure authentication between multiple database nodes and finally configure the replication between all nodes.
Table of Contents
Create a MongoDB Environment
First, log in to RoseHosting Cloud platform at https://app.rosehosting.cloud as shown below:

Click on the NEW ENVIRONMENT to create a new MongoDB environment as shown below:
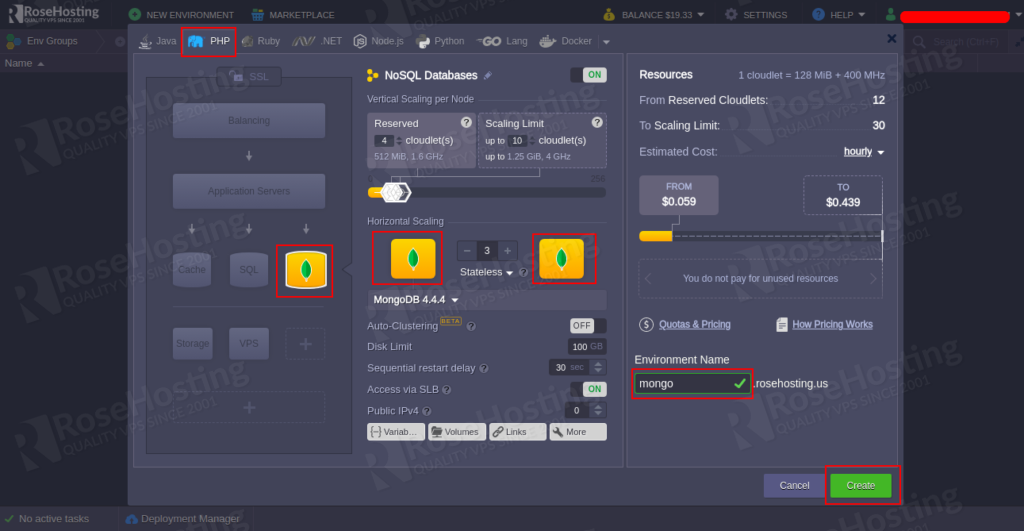
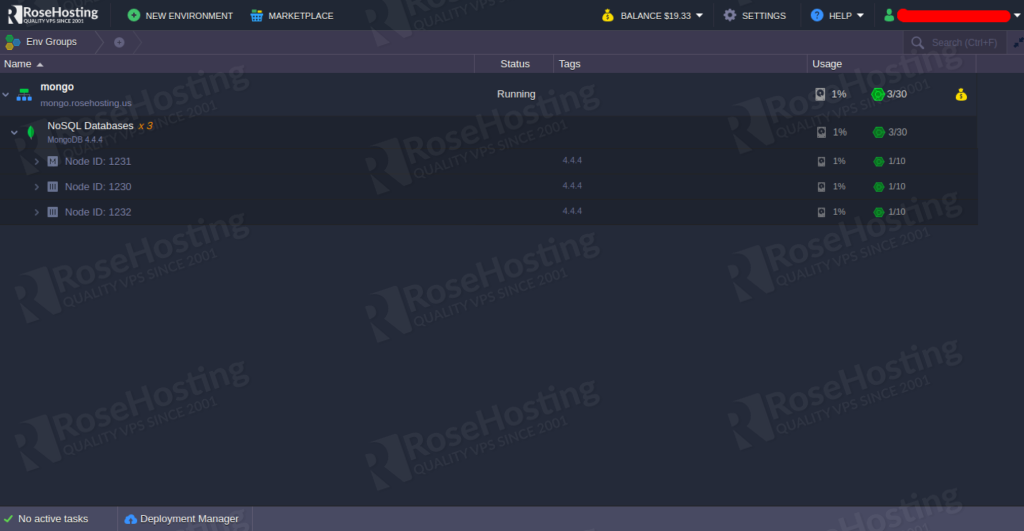
Click on the PHP tab, Select the appropriate MongoDB version, Select reserved cloudlets, Add three MongoDB instances in Horizontal scaling, Define your environment and click on the Create button. Once the MongoDB environment has been created, you should see the following screen:
Add MongoDB Authentication Key File
Next, you will need to generate and add a MongoDB authentication key to secure the communication between all nodes.
Follow the below steps to generate and add the MongoDB key:
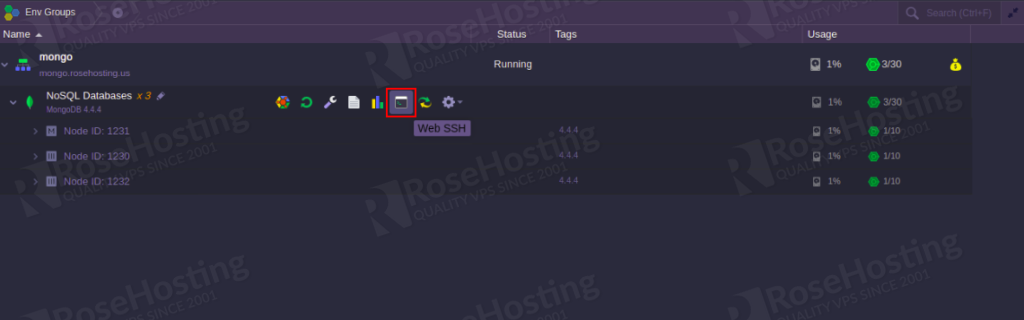
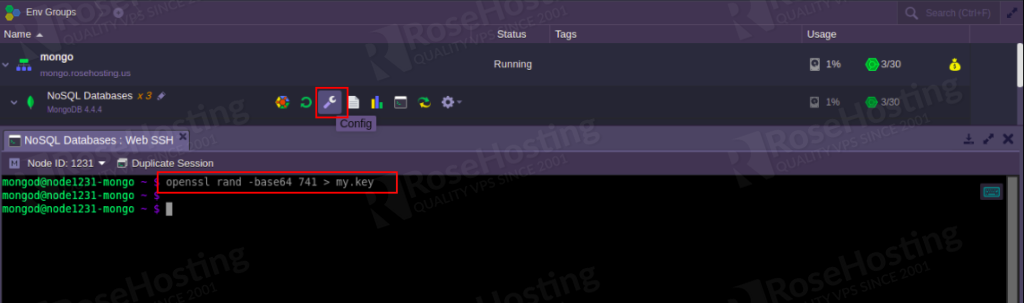
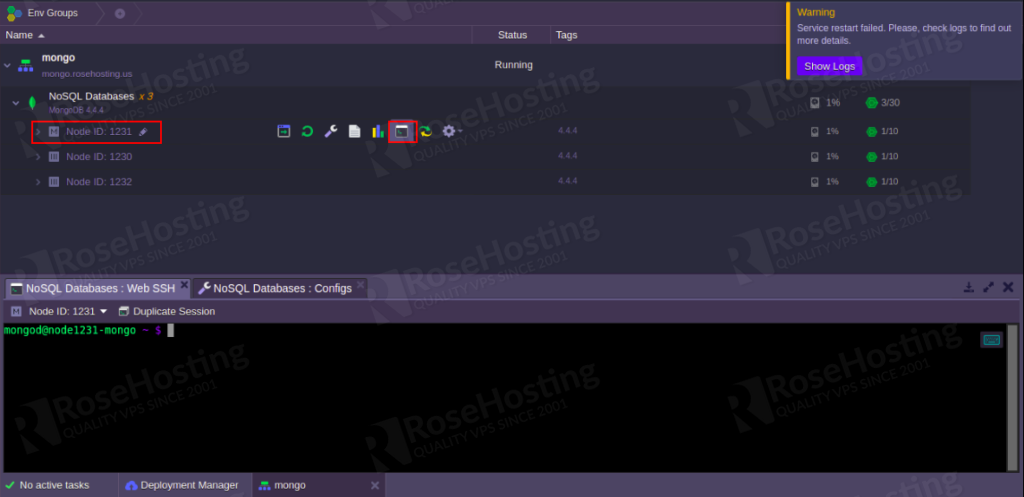
Step 1: Click on the Web SSH to log into the NOSQL Database node:
Step 2: Now, run the following command to generate a key and store it in the file named my.key:
openssl rand -base64 741 > my.key
Step 3: Next, you will need to copy the generated key to all database nodes. To do so, click on the Config button to open the File Manager as shown below:

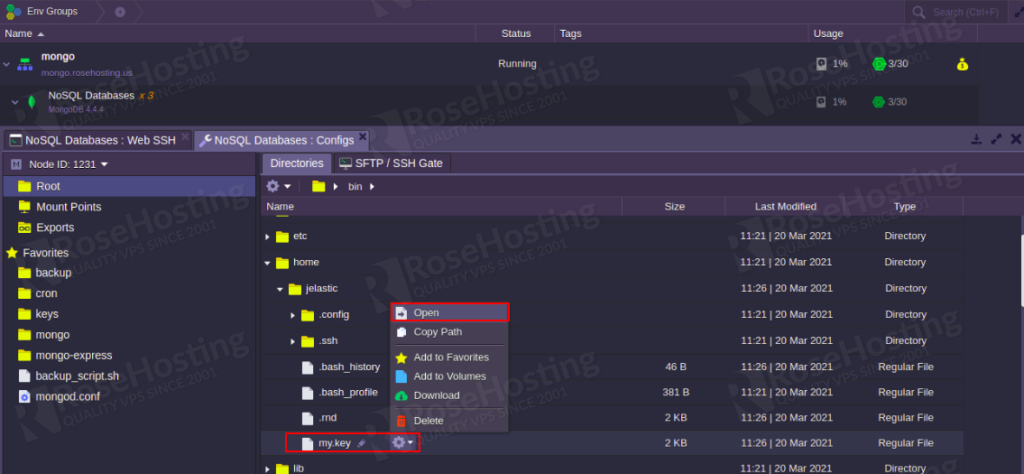
Step 4: Here, you will need to open the my.key file located at /home/jelastic/my.key. You should see the content of the my.key file as shown below:
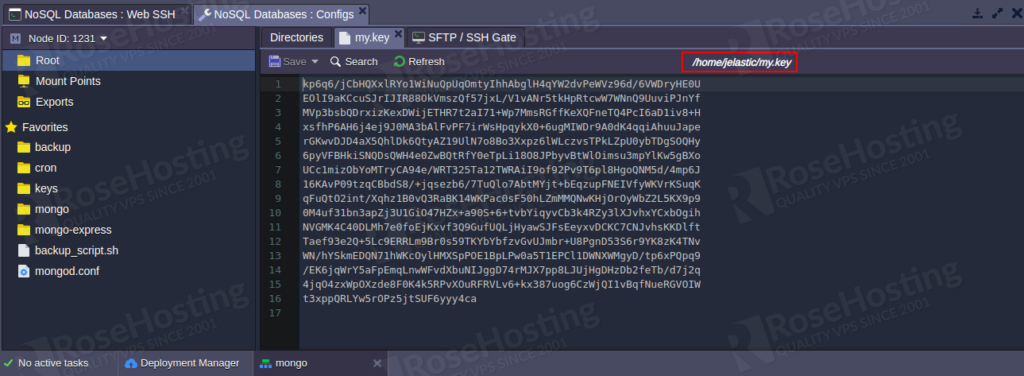
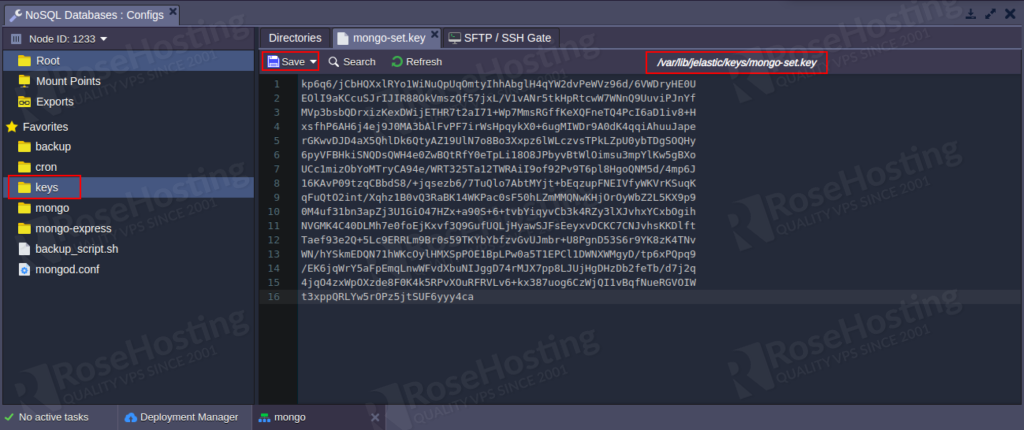
Step 5: Now, copy its content to the clipboard. Then, navigate to the /var/lib/jelastic/keys directory as shown below:
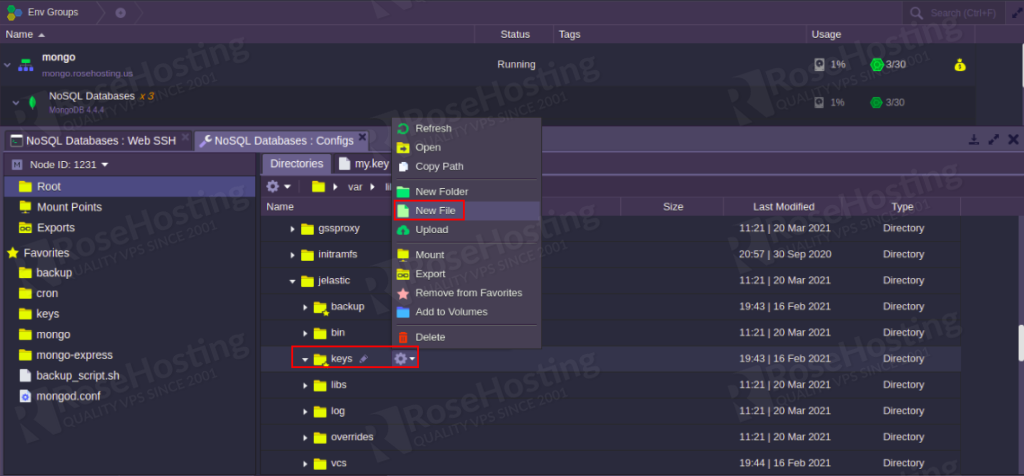
Step 6: Now, create a new file named mongo-set.key and paste the content from the clipboard as shown below:

Step 7: Now, click on the Save => Save for all instances to apply the changes.
At this point, mongo-set.key will be distributed across all nodes.
Configure MongoDB Replication
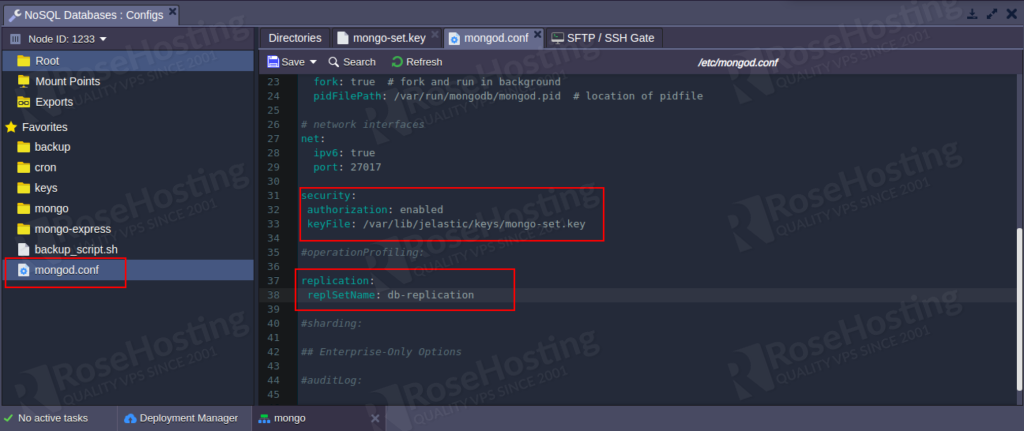
Next, you will need to edit the mongod.conf file and enable the replication and define the path of the mongo-set.key.
Follow the below steps to configure MongoDB replication.
Step 1: Edit the /etc/mongod.conf file within the same configuration tab as shown below:

Specify the unique name for your replica set, specify the path to your key file then click on the Save => Save for all instances to save the changes.
Step 2: Next, click on the Restart Nodes button to start your database nodes to apply the changes.

Step 3 : Now, click on the Web SSH to access the first database node that you want to use as a PRIMARY as shown below:
Step 4: Now, connect to the MongoDB database which should be replicated using the appropriate admin credentials:
mongod -u username -p password dbname
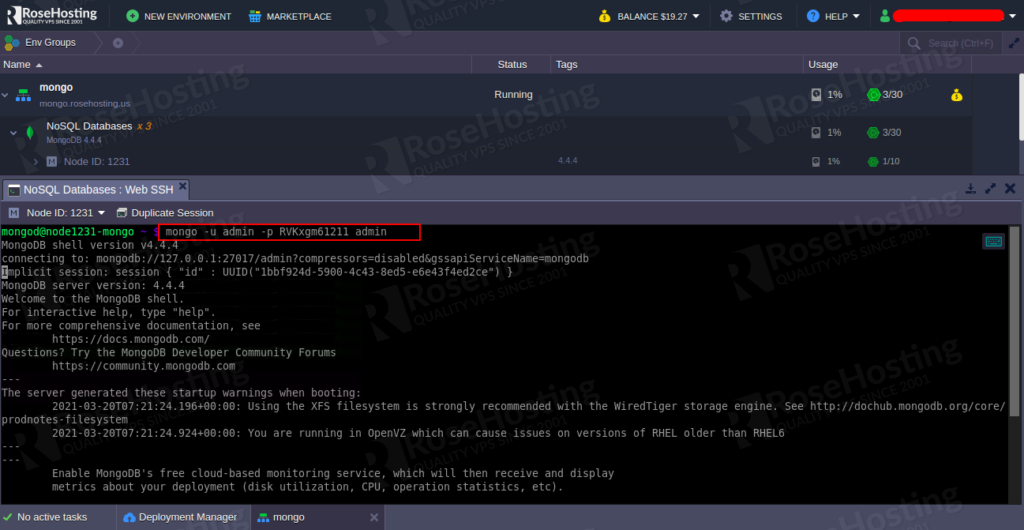
where:
username : MongoDB admin username sent to your email address.
password : Password for the admin user sent to your email address.
dbname : Name of the MongoDB database that you want to replicate.
Step 5: Once the connection has been established, find the IP address of the first database node as shown below:
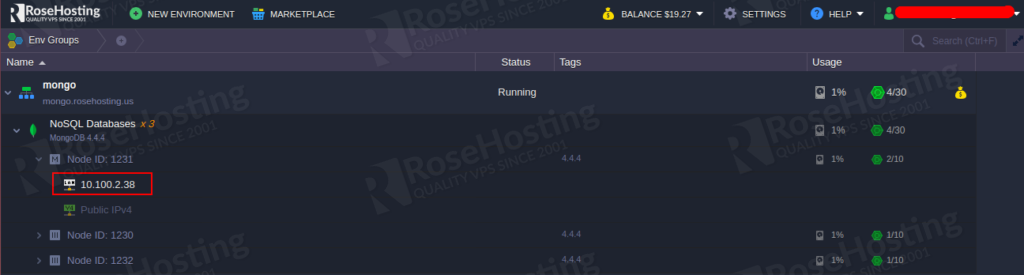
Then, run the following command to define parameters for the current MongoDB node:
config = {_id : "db-replication", members : [{_id : 0, host:"10.100.2.38:27017"},]}

Where :
10.100.2.38 is the IP address of the first database node.
db-replication is the name of the replica set which you have defined in the mongod.conf file.
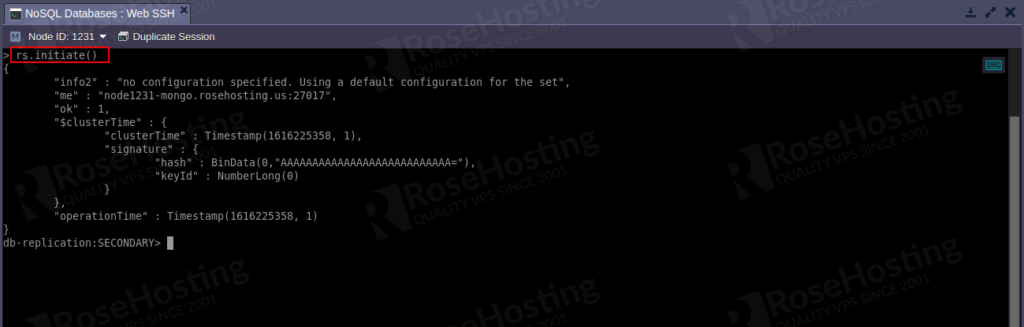
Step 6: Next, initiate the replica set with the following command:
rs.initiate()
Step 7: Next, run the following command for the remaining two database node:
rs.add("10.100.2.36:27017")
rs.add("10.100.2.37:27017")
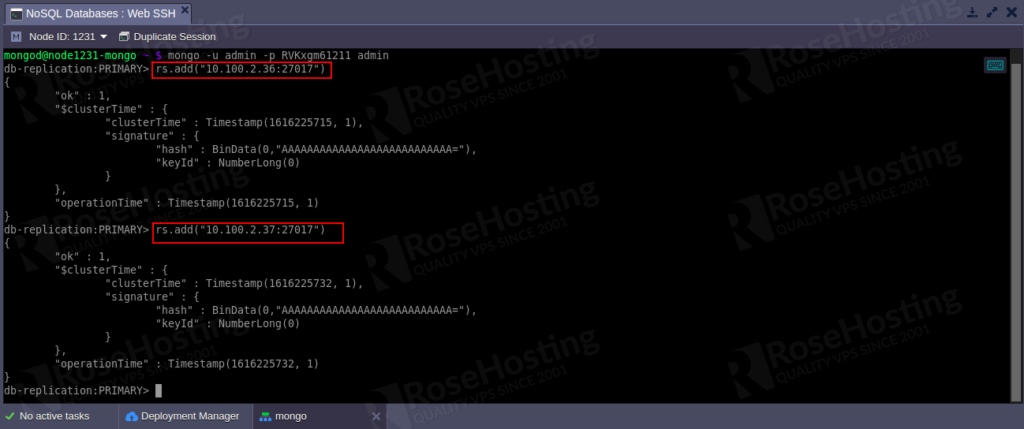
Where:
10.100.2.36 is the IP address of the second database node.
10.100.2.37 is the IP address of the third database node.
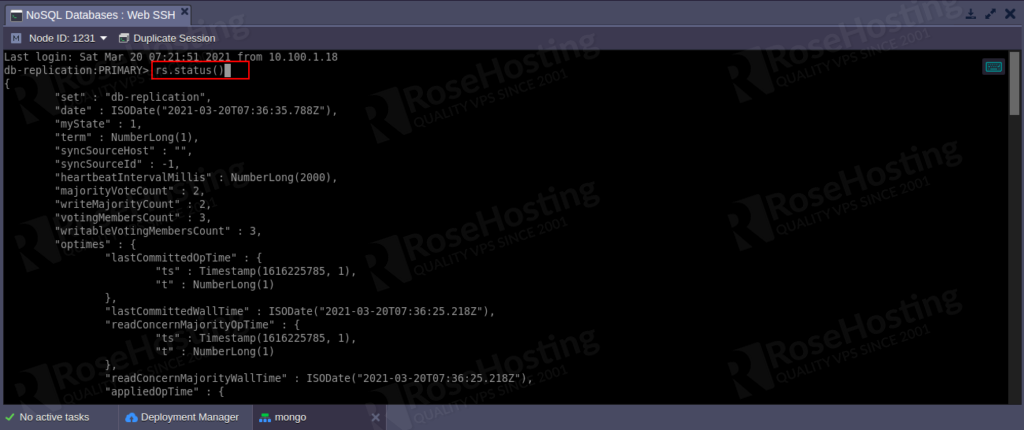
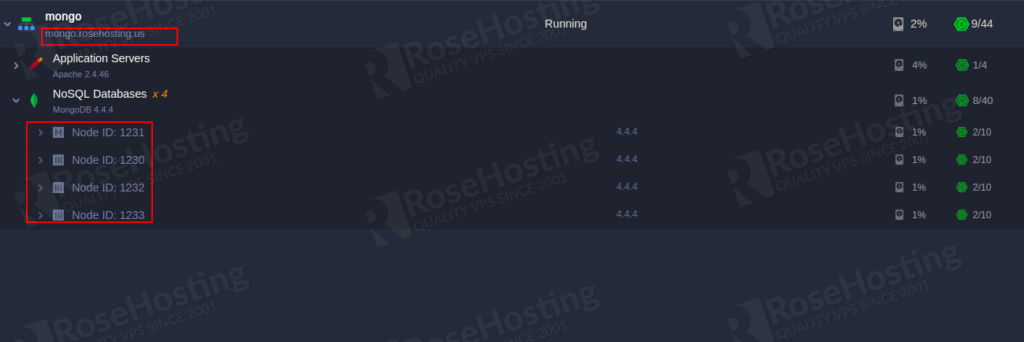
Step 8: After adding all database node members, run the following command to get detailed information of your replica set.
rs.status()
MongoDB Replica Set Arbiter
If you have configured an odd number of members in the replica set then it would be more reliable. Otherwise, it is recommended to add an arbiter node to maintains a quorum. Arbiter is used to exchanges user credentials between all replicas. It is a good idea to run the arbiter on a separate node.
Follow the below steps to add an arbiter node to the replica set:
Step 1: Edit your MongoDB environment as shown below:

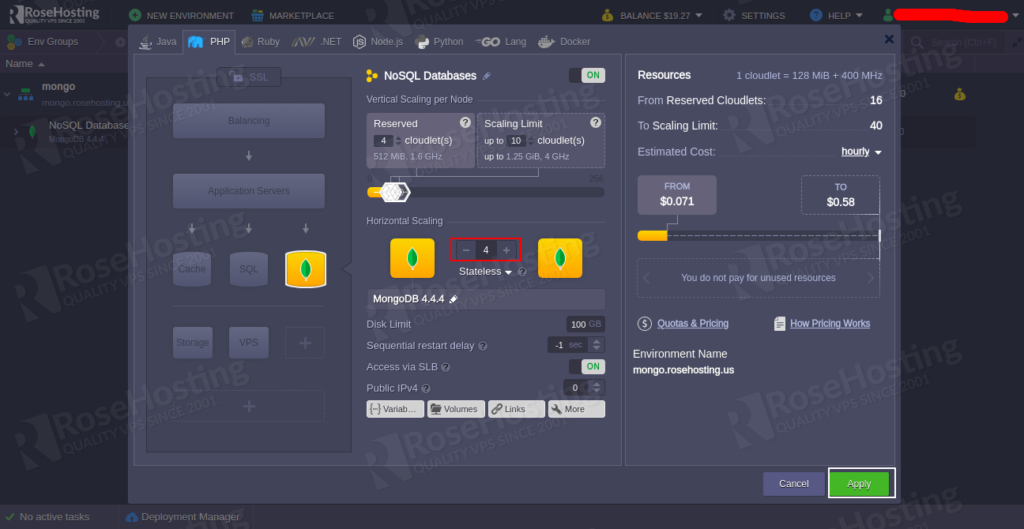
Add one extra node to the database cluster horizontally then click on the Apply button to recreate an environment.
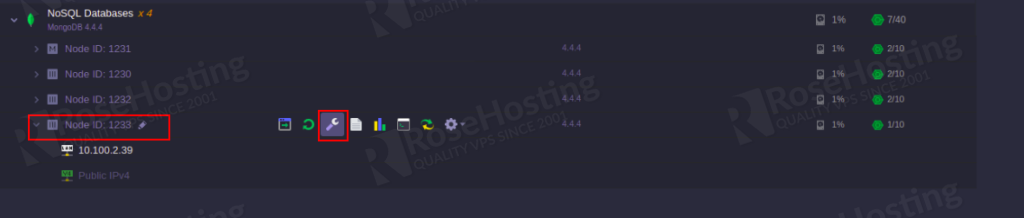
Step 2: Once the environment has been created. You should see a fourth database node on the following page:
Step 3: Click on the config button within the fourth node, create a key file mongo-set.key and paste the same content from the other database node.
Click on the Save button to save the changes.
Step 4: Edit the mongod.conf file and define the replica set name and keyfile path as shown below:
Click on the Save button to save the changes.
Step 5: Restart the fourth node to apply the configuration changes.

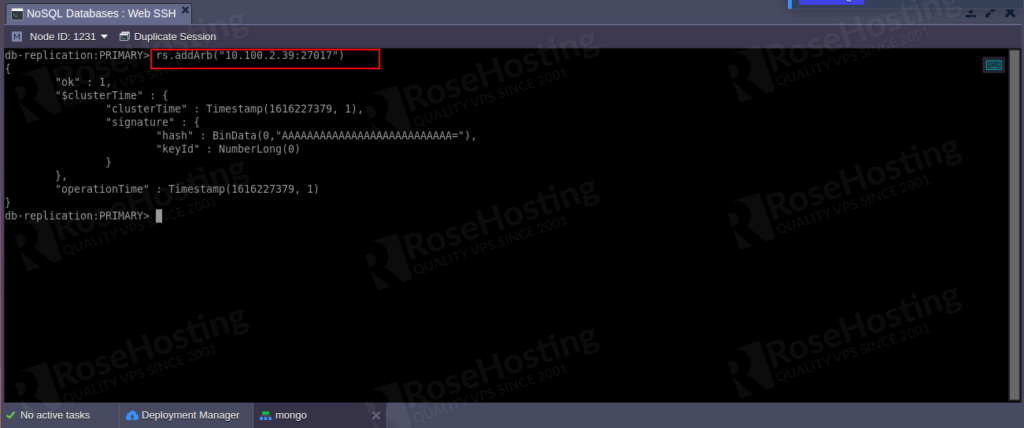
Step 6: Connect to the first database node with Web SSH and run the following command to add the arbiter node to the cluster:
rs.addArb("10.100.2.39:27017")
Where:
10.100.2.39 is the IP address of the fourth node.
Step 7: Next you will need to check whether the fourth node became an arbiter or not. To check it, connect to the fourth node with Web SSH and connect to the MongoDB with the following command:
mongod -u username -p password dbname
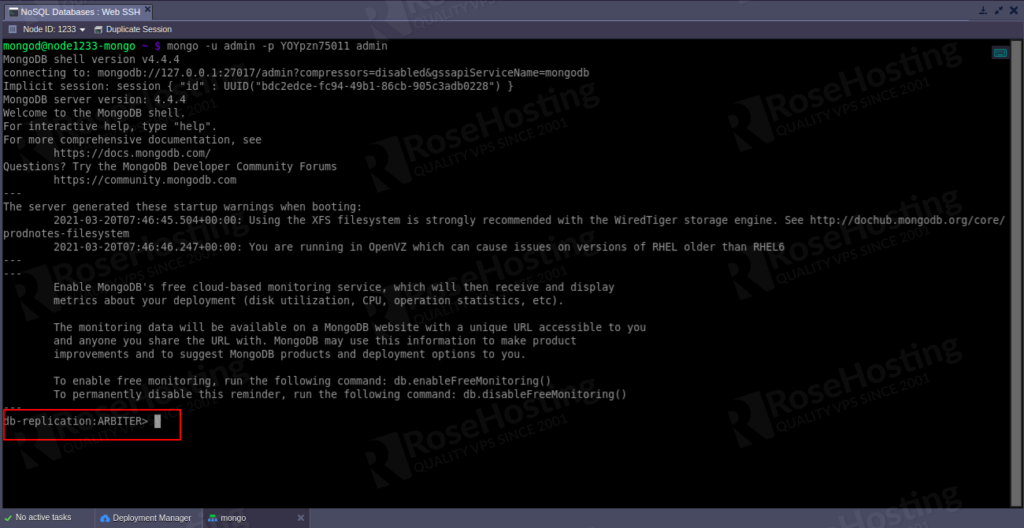
As you can see, the fourth node acts as the arbiter of db-replication.
Test MongoDB Cluster Availability
In this section, we will check whether MongoDB cluster availability functioning or not. To do so, you will need to add an application server to the MongoDB environment.
Step 1: Click on the Change Environment Topology button to edit the MongoDB environment.


Add the Apache application server and click on the Apply button to re-create the environment.
Step 2: Once the application server is added to the environment, click on the config tab of the Apache server.

Step 3: Navigate to the /var/www/webroot/ROOT directory, edit the index.php file, remove the default content and add the following content:
<?php
    try {
        $mongodbConnectionURI= "mongodb://dbuser:dbpassword@firstnodeid-environmentname:27017,secondnodeid-mongo.rosehosting.us:27017,thirdnodeid-environmentname:27017,fourthnodeid-environmentname:27017/?replicaSet=replicasetname&readPreference=primary";
    $manager = new MongoDB\Driver\Manager($mongodbConnectionURI);

    $command = new MongoDB\Driver\Command(['ping' => 1]);
    $cursor = $manager->executeCommand('db', $command);
    $response = $cursor->toArray()[0];
    var_dump($response);
    echo'

';
    var_dump($manager->getServers());
    } catch (Exception $e){
        echo $e->getMessage();
        }
?>
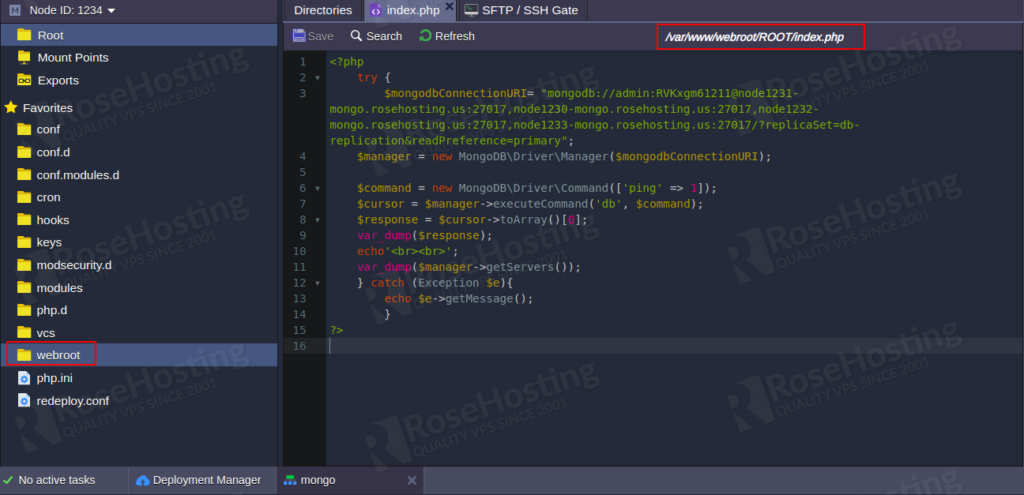
Click on the Save button to apply the changes.
Where:
dbuser is the admin user of the first node.
dbpassword is the password of the first node user.
firstnodeid is the ID of the first node.
secondnodeid is the ID of the second node.
thirdnodeid is the ID of the third node.
fourthnodeid is the ID of the fourth node.
environmentname is the name of your environment.
replicasetname is the name of the replica set that you have defined in the mongod.conf.
Step 4: Next, you will need to define the mongodb extension in the php.ini file to interact Apache with the MongoDB server. To do so, navigate to /etc/ directory, edit the php.ini file, find the [mongodb] section, and remove the semicolon before the extension=mongodb.so line to enable this extension as shown below:
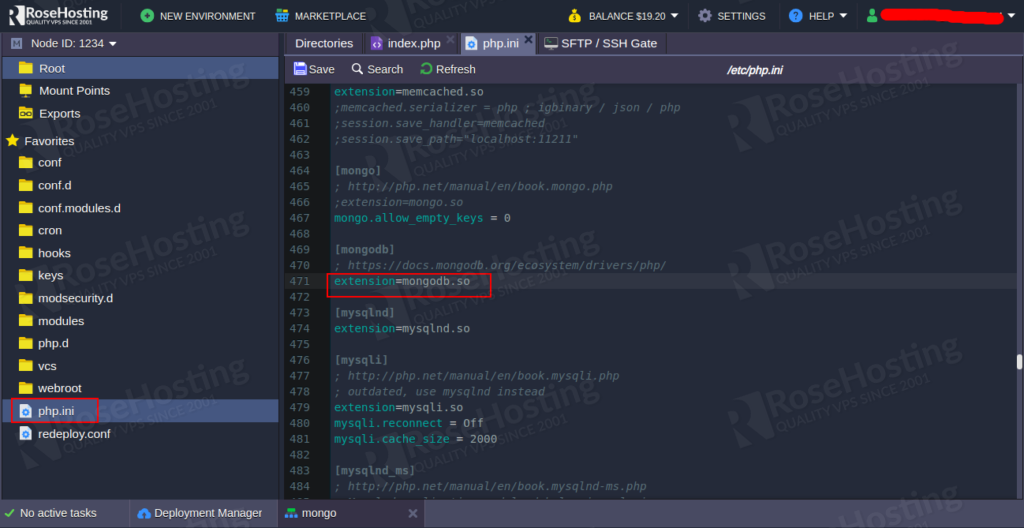
Click on the Save button to save the changes.
Step 5: Now, restart the Application server node to apply the changes.

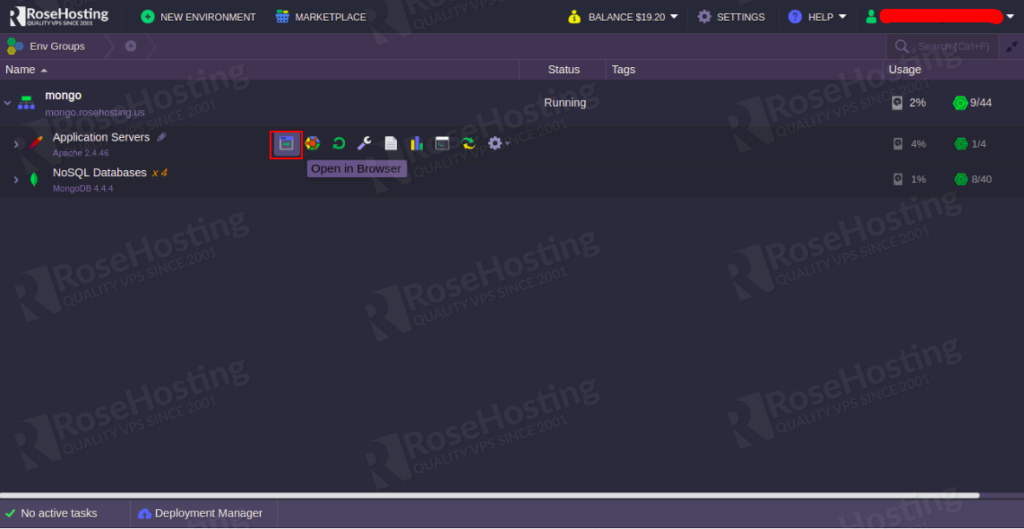
Step 6: Now, click on the Open in Browser button to open your application in a web browser.
You should see the detailed information about your replica set nodes in the following page:
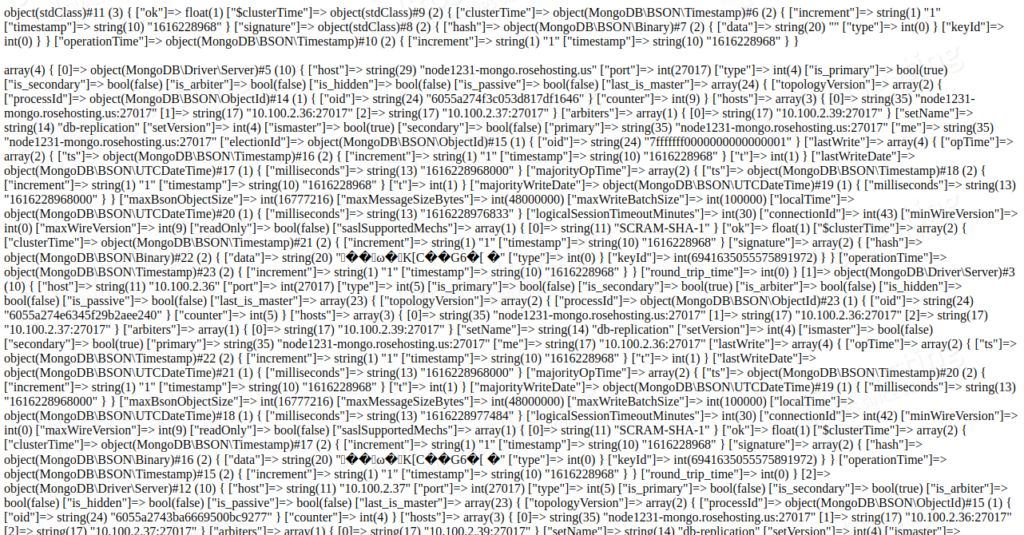
You can see the IP address and port of each node with primary, secondary, and arbiter node information in the above image. That means the replica set is functioning properly.
With our managed cloud hosting, you don’t need to do any of this configuration, simply ask our technical support guys and they will set up MongoDB Replicate Set with Master-Slave Replication and Automated Failover, for you and free of charge. They are available 24/7.