In this tutorial, we will show you how to install WordPress on Ubuntu 20.04. We will also show you how to install and configure a fully functional LAMP stack, including the installation of the Apache web server, MySQL database server, and PHP 7.4.

WordPress is one of the world’s most popular, if not the world’s most popular content management system (CMS). It is a free and open-source platform built entirely in PHP – it’s used by millions of people for running blogs, business websites, e-commerce stores, and much more. With features such as in-depth theming, thousands of plug-ins, and a huge community, WordPress is probably the most user-friendly CMS you can choose for building your website. The installation is very simple – all you need to do is closely follow the steps in this tutorial and you will have your WordPress website up and running in no time.
Table of Contents
Requirements:
- For the purposes of this tutorial, we will use an Ubuntu VPS. Our Ubuntu VPS hosting already comes preinstalled with a fully working LAMP stack. However, we will still go through all the necessary steps and show you how to install and configure the LAMP stack yourself, in case you are doing this on a clean server.
- Full SSH root access or a user with sudo privileges is also required. Our VPSes all come with full root access at no additional cost.
- A valid domain name for accessing your WordPress site (optional)
Connect to your Server and Update your System
Before we begin, let’s connect to your VPS via SSH as the root user (or with an administrator account) and update your system software to the latest available version.
To connect to your server via SSH as the user root, use the following command:
ssh root@IP_ADDRESS -p PORT_NUMBER
Make sure to replace “IP_ADDRESS” and “PORT_NUMBER” with your actual server IP address and SSH port number. The default SSH port is 22.
Once logged in, make sure that your server is up-to-date by running the following commands:
sudo apt-get update
sudo apt-get upgrade
Install LAMP
Before we proceed with the WordPress installation, we will need to prepare our server and set up a LAMP stack. The LAMP stack is a combination of software that is required on your server so that you can host dynamic websites built on PHP, such as WordPress. The LAMP acronym stands for Linux operating system, Apache web server, MySQL database server and PHP. If you already have a working LAMP setup installed on your server, you can skip this and go ahead to the next step of this tutorial.
1. Install the Apache Web Server
Apache is a fast and secure web server and one of the most popular and widely used web servers in the world. Its ease of use makes it very appealing when starting with web servers and web server hosting.
To install the Apache web server, run the following command:
sudo apt install apache2
Once the installation is complete, enable the Apache service to start automatically upon system boot. You can do that with the following command:
sudo systemctl enable apache2
To verify that Apache is running, execute the following command:
sudo systemctl status apache2
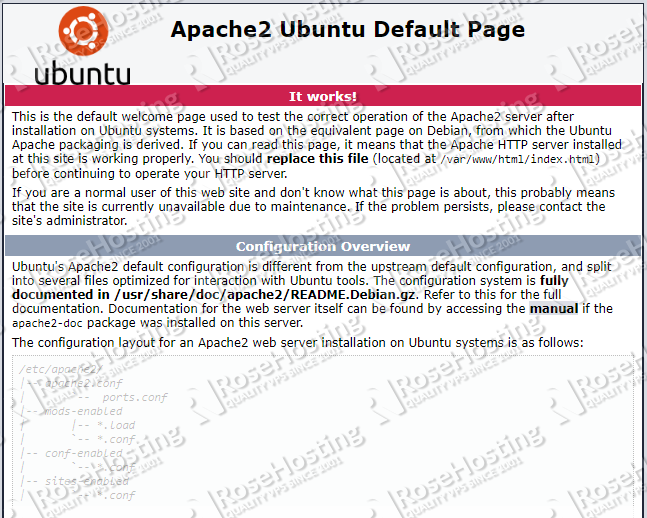
You can also open your web browser and enter your server IP address, (e.g. http://your_server_ip_address). If Apache is successfully installed, you should see the Apache default welcome page.
2. Install the MySQL Database Server
The next step is to install the MySQL database server which will be used for the data storage of your WordPress site.
To install the MySQL database server, enter the following command:
sudo apt install mysql-server
During the installation, you will be asked to enter a password for the MySQL root user. Make sure to enter a strong password.
To further improve the security of our MySQL installation, as well as set up a password for our MySQL root user, we need to run the mysql_secure_installation script and follow the on-screen instructions. Run the command below to configure your system:
sudo mysql_secure_installation
If the program asks you to enter your current MySQL root password, just press your [Enter] key once, as no password is set by default when installing MySQL.
A few more questions will be displayed on-screen – it is recommended that you answer with YES to all of them by entering the character ‘Y’:
Remove anonymous users? (Press y|Y for Yes, any other key for No) : Y
Disallow root login remotely? (Press y|Y for Yes, any other key for No) : Y
Remove test database and access to it? (Press y|Y for Yes, any other key for No) : Y
Reload privilege tables now? (Press y|Y for Yes, any other key for No) : Y
You will also need to enable MySQL to start on boot with this:
sudo systemctl enable mysql
3. Install PHP 7.4
The last step of our LAMP stack setup is to install PHP. WordPress is a PHP-based CMS, so we need PHP for processing the dynamic content of our WordPress site.
Ubuntu 20.04 comes with PHP 7.4 by default. We will also need some additional modules in order to allow PHP to connect and communicate with our Apache and MySQL instances. To install PHP together with the required MySQL and Apache modules, run the following command:
sudo apt install php libapache2-mod-php php-mysql
WordPress and many of its plugins use PHP extensions that you’ll need to install manually. This section is optional, but it will allow you to access some WordPress features you might not have access to with a basic PHP installation. Simply run this command and the packages will install.
sudo apt install php-curl php-gd php-mbstring php-xml php-xmlrpc php-soap php-intl php-zip
To verify that PHP 7.4 is successfully installed, run the following command:
php -v
You should get the following output on your screen:
PHP 7.4.3 (cli) (built: May  5 2020 12:14:27) ( NTS )
Copyright (c) The PHP Group
Zend Engine v3.4.0, Copyright (c) Zend Technologies
    with Zend OPcache v7.4.3, Copyright (c), by Zend Technologies
Install WordPress
Now that we have our LAMP environment completely set up, we can now proceed with the WordPress installation. We will first download and place the WordPress installation files in the default web server document root directory, /var/www/html.
You can move to this directory using the following command:
cd /var/www/html
We can now download the latest WordPress installation with the following command:
wget -c http://wordpress.org/latest.tar.gz
Then, extract the files with:
tar -xzvf latest.tar.gz
The extracted WordPress files will be now placed in the wordpress directory at the following location on your server /var/www/html/wordpress
The owner of these files needs to be the user of the web server running on your system. In our example, we are using the Apache web server and Apache runs as the www-data user on Ubuntu 20.04. To change the owner and set the correct permissions for these files, you need to run the following command:
sudo chown -R www-data:www-data /var/www/html/wordpress
Create a Database for WordPress
Next, we will create our MySQL user and database for our WordPress site. Log in to your MySQL server with the following command and enter your MySQL root password:
mysql -u root -p
To create a new database for our WordPress installation, run the following commands:
CREATE DATABASE wordpress_db;
CREATE USER wordpress_user@localhost IDENTIFIED BY 'strong-password';
GRANT ALL PRIVILEGES ON wordpress_db.* TO wordpress_user@localhost;
FLUSH PRIVILEGES;
exit;
You can replace the database name (wordpress_db) and the MySQL user name (wordpress_user) with your own names if you wish. Also, make sure to replace “strong-password” with a real, strong password.
Once the database is created, we will need to add this information to the WordPress configuration file.
Make sure you are inside the /var/www/html/wordpress directory:
cd /var/www/html/wordpress
and then run the following command to rename the sample configuration file:
mv wp-config-sample.php wp-config.php
Now open the wp-config.php file with your favorite text editor, for example:
nano wp-config.php
And update the database settings, replacing wordpress_db, wordpress_user and strong_password with your own details:
// ** MySQL settings - You can get this info from your web host ** //
/** The name of the database for WordPress */
define('DB_NAME', 'wordpress_db');

/** MySQL database username */
define('DB_USER', 'wordpress_user');

/** MySQL database password */
define('DB_PASSWORD', 'strong-password');

/** MySQL hostname */
define('DB_HOST', 'localhost');

/** Database Charset to use in creating database tables. */
define('DB_CHARSET', 'utf8');

/** The Database Collate type. Don't change this if in doubt. */
define('DB_COLLATE', '');
Save and exit the file.
With this being done, you can now access your WordPress page and finish the installation by following the on-screen instructions in your browser at http://your_server_ip_address/wordpress
Configure an Apache Virtual Host
If you have a valid domain name, and you want to use it to access your WordPress instance, you will need to create a new Apache virtual host file. Let’s say we want to access our WordPress with the mydomain.com domain name. Wherever you see a mydomain.com show up in the tutorial, make sure to replace it with your domain name to make sure that everything is named correctly.
First, run the following command to create the virtual host configuration file :
nano /etc/apache2/sites-available/mydomain.com.conf
And add the following content to the file (you can replace mydomain.com with your actual domain name):
<VirtualHost *:80>

ServerAdmin admin@mydomain.com
ServerName mydomain.com
ServerAlias www.mydomain.com
DocumentRoot /var/www/html/wordpress

ErrorLog ${APACHE_LOG_DIR}/mydomain.com_error.log
CustomLog ${APACHE_LOG_DIR}/mydomain.com_access.log combined

</VirtualHost>
To enable the virtual host we have just created, run the following command:
a2ensite mydomain.com.conf
Another alternative way to do this is by creating a symbolic link for your virtual host in /etc/apache2/sites-enabled:
ln -s /etc/apache2/sites-available/mydomain.com.conf /etc/apache2/sites-enabled/
Once you enable the virtual host, using either of the above methods, you will need to restart the Apache web server:
systemctl restart apache2
If the DNS records are properly configured, and your domain is pointed to your server, you can use it to access your WordPress installation by typing http://mydomain.com in your browser and see the following screen:
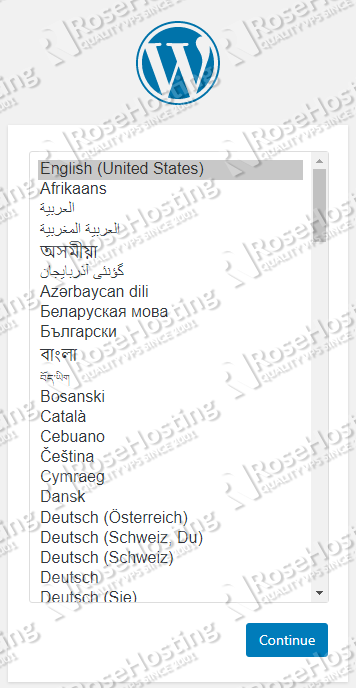
Choose your language and click “Continue”.
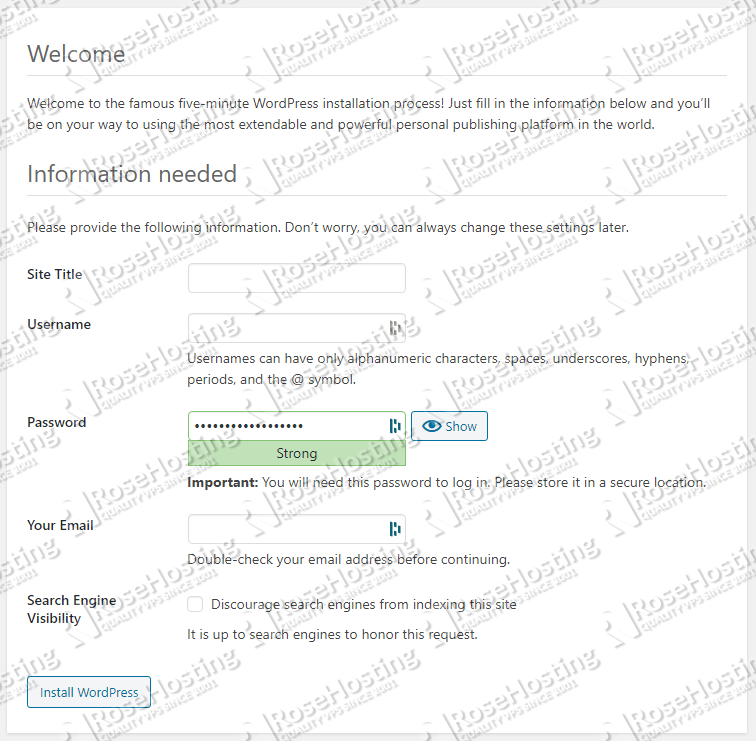
Enter your preferred information at the main installation screen, such as site title, username, password and email, and click on “Install WordPress”:
You will be informed that WordPress has been successfully installed and you can now log in to your administration dashboard using the information you have previously set up.
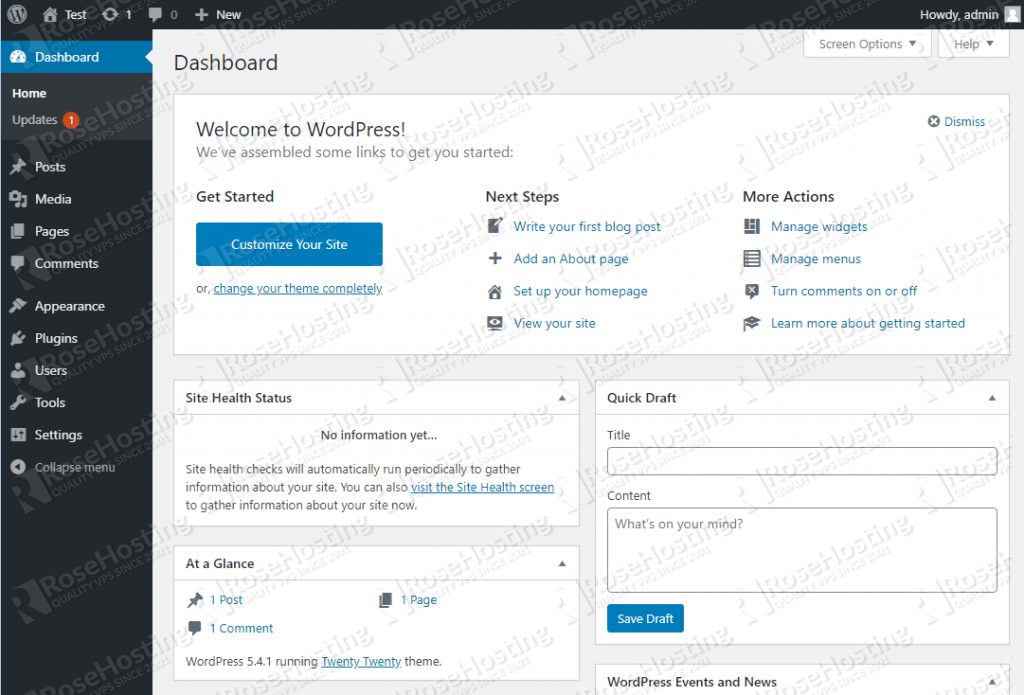
After a successful login, you will be greeted by the WordPress dashboard page:
Congratulations! WordPress has been successfully installed on your server. You can now start building and customize your site according to your needs.

Of course, you don’t have to install WordPress with LAMP Stack on Ubuntu 20.04 if you use one of our Optimized WordPress Hosting services, in which case you can simply ask our expert system administrators to install WordPress on Ubuntu 20.04 for you, using the LAMP stack or any other web hosting stack of your choice. They are available 24×7 and will take care of your request immediately. If you liked this post, you may also want to read How To Install LAMP With PHP 7.4 on Ubuntu 20.04.
PS. If you liked this post, on how to install WordPress with LAMP Stack on Ubuntu 20.04, please share it with your friends on the social networks using the buttons below or simply leave a comment in the comments section. Thanks.
Thanks for posting this, excellent procedure , no error from start to end.
Excellent !!!